4
OPERATION
1. Before each use, inspect the general condi-
tion of the jack. Check for broken, cracked,
or bent parts, loose or missing parts, and
any condition that may affect the proper
operation of the product. Any jack that ap-
pears damaged in anyway must be removed
from service. Have the problem corrected
before further use. DO NOT use damaged
equipment.
2. Replace worn or damaged parts with Perfor-
mance Tool replacement parts. Be sure that
onlyqualiedpersonnelperformrepairs.
3. Before each use, thoroughly test the jack for
proper operation prior to its actual use.
4. When jack is not in use, jack should be in
fully down position to keep their machined
surfaces free from corrosion.
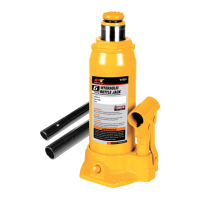
5. Keep jack clean and well lubricated at points
illustratedingure4.
6. For best results, use only high quality light-
weight oil.
7. Keeping the Screw Rod (4) well oiled and
free of rust will avoid the jack binding during
use.
CARE & MAINTENANCE
Monthly maintenance is recommended. Lubrication is critical to jacks as they support
heavy loads. Any restriction due to dirt, rust, etc. can cause either slow movement or
cause extremely rapid jerks, damaging the internal components. The following steps are
designed to keep the jack maintained and operational.
To raise:
1. Park vehicle on a hard level surface safely away
fromoncomingtrafc.
2. Place the vehicle’s transmission in PARK, if
equipped with an automatic, or in its lowest gear,
if equipped with a manual transmission.
3. Turn off the vehicle’s engine.
4. Set the vehicle’s emergency brake and block the
wheels that are not being lifted.
5. Refer to vehicle owner’s manual for proper jack-
ing procedures. Lift only on areas of vehicle as
speciedbymanufacturer.
6. The electric jack should be placed on smooth,
at,solidground.Makecertainthatloadiscen-
tered on saddle. Utilize the seam of the vehicle
and the cutouts of the saddle.
7. Plug the jack’s power cord end into the utility
plug of the vehicle.
8.Pressthe“UP”buttonontheremotetoconrm
the saddle is positioned properly under the
vehicle. Press the “DOWN” button if reposition-
ing of the jack saddle is necessary.
9. Once the saddle is properly positioned pressing
the “UP” button until the car is to an ideal height.
10. Press the “DOWN” button on the remote to
lower the vehicle completely after repair.
11. Always support load with jack stands. Place
jack stands of appropriate capacity (not
included) beneath the vehicle at locations
recommended by the vehicle manufacturer. DO
NOT Get under the vehicle without jack stands.
Jacks are not designed to maintain heavy loads
for long periods of time. DO NOT attempt to put
jack stands simultaneously under both ends of
vehicle or under one side of vehicle.
NOTE: When using two jack stands, they must be
at the same height.
3
2
1
Figure 4