Page 18
ASSEMBLY
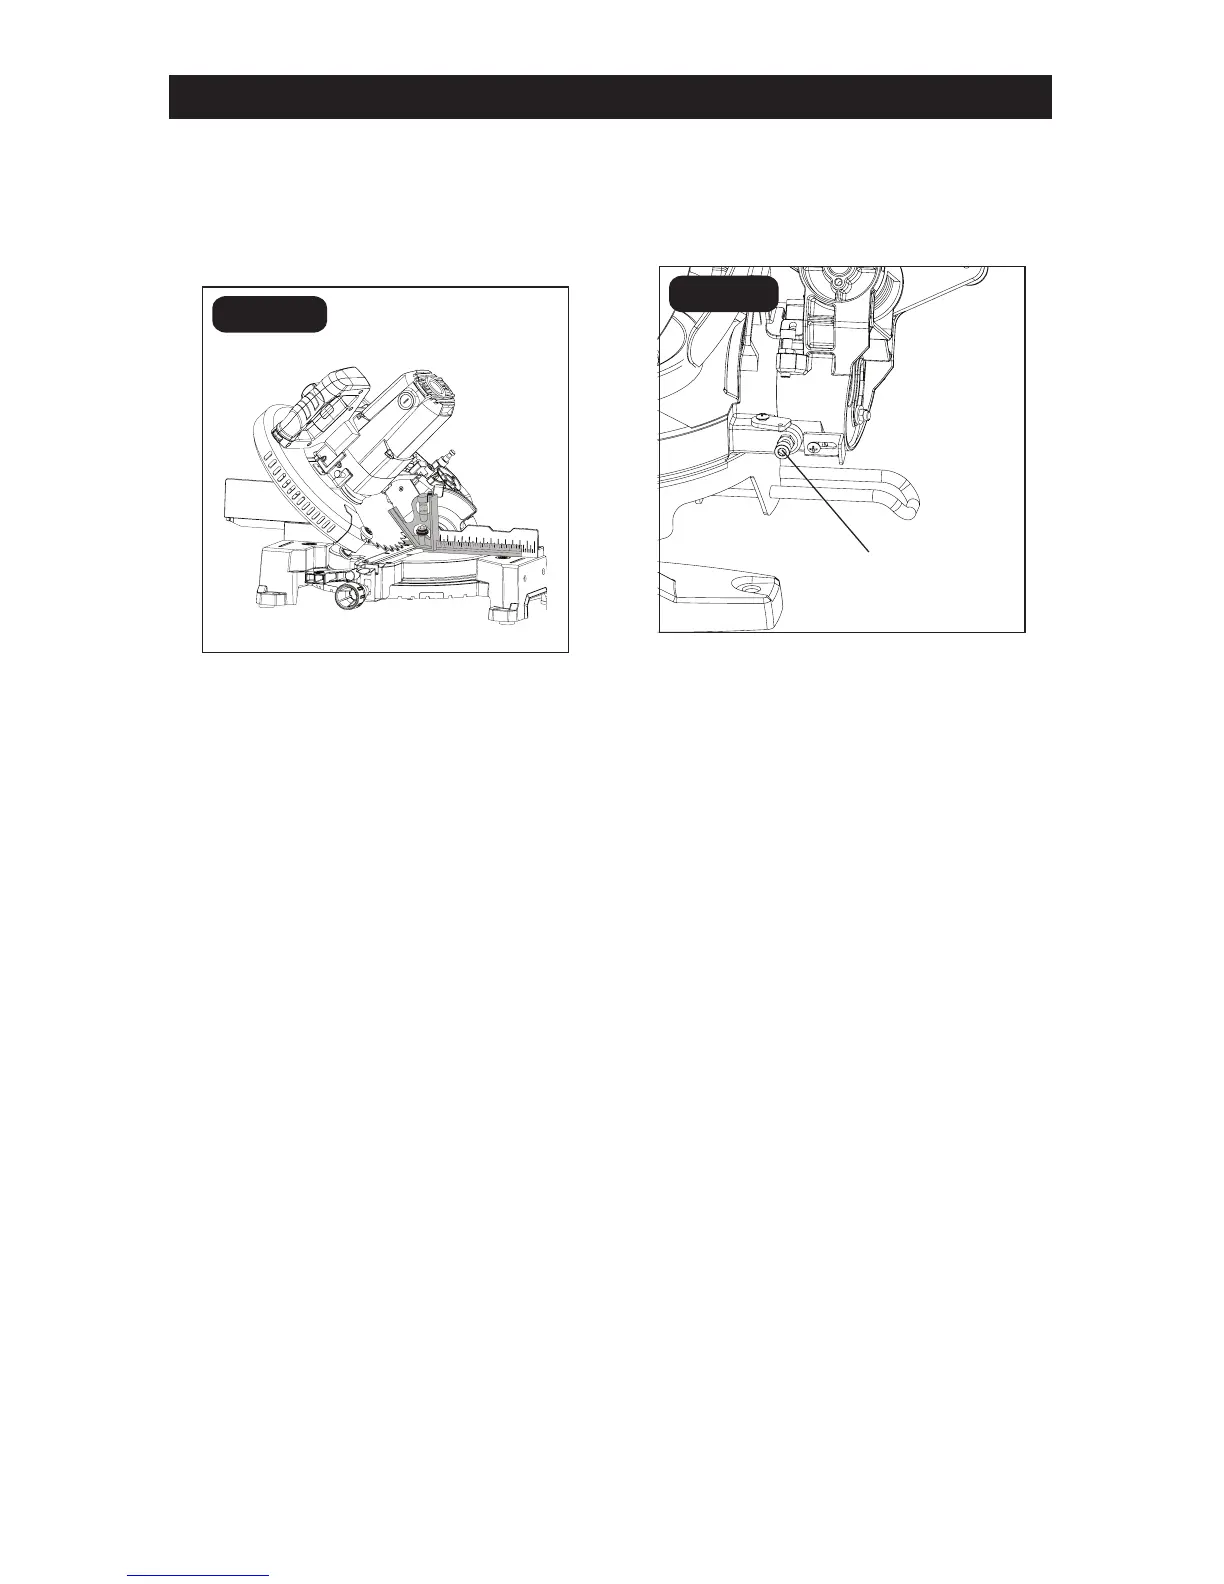
ADJUSTING THE BLADE TO
THE MITER TABLE 45° BEVEL,
0° MITER (FIG. 11A - 11B)
1. Unplug the saw.
2. Lift the bevel locking lever to release
the saw head assembly.
3. Set the bevel angle scale to 45°. The
miter scale should be on 0°. Lower and
lock the saw arm in the” DOWN”
position.
4. Place a combination square on the miter
table with the rule against the table and
heel of the square against the saw
blade (Fig. 11a).
FIG. 11a
NOTICE: Be sure to rest the square against
the body of the blade and not against the
teeth of the blade.
5. If the blade is not at 45° to the miter
table, perform steps 6 through 8.
6. Loosen the lock nut on the 45° setting
bolt using a wrench (available separately).
The 45° setting bolt is to your left side
as you face the back of the saw (Fig.11b).
7. Lift the bevel locking lever to release
the saw head assembly, then adjust
the blade to 45° by adjusting the setting
bolt clockwise or counter-clockwise. You
may have to move the saw arm left or
right by hand while turning the set bolt.
8. Once the angle is set, tighten the lock
nut and the bevel locking lever.
FIG. 11b
45° setting bolt
 Loading...