Operation (continued)
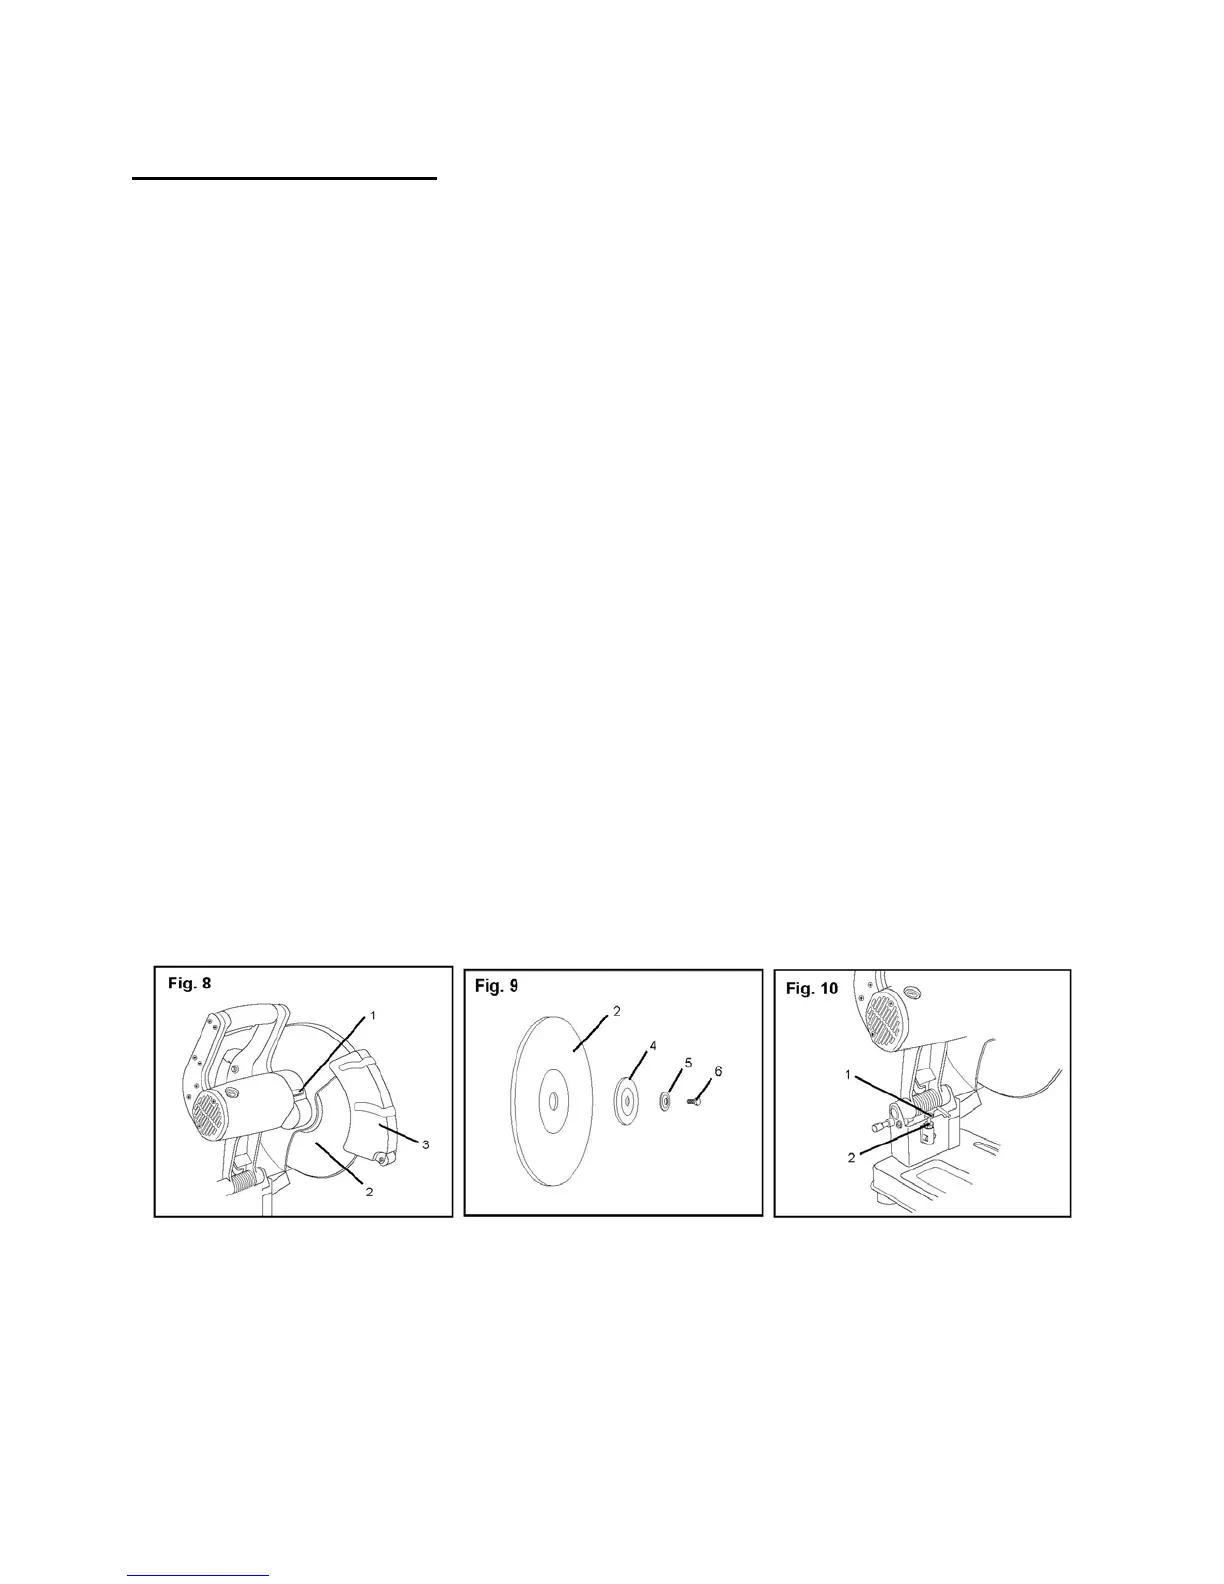
Installation and removal of metal cutting disc (Fig. 8–10)
1. Unplug the cut-off saw.
2. Push the arbor lock lever (1) towards the metal cutting disc (2) and slowly turn the disc (either
direction) until the disc locks (Fig. 8).
3. Push back the lower blade guard (3) and loosen the hex bolt (6) in the center of the disc using
the wrench. Remove the bolt (6), washer (5), flange (4), and disc (2) (Fig. 9).
4. To install a new metal cutting disc, reverse the process in step 3. Do not overtighten the bolt.
5. Make sure all guards are in place and the disc rotates freely.
6. Adjust the depth stop bolt (Fig. 10). Return the wrench to the storage slot.
7. Plug in the cut-off saw.
8. Run the cut-off saw and check to make sure the disc is in good condition. Always stand to one
side when turning on the cut-off saw. When testing a new disc, run the cut-off saw for 3
minutes. When testing an existing disc, run the cut-off saw for 1 minute.
Adjusting the cutting depth (Fig. 10)
The diameter of the metal cutting disc decreases with use. The depth stop bolt should be adjusted
periodically to prevent the disc from cutting the work surface below the cut-off saw table.
1. Loosen the lock nut (1).
2. Turn the stop bolt (2) to set the downward travel of the disc.
3. Lower the saw to check the depth.
4. Repeat steps 2 and 3 until the downward travel of the disc is at the desired level.
5. Tighten the lock nut (1) to secure the cutting depth assembly.
11