19
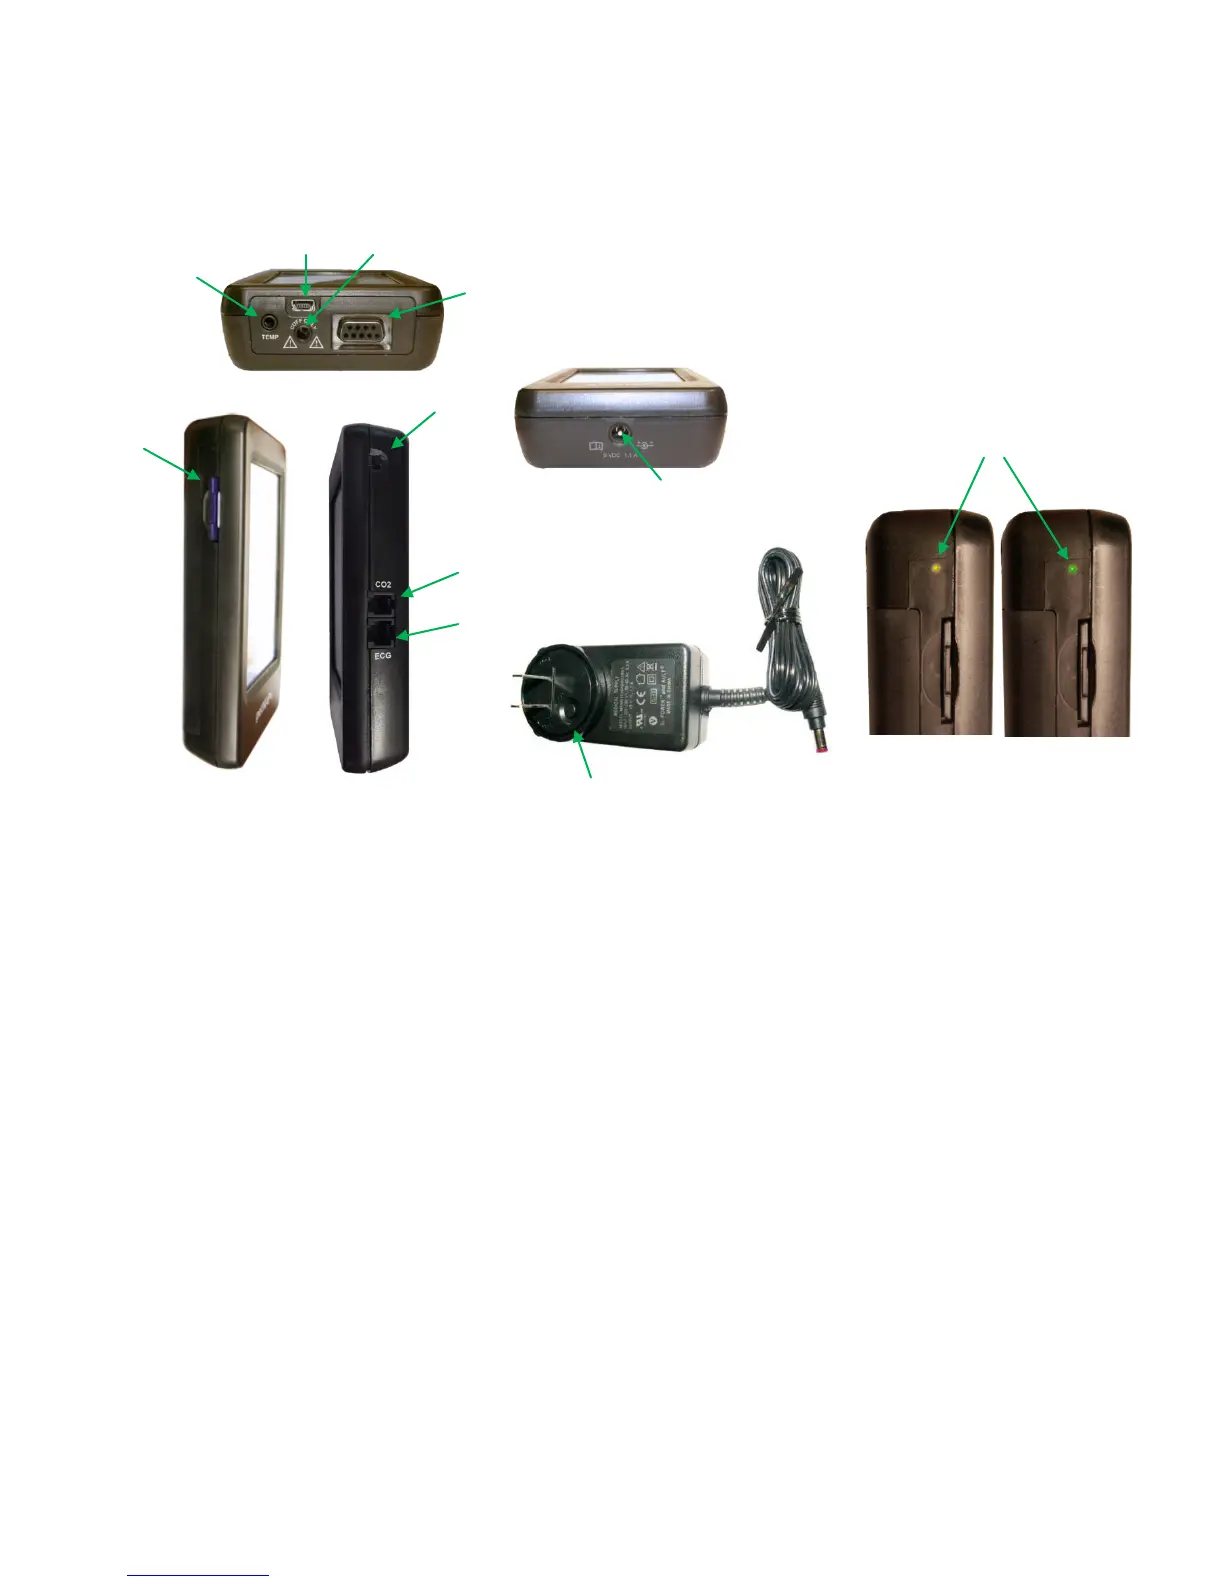
Controls & Connections. Note the diagrams for petMAP+II controls and connections.
Temperature Connector. petMAP+II optional accessories include a temperature extension cable, an
esophageal probe and a rectal probe (see Unit Configurations & Accessories section). While it is
possible to connect the probes directly to the unit, using the extension cable allows for more placement
flexibility. (Do not inadvertently plug in headsets to the temperature connector.)
Cuff Connector. Firmly push (with a slight twist) the male Luer connector of either a CritterCuff or the BP
Extension Hose into this slot. When using a BP Extension Hose, be sure that the hose is the proper one
for the size of the cuff, as marked, and it should be of the same diameter as the cuff hose. Do not attach
anything other than the extension hose or a cuff to this connection (see WARNINGS) as doing so will
result in a hazardous condition, since air under pressure is pumped through this connector to inflate the
BP cuff!
SpO2 Connector. If equipped, this is the connection for the SpO2 sensor cable. Noting the pin
orientation, push the connector firmly into place.
SD Card. To install an SD card, orient it with the label side up and push the card into the unit until it fully
engages. To remove, push in and release to eject the SD card. See additional instructions in this manual
for SD card use and utility.
AC/DC Adapter. AC/DC Adapter Connection. Only use the AC/DC adapter supplied with the device. Plug
the AC/DC adapter firmly into the AC/DC adapter connection and confirm that the amber charging
indicator status light is visible. It will be green when charging is complete. See Device Overview,
Power/Batteries section, above.
SD Card
Slot
SpO2 Connector (Not applicable to REF 7400)
Connector
ON/OFF
AC/DC Adapter Connection
green – fully charged
amber - charging
Mini
ECG Plugin