Do you have a question about the Pfaff 1163 and is the answer not in the manual?
Machine construction adheres to European regulations and manufacturer declarations.
Operation by trained personnel only after reading manual and adhering to safety notes.
Interpretation of danger and caution symbols indicating potential hazards and critical points.
Instruction manual is integral; must be accessible and read by all operating personnel.
Defines operating and specialist personnel duties and required safety adherence.
Maintain 1-meter clear working area; avoid reaching into sewing area; secure objects.
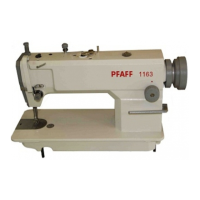
Key technical specifications including stitch type, needle system, dimensions, speed, and power.
Lists available models (e.g., Model B) and optional work aids like thread trimmers.
Information on delivery, internal transport, and manufacturer's liability limits.
Details on packaging materials and recommendations for storing the machine.
Instructions on turning the machine on and off using the main switch.
Operation of the foot pedal for sewing, presser foot lifting, and thread trimming.
How to manually raise the presser foot using the designated lever.
Using the knee lever to lift the presser foot, providing hands-free operation.
Procedure for setting the desired stitch length using the adjustment wheel.
How to engage the reverse stitch key for sewing in the backward direction.
Operation of the key on the machine head for reverse sewing on specific models.
Instructions for activating or deactivating the thread wiper accessory.
Components of the control panel: LCD display, status indicators, and function keys.
How activated functions and machine status are indicated on the screen.
Basic principles for using function keys to switch machine operations on/off.
Controls for start and end backtacks, setting stitch counts and patterns.
Functions for needle/foot position and thread trimming operations.
Activation and configuration of darning and counted seam programs.
Using the TE/Speed key for speed limiting and mode selection.
General mounting requirements including electricity, surface, and lighting.
Steps to adjust table-top height by loosening and tightening screws.
Instructions for fitting rubber pads and installing the oil pan into the table cutout.
Procedure for mounting the sewing head using hinges and securing it.
Steps to fit and fasten the balance wheel securely with screws.
How to tighten the V-belt by adjusting motor mounting and securing nuts.
Attaching the top V-belt guard for essential machine safety.
Aligning and tightening the bottom V-belt guard for proper belt operation.
Instructions for installing the thread guide pin into the machine housing.
Steps for mounting the spool holder and securing it in the table top.
Pre-operation checks including cleaning, oil level, and voltage verification.
Instructions for switching the machine on and off using the main power switch.
Accessing input mode for drive unit settings via TE/Speed key.
Instructions for inserting the correct needle system (DBx1) and securing it.
Steps for winding bobbin thread and adjusting its preliminary tension.
Procedure for removing and inserting the bobbin case, with safety warnings.
How to insert the bobbin and adjust thread tension using the tension screw.
Instructions for threading the needle and adjusting the needle thread tension.
Details on functions like backtacks, needle/foot position, and presser foot lifting.
How to select and configure darning programs, including seam sections and stitches.
Instructions for setting up counted seam sections and specifying the number of stitches.
Step-by-step guide for cleaning the machine, including hook compartment.
| Brand | Pfaff |
|---|---|
| Model | 1163 |
| Category | Sewing Machine |
| Language | English |