Traditional embroidery techniques
50
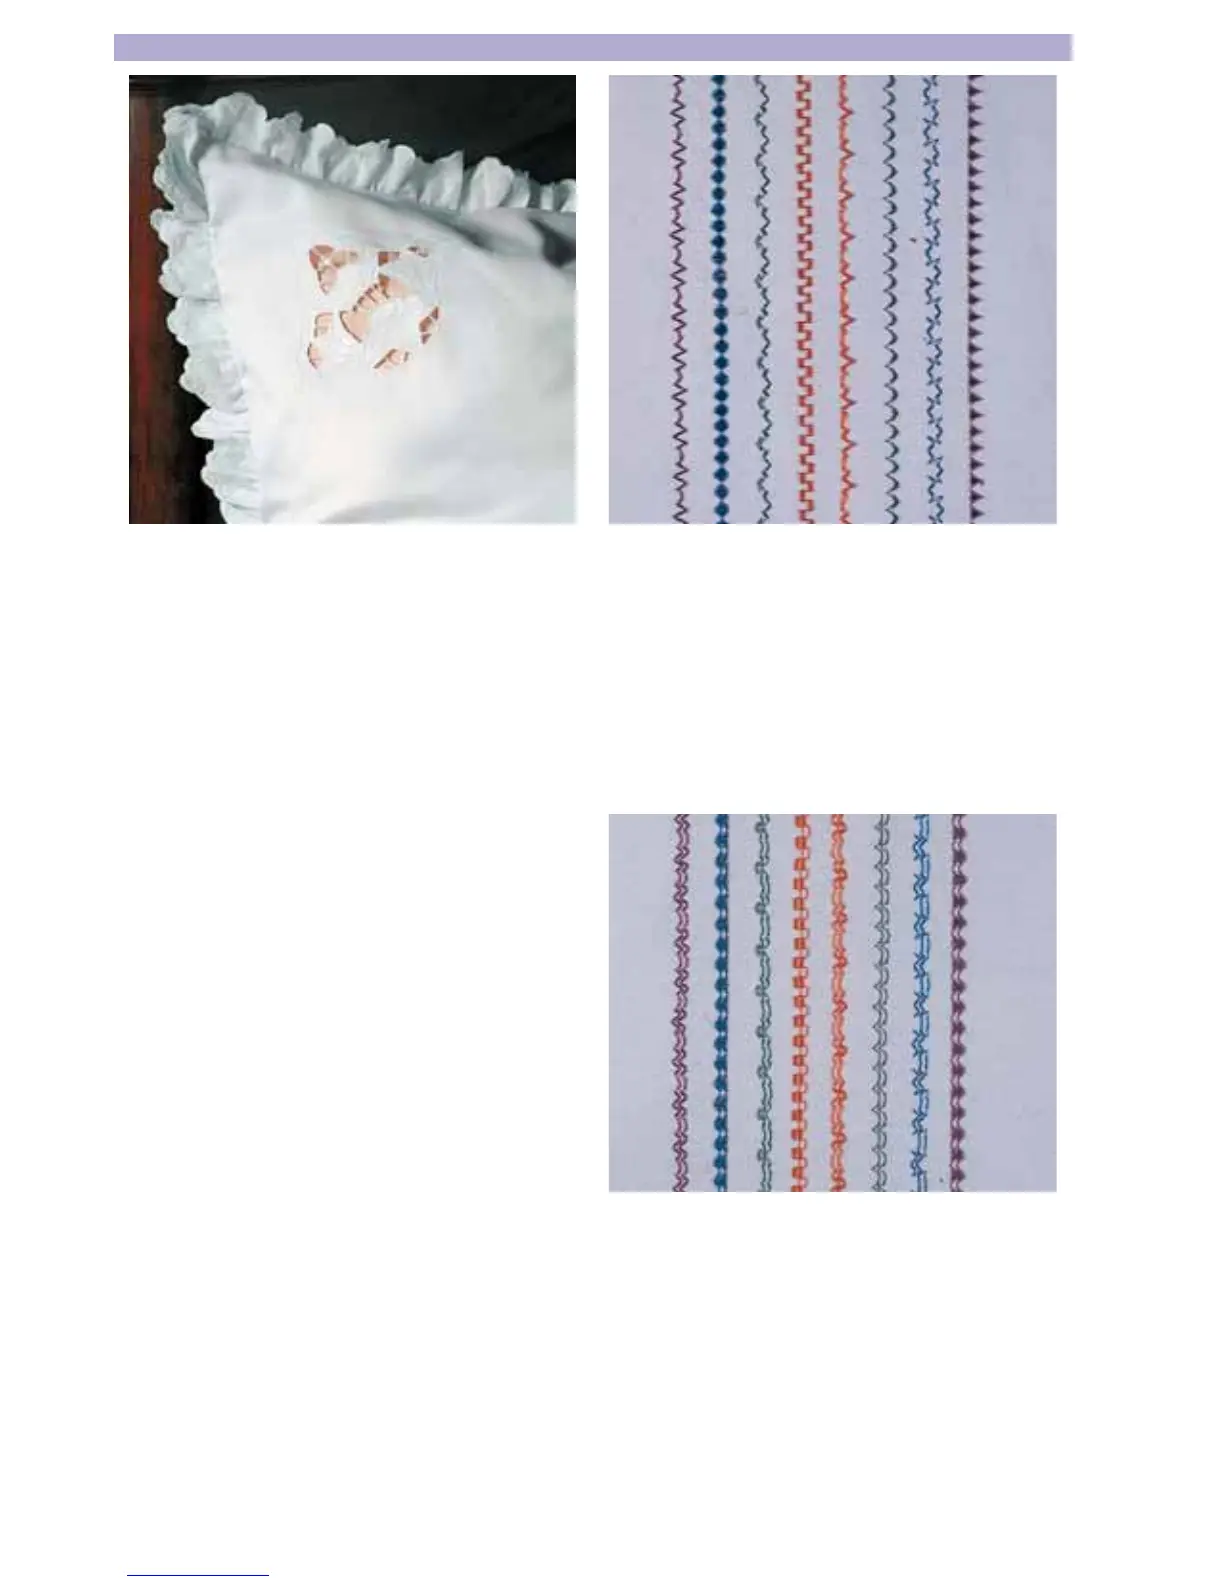
Richelieu
This very artistic form of bar and eyelet
embroidery is easy to create with your
sewing machine.
• Transfer your pattern onto the right side
of the fabric using a fabric marker.
• Place two layers of water-soluble stabi-
lizer under the area to be embroidered
and tightly hoop the fabric and stabi-
lizer.
• Attach foot number 0 to your machine.
• To make the embroidery more stable,
sew all of the contours twice using the
straight stitch (stitch length approx. 1
mm).
• Carefully cut away the fabric from the
areas that will form the cutouts approxi-
mately 1/8ß (2 mm) from stitching. Do
not cut away the stabilizer – it helps
maintain the shape and stability of the
areas while
sewing.
• Embroider the contours with a satin
stitch zigzag.
• When all satin stitching is completed,
tear away large areas of water-soluble
stabilizer and dissolve remaining small
areas in water.
Combined Borders
(model 1042 only)
You can create borders of any width by
combining different embroidery programs.
Tip: Apply iron-on backing or other sta-
bilizer under the fabric.
Embroidering with the twin needle
(model 1042 only)
Additional embroidery effects can be
achieved using a twin needle. To avoid
needle breakage, the twin needle spac-
ing must not exceed 2 mm and the stitch
width must not be greater than 3 mm. A
description of how to thread the twin nee-
dle is found on page 38.