10
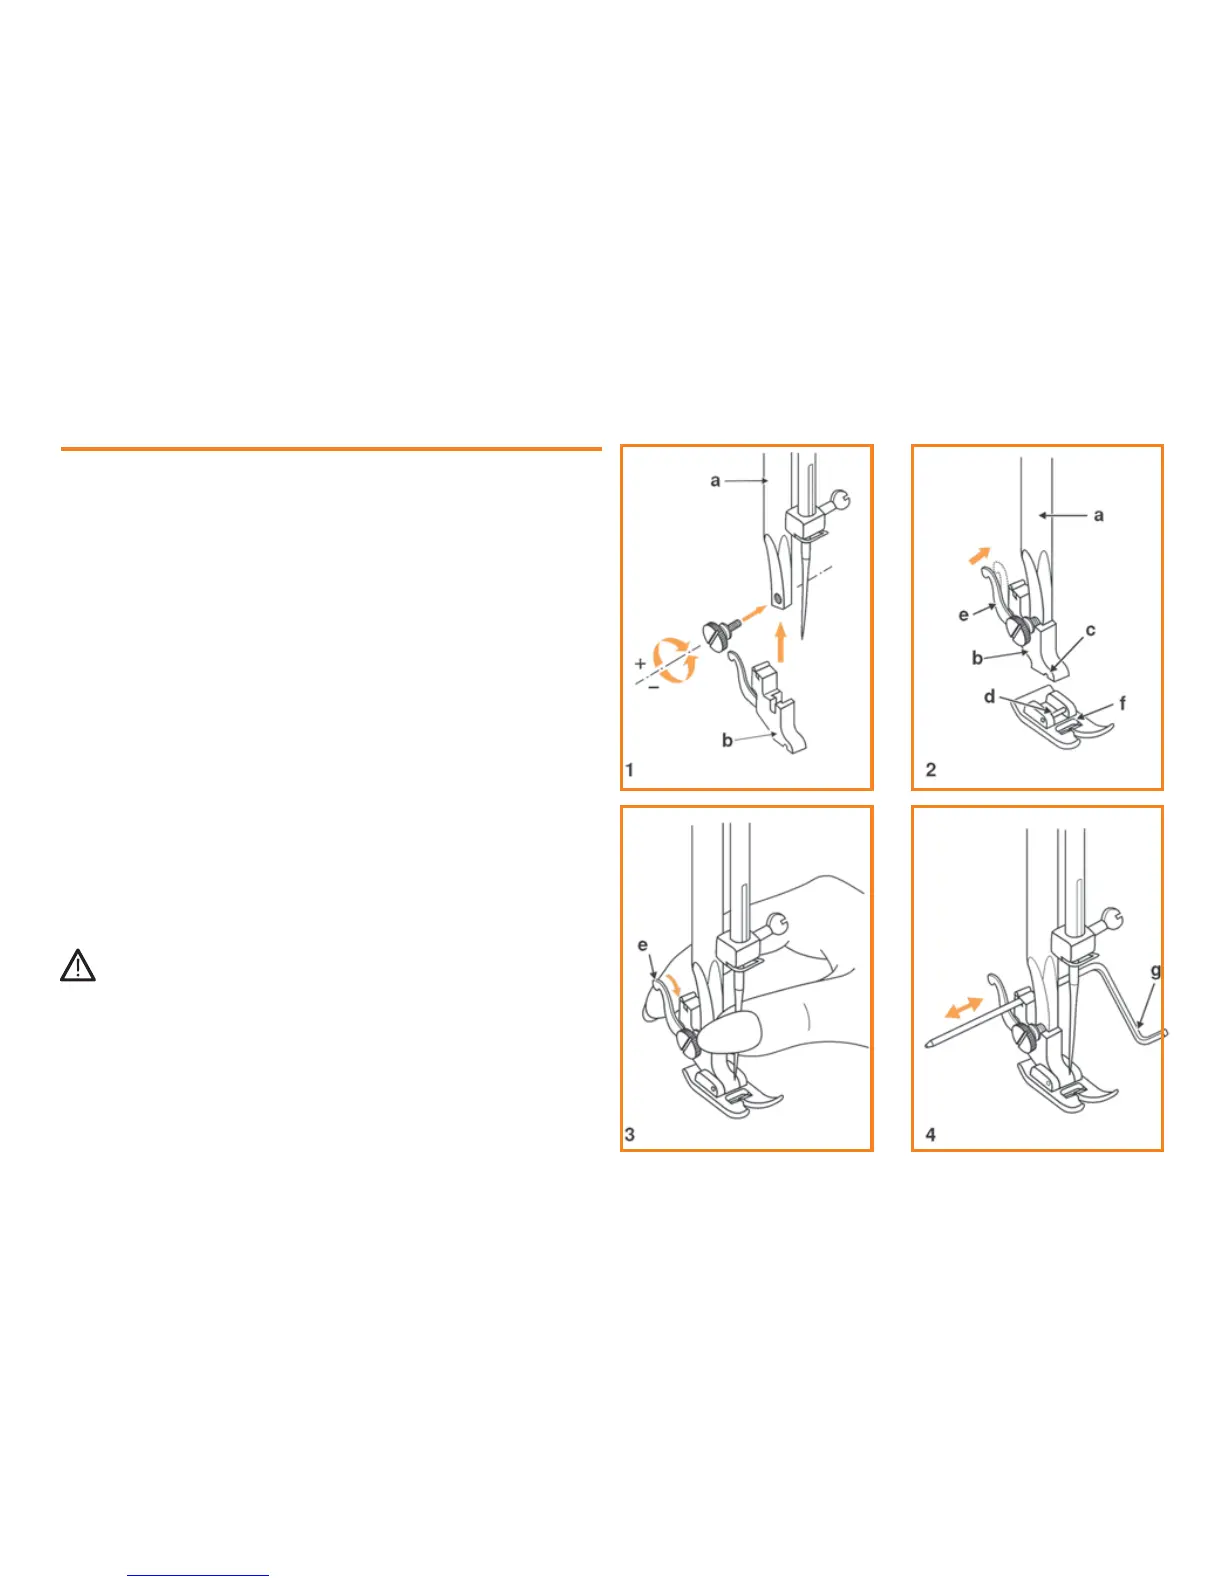
Attaching the presser foot holder/presser foot/seam guide
Raise the presser bar (a). (1)
Attach the presser foot holder (b) as illustrated.
Attaching the presser foot
Lower the presser foot holder (b) until the cut-out (c) is directly
above the pin (d). (2)
Raise the lever (e).
Lower the presser foot holder (b) and the presser foot (f) will engage
automatically.
Removing the presser foot
Raise the presser foot. (3)
Raise the lever (e) and the foot disengages.
Note: You can use the standard foot for all stitches.
Attaching the seam guide
Attach the seam guide (g) in the slot as illustrated.
Adjust according to need for hems, pleats, etc. (4)
Attention:
Turn power switch to off ("O") when carrying out any of the above
operations!