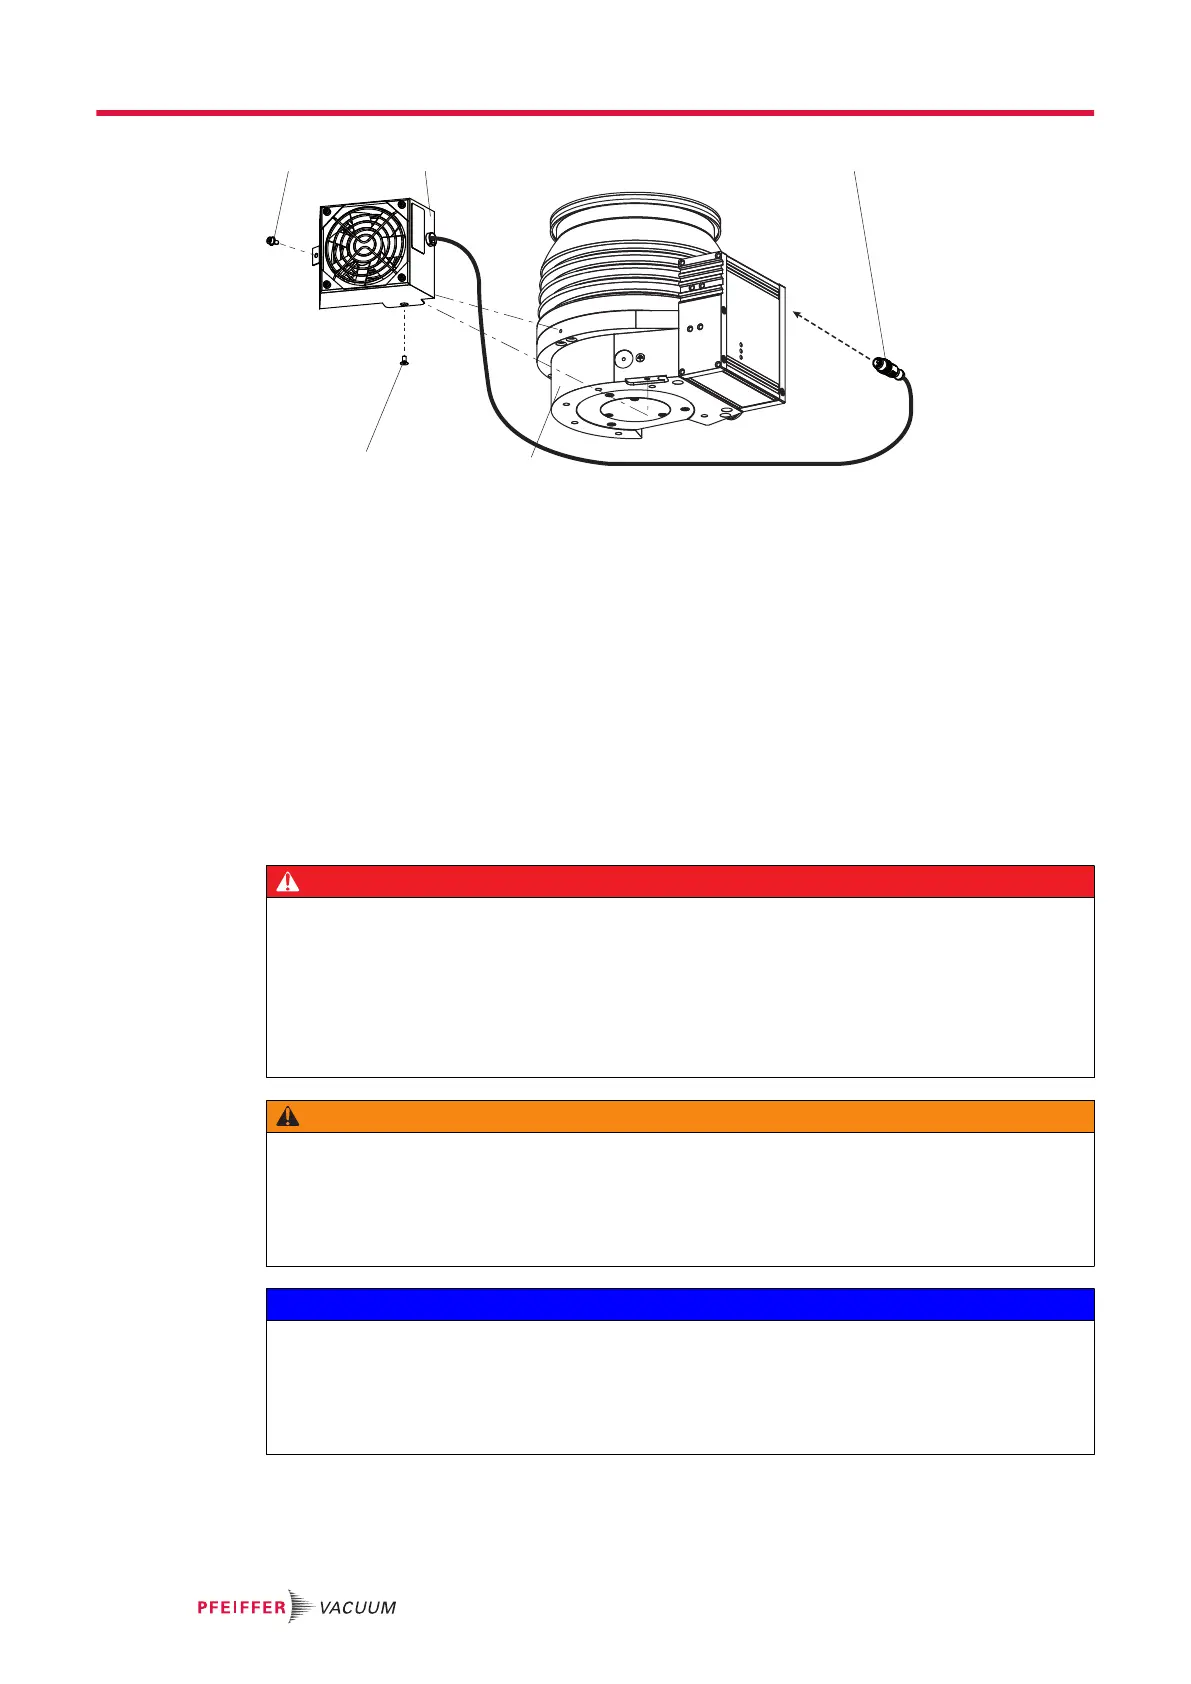
Fig. 7: Connecting the air cooling to HiPace 400, HiPace 700 and HiPace 800
1 Interior hexagon socket screw 4 Pump bottom part
2 Air cooling 5 Countersink screw
3 Control cable connector plug
Procedure
1. Attach the air cooling to the pump bottom part using the screws from the mounting kit.
2. Screw the control cable of the air cooling valve into a vacant accessory connection on the elec-
tronic drive unit.
3. If necessary, configure the accessory output for the air cooling via the interfaces of the electronic
drive unit.
–
The specification for the air cooling is "accessory A1".
4.2 Connecting the air cooling for 115/230 V AC
DANGER
Danger to life from electric shock
Contact with exposed and live elements generate an electric shock. Incorrect connection of the mains
supply leads to the risk of live housing parts that can be touched. There is a risk to life.
►
Before the installation, check that the connection leads are voltage-free.
►
Make sure that electrical installations are only carried out by qualified electricians.
►
Provide adequate grounding for the device.
►
After connection work, do a PE conductor check.
WARNING
Risk of fatal injury due to electric shock on account of incorrect installation
The device's power supply uses life-threatening voltages. Unsafe or improper installation can lead to
life-threatening situations from electric shocks obtained from working with or on the unit.
►
Ensure safe integration into an emergency off safety circuit.
►
Do not carry out your own conversions or modifications on the unit.
NOTICE
Property damage due to incorrect polarity
Incorrect or excessive supply voltage will destroy the air cooling.
►
Always observe the rating plate specifications.
►
When connecting the supply cable, observe the colored marking on the corresponding wires.
►
Always provide a suitable mains fuse.
Installation
14/26