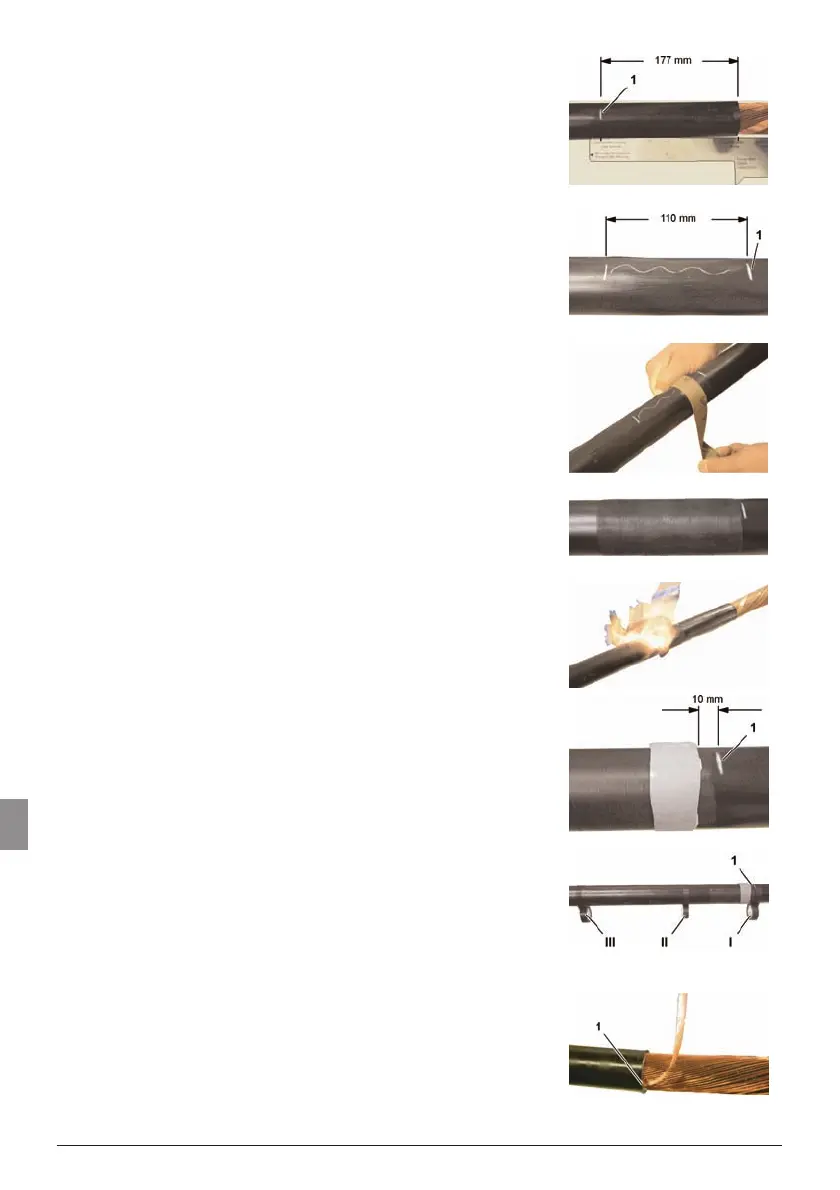
4. Mark the reference length (1):
– 177 mm from the cut mark on the jacket
– or using the measuring template, size 3.
5. Mark the shrink area:
– Make another mark approx. 110 mm from the
reference length (1).
6. Sand the outer jacket in the shrink area using
emery cloth.
7. Clean roughened area.
8. Heat the shrink area with a “soft“ flame until the
surface takes on a slight gloss.
9. Apply one layer of sealing tape *) in the shrink area
10 mm from the reference length.
If included in scope of delivery (design-specific).
10. Apply one layer of adhesive tape at each of three
points (I, II, III.) to fix the screen wires.
Attach the first adhesive tape (I) at the reference
length (1). Allow adhesive tapes to hang loosely;
do not tear.
11. Cut cross conductor band at jacket cut (1).
18
Assembly / Installation PFISTERER CONNEX cable connector Size 3 and 3/S