INSTALLATION GUIDE
| www.phanteks.com
02
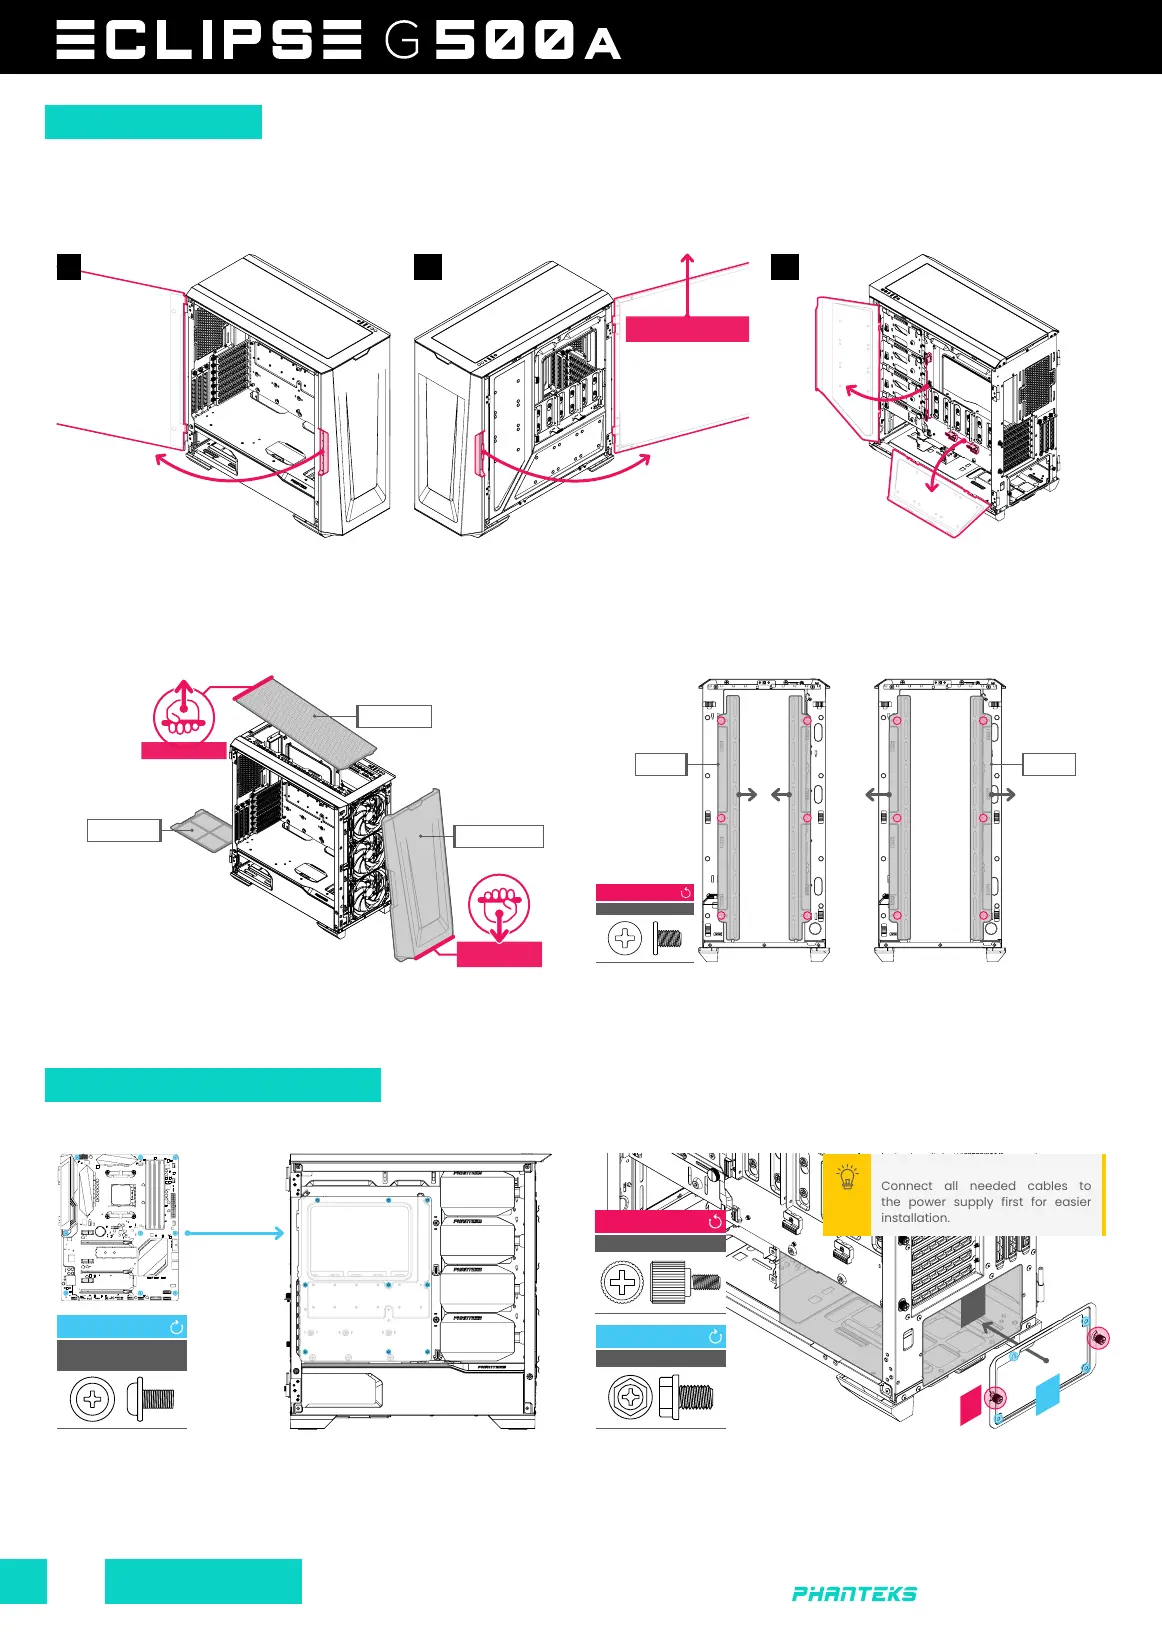
LEFT SIDE PANEL
MOTHERBOARD POWERSUPPLY
RIGHT SIDE PANEL
FRONT PANEL & DUST FILTERS
It is recommended to remove all external panels before starting the installation process. The G500A comes with storage cover panels
that are behind the right side panel, these support up to 6x 2.5” SSDs next to the 3x 2.5” SSD pre-installed brackets.
Open the left side panel and lift upwards
to remove it.
Remove the front panel by pulling the panel from below towards
you. The top filter can also be remove by pulling it upwards at
the rear. The PSU filter can be removed by sliding it outwards.
Install the ATX motherboard using 9x motherboard screws. For
M-ATX Motherboards follow the motherboard instructions to
move the stand-offs to the correct position. Use the ‘stand-off
removal tool’ when using a smaller motherboard.
(01) Remove the PSU bracket first by loosing the 2x thumb
screws. (02) Install the power supply with 4x PSU screws onto the
bracket. (03) Place it back into the chassis and tighten the 2x
thumb screws.
Open the right side panel and lift upwards
to remove it.
THUMBSCREW
LOOSEN
2x
MOTHERBOARD
SCREWS
INSTALL
9x
PSU SCREW
INSTALL
4x
PANEL REMOVAL
HARDWARE INSTALLATION
01
Connect all needed cables to
the power supply first for easier
installation.
PRO TIP
FRONT FAN BRACKETS
The front fan brackets can
be secured in the 120mm fan
position by 6x screws.
Out of the box the brackets
are set to 140mm position.
CASE SCREW
REMOVE
6x
GRAB AND PULL
TOWARDS YOU
PSU
01 02
03
02
120MM 140MM
PSU FILTER
COVER PANELS
To access the storage space, push down
the clips on each cover panel to release it.
03
REMOVE SIDE PANEL BY
LIFTING IT UPWARDS
PULL UPWARDS
TOP FILTER
FRONT FILTER