EasyManua.ls Logo

Phanteks Eclipse Series - User Manual

Phanteks Eclipse Series
4 pages
Print Icon
To Next Page IconTo Next Page
Loading...
FRONT I/O
FANS & RADIATORS CLEARANCES
PRODUCT OVERVIEW
ECLIPSE series
REAR
FRONT
TOP
120
FAN
140
FAN
140
FAN
120
FAN
120
FAN
140
RAD
120
RAD
120
RAD
120
RAD
CLEARANCE
CPU Cooler Height 160mm
PSU Clearance 250mm
GPU Clearance 400mm
E-ATX Motherboard 280mm
140
280
120
240
120
240
120
Max 122x315mm
*max motherboard compo-
nent height is 38mm
Max 142x315mm
Installation guide for:
Eclipse P360 models
Eclipse P418 models
22x Motherboard
+ SSD Screw
1x Motherboard-
Stando
FRONT FILTER
TOP FILTER
PSU FILTER
2x Thumb Screw
4x PSU Screw
12x Fan Screw
1x This Manual
6x Zip Tie
2x 120 mm
D-RGB Case fan
2x 2.5” SSD Bracket
(Pre-Installed)
INTRODUCTION INCLUDED ACCESSORIES
INSTALLATION GUIDE V1.0
Thank you for choosing Phanteks. Please take a moment
to carefully go through the manual. Phanteks will not take
responsibility for any damages incurred due to incorrect
installation or usage of this product.
1. Power Button
4. USB 3.0
2. Headphone
6. D-RGB Mode
5. D-RGB Color
3. Microphone
English
1. Power Button
2. Headphone
3. Microphone
4. USB 3.0
5. D-RGB Color
6. D-RGB Mode
Francais
1. Bouton d’alimentation
2. Casque
3. Microphone
4. USB 3.0
5. D-RGB Couleur
6. D-RGB Mode
Deutch
1. Ein-/Austaste
2. Kopfhörer
3. Mikrofon
4. USB 3.0
5. D-RGB Farbe
6. D-RGB Modus
Espanol
1. Botón de encendido
2. Auricular
3. Micrófono
4. USB 3.0
5. D-RGB Color
6. D-RGB mode
For PH-EC360A_DBK model, other models may vary

Other manuals for Phanteks Eclipse Series

Question and Answer IconNeed help?

Do you have a question about the Phanteks Eclipse Series and is the answer not in the manual?

Summary

Introduction

Included Accessories

Product Overview

Front I;O Ports

Details the front panel connectors and ports, including power, audio, and USB.

Fans and Radiators Clearances

Clearance Specifications

Specifies maximum supported fan and radiator sizes for different chassis locations.

Panel Removal

Left Side Panel Removal

Instructions for removing the left tempered glass panel by loosening screws and sliding.

Right Side Panel Removal

Instructions for removing the right side panel by loosening screws and sliding.

Front Panel Removal

Instructions for removing the front panel by pulling from the bottom.

Hardware Installation

Motherboard Installation

Guide on installing the motherboard using the provided screws.

Power Supply Installation

Steps for installing the power supply unit with PSU screws.

Storage Drive Installation

Covers installation of 2.5" SSD and 3.5" HDD using screws and brackets.

Cable Connection

Digital-RGB Product Connection

Connects Digital-RGB products to the controller or motherboard.

Motherboard & Power Supply Connectors

Details connecting power and data cables to motherboard and power supply.

Optional Upgrades

Information on installing optional components like the vertical GPU bracket.

Digital-RGB Control

Explains modes, colors, and software control for integrated RGB lighting.

Overview

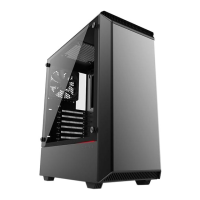
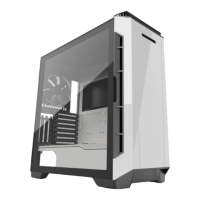
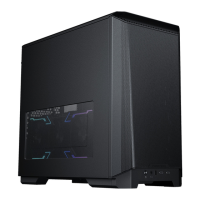
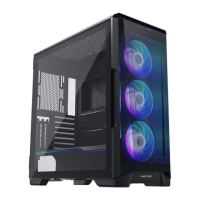
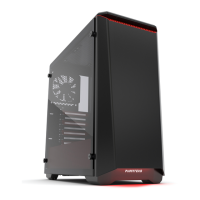
The Phanteks Eclipse Series is a range of computer chassis designed for PC enthusiasts and builders, offering a balance of aesthetics, functionality, and ease of use. This manual specifically details the Eclipse P360 and P418 models, guiding users through the installation process and highlighting key features.

Function Description

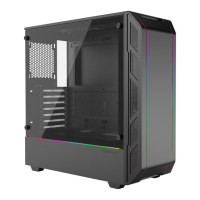
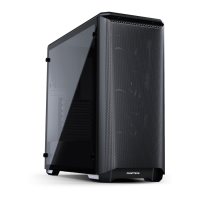
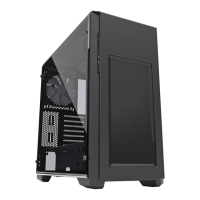
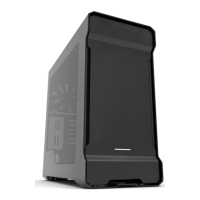
The Phanteks Eclipse Series chassis serves as the enclosure for a personal computer's internal components, providing structural support, protection, and thermal management. It is designed to house a motherboard, power supply unit (PSU), graphics processing unit (GPU), storage drives (SSDs and HDDs), and various cooling solutions such as fans and radiators. The chassis facilitates airflow to keep components cool and includes dust filters to minimize dust accumulation, thereby extending the lifespan of the hardware. Integrated Digital-RGB (D-RGB) lighting allows for customizable illumination, enhancing the aesthetic appeal of the build. The front I/O panel provides convenient access to power control, audio jacks, and USB 3.0 ports for peripheral connectivity. The modular design supports various configurations, including vertical GPU mounting, catering to different build preferences and performance requirements.

Usage Features

The Eclipse Series chassis is designed with user-friendly features to simplify the PC building experience.

Panel Removal:

The chassis features easily removable panels for convenient access to internal components.

  • Left Side Panel (Tempered Glass): To remove the tempered glass side panel, users need to loosen two thumb screws located at the rear of the chassis. Once loosened, the panel can be slid backward and then lifted off. This provides a clear view of the internal components and allows for easy installation or maintenance of the motherboard, CPU cooler, and other visible hardware.
  • Right Side Panel: Similar to the left panel, the right side panel is secured by two thumb screws. After loosening these screws, the panel slides off, granting access to the cable management area behind the motherboard tray, where the PSU and storage drives are typically mounted.
  • Front Panel: The front panel can be removed by pulling it from the bottom. This provides access to the front fan and radiator mounting points, as well as the front dust filter for cleaning.

Hardware Installation:

The chassis offers a straightforward installation process for core components.

  • Motherboard: Motherboards are installed using nine motherboard screws. The chassis includes pre-installed standoffs for standard ATX motherboards, with additional standoffs provided for other form factors if needed.
  • Power Supply Unit (PSU): The PSU is mounted at the bottom rear of the chassis and secured with four PSU screws. The design typically allows for the PSU to be installed from the rear, simplifying the process.
  • 2.5" SSDs: The chassis supports multiple 2.5" SSDs. These drives are installed onto dedicated brackets using four SSD screws per drive. The brackets often feature rubber grommets to absorb vibrations and can be easily mounted in designated locations, typically behind the motherboard tray or in specific drive bays.
  • 3.5" HDDs: For 3.5" HDDs, the chassis includes HDD trays or brackets. Users install the HDD into the bracket, which often features tool-less or screw-less designs for ease of use, and then slide the bracket into the chassis's drive cage. Some HDD trays are versatile and can also accommodate 2.5" SSDs.

Cable Connection:

Effective cable management is crucial for aesthetics and airflow, and the Eclipse Series provides features to assist with this.

  • Digital-RGB Products: The chassis includes an integrated D-RGB controller. This controller has dedicated ports to connect D-RGB products, such as additional D-RGB fans or LED strips, allowing them to synchronize with the chassis's built-in lighting.
  • Motherboard Connectivity: Standard front I/O cables connect to the motherboard. These include the Power SW (power switch), HD AUDIO (for headphone and microphone jacks), and USB 3.0 headers.
  • Power Supply Connectivity: The front I/O panel and D-RGB controller require power, typically supplied via a SATA power connector from the PSU.

Digital-RGB Control:

The integrated D-RGB controller offers extensive customization options for lighting.

  • Modes: Users can cycle through various lighting modes, including Solid (static color), Breathing (fading in and out), Radar (a sweeping effect), Sparkle (a twinkling effect), and Rainbow (a dynamic multi-color gradient).
  • Colors: A dedicated button allows users to select from a wide spectrum of colors to match their build theme or personal preference.
  • Software Control: For advanced users, the D-RGB lighting can be controlled via compatible motherboard software (e.g., ASUS Aura Sync, MSI Mystic Light Sync, ASRock Polychrome Sync, Gigabyte RGB Fusion 2.0, Razer Chroma). To enable software control, users must connect the chassis's D-RGB cable to a D-RGB header on their motherboard. When under software control, the physical mode and color buttons on the chassis become inactive.
  • LED On/Off: The mode button can also be used to turn off the front LEDs. Pressing and holding the mode button for two seconds will turn off the front LEDs, and pressing and holding it again will turn off all LEDs.
  • Expandability: The D-RGB controller is robust, capable of providing a maximum of 7A of power, allowing for the connection and synchronization of multiple additional D-RGB devices.

Optional Upgrades:

The chassis supports enhancements for specific build configurations.

  • Vertical GPU Upgrade (PH-VGPUKT_02): The P360/P418 chassis is compatible with Phanteks' Vertical GPU bracket. This allows the graphics card to be mounted vertically, showcasing its design and often improving aesthetics, especially with custom water-cooling blocks or elaborate GPU coolers. Installation involves placing the bracket in the PCI slot area, following the instructions provided with the bracket.

Maintenance Features

The Phanteks Eclipse Series chassis incorporates features designed to simplify maintenance and ensure optimal performance over time.

Dust Filters:

The chassis is equipped with multiple dust filters to prevent dust from entering the system, which can accumulate on components and lead to overheating.

  • Top Filter: A magnetic dust filter is typically located on the top panel, covering the top fan/radiator mounts. This filter is easily removable for cleaning by simply lifting it off.
  • Front Filter: The front panel often has a removable dust filter that can be accessed once the front panel is detached. This filter protects the front intake fans from dust.
  • PSU Filter: A slide-out dust filter is located at the bottom of the chassis, directly beneath the power supply unit. This filter can be easily pulled out from the rear or side for cleaning without needing to open the main chassis. Regular cleaning of these filters helps maintain good airflow and keeps the internal components free from dust buildup.

Cable Management:

While not strictly a maintenance feature, effective cable management contributes to easier maintenance. The chassis provides ample space behind the motherboard tray, along with cable tie-down points and Velcro straps (often included or pre-installed), to route and secure cables neatly. This organized approach improves airflow, makes it easier to access components for upgrades or troubleshooting, and enhances the overall aesthetic of the build.

Tool-less/Thumb Screw Design:

Many aspects of the chassis, such as the side panels and some drive bays, utilize thumb screws or tool-less mechanisms. This design significantly simplifies the process of opening the chassis, installing drives, or performing quick maintenance tasks without requiring specialized tools.

Durable Construction:

The chassis is constructed from high-quality materials, typically steel and tempered glass, ensuring durability and longevity. This robust build quality means the chassis can withstand regular handling during maintenance and component swaps.

By integrating these design choices, the Phanteks Eclipse Series aims to provide a user-friendly experience not only during the initial build but also throughout the life of the PC, making maintenance tasks straightforward and accessible.

Phanteks Eclipse Series Specifications

General IconGeneral
Case TypeMid Tower
Fan Support Top2 x 120mm or 2 x 140mm
Fan Support Rear1 x 120mm
Radiator Support Rear120mm
Maximum CPU Cooler Height160mm
PSU ShroudYes
MaterialSteel, Tempered Glass
Expansion Slots7
Motherboard SupportATX, Micro-ATX, Mini-ITX
Front Panel I/O2 x USB 3.0, 1 x Headphone, 1 x Microphone, Reset
Side Panel WindowTempered Glass
Fan Support Front2 x 120mm or 2 x 140mm
Radiator Support Top240mm or 280mm
ColorBlack

Related product manuals