Do you have a question about the Phanteks Eclipse P600s and is the answer not in the manual?
Details dimensions, form factor, materials, MB support, and front I/O for the chassis.
Lists PCI slot count and drive bay capacities (3.5" and 2.5") for storage.
Specifies fan sizes (120mm/140mm) and counts for front, top, and rear mounting.
Lists radiator sizes and maximum supported dimensions for front, top, and rear.
Provides clearance measurements for motherboard width, CPU cooler, GPU, and radiators.
Lists contact email, website, and warranty details for customer assistance.
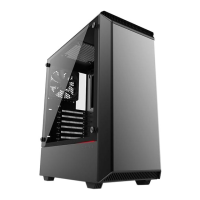
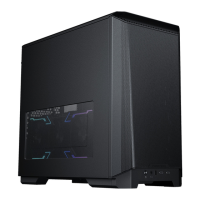
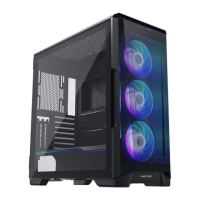
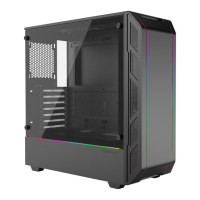
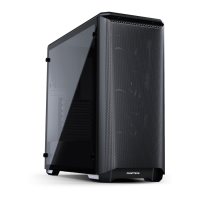
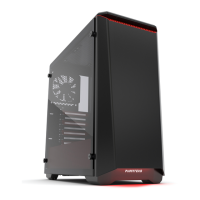
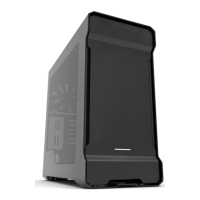
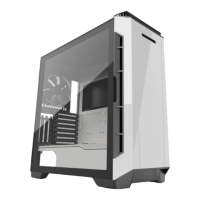
The main structural component of the PC case.
The front-facing part of the PC case, housing I/O and drive bays.
The top-facing part of the PC case, often used for fan or radiator mounting.
The side panels of the PC case, typically featuring tempered glass.
Component for mounting radiators in the case.
Component for mounting the power supply unit (PSU).
Removable cover for the front panel, affecting airflow and noise.
Removable cover for the top panel, affecting airflow and noise.
Component that manages and directs airflow within the case.
Filter located at the front intake to prevent dust entry.
Filter located at the PSU intake to prevent dust entry.
Bracket for mounting 3.5" or 2.5" drives, included in the accessory box.
Information about the included 140mm fan, featuring high static pressure and silent operation.
Accessory for mounting a GPU vertically, riser cable sold separately.
Accessory that attaches magnetically to manage airflow.
Details contents of the accessory bag (GPU bracket, zip ties) and toolbox (screws, tools).
Guide to air cooling configurations and fan placements.
Guide to storage drive installations and bay usage.
Guide to water cooling setups and radiator compatibility.
Guide to dual system configurations and setup options.
Important steps and safety precautions before starting component installation.
Step-by-step instructions on how to remove the front panel of the chassis.
Step-by-step instructions on how to remove the top panel of the chassis.
Detailed instructions on how to remove the side panel of the chassis.
Guide to positioning motherboard standoffs for ATX/E-ATX and Micro ATX layouts.
Standoffs have collars; slide cable covers for optimal cable management.
Connect all necessary cables to the power supply before installing it in the case.
Install the magnetic Airflow Cover to prevent air re-circulation with certain fan configurations.
Locations and compatibility for fan mounting at the top of the chassis.
Locations and compatibility for fan mounting at the rear of the chassis.
Locations and compatibility for fan mounting at the front of the chassis.
Steps to connect the fan hub to the motherboard and power supply.
Details on PWM/DC output selection and splitter cable usage for fan expansion.
Instructions for installing 2.5-inch Solid State Drives (SSDs) into drive brackets.
Ensure screws are installed once the SSD rests in the bracket to secure its position.
Guide for installing 3.5-inch Hard Disk Drives (HDDs) using modular brackets.
The HDD bracket can also house a 2.5" SSD instead of a 3.5" HDD.
Details drive tray placement options in the bottom compartment of the chassis.
Instructions for installing HDD brackets in the main compartment of the chassis.
Stack the HDD brackets before mounting if installing more than one bracket.
Locations and compatibility for radiator mounting at the top of the chassis.
Locations and compatibility for radiator mounting at the rear of the chassis.
Locations and compatibility for radiator mounting at the front of the chassis.
Use the Airflow Cover to prevent hot air from circulating around radiators.
Maximum radiator clearance specifications for the top mounting location.
Maximum radiator clearance specifications for the front mounting location.
Installing fill/drain ports in radiator brackets for easier water cooling maintenance.
Information on accessing reservoir mounting points by removing cable covers.
Instructions for installing the optional universal pump bracket in the bottom compartment.
Steps to install the GPU anti-sag bracket to prevent GPU tipping.
Loosen screws before GPU removal; hold GPU when tightening thumbscrews.
Connection for the front panel power button to the motherboard.
Connection for the front panel power LED to the motherboard.
Connection for the front panel USB 3.0 ports to the motherboard.
Connection for the front panel reset button to the motherboard.
Connection for front panel headphone and microphone jacks to the motherboard.
Connection for the front panel USB 3.1 Gen 2 Type-C port to the motherboard.
Use double-loop Velcro ties to route and split cables into channels.
Instructions for cleaning the power supply unit (PSU) dust filter.
Instructions for cleaning the front dust filter.
Ensure dust filters are properly dry before re-installing them after cleaning.
Details on optional HDD brackets for adding more storage capacity.
Information on optional high-performance fans for improved cooling.
Details on splitter cables for connecting more fans to the fan hub.
Description of available cable extension kits and their included cables.
Details on slimline PCI-e riser cables for vertical GPU mounting.
Details on premium shielded PCI-e riser cables for vertical GPU mounting.
Details on flatline PCI-e riser cables for vertical GPU mounting.
Information on the Revolt X power supply, essential for dual system configurations.
Details on the ITX upgrade kit for installing an additional ITX motherboard.
Details on 600mm premium riser cables for a second system's GPU.
Steps to remove top panel and dual system cover for installation.
Mounting the ITX motherboard onto its dedicated bracket using screws.
Connecting front panel power switch and LED cables to the ITX motherboard.
Securing the ITX bracket assembly into the chassis with bracket screws.
Recommended cable routing for the second system's components.
Use the longer, 710mm, 24-pin cable for the System 2 ITX motherboard.
Attaching the riser cable to the vertical GPU mount.
Securing the vertical GPU mount to the chassis with screws.
Relocating Velcro ties for optimal cable management during GPU installation.
GPU mount positions affect airflow and 3-slot GPU card compatibility.
Contact details for international and Americas technical support and RMA.
Link to the official Phanteks website for up-to-date information and resources.
Lists specific warranty periods for fans, I/O ports, fan hub, lighting, buttons, chassis, and panels.
| Form Factor | Mid Tower |
|---|---|
| Dimensions | 240 mm x 520 mm x 510 mm (W x H x D) |
| Material | Steel, Tempered Glass, Plastic |
| Radiator Support | Front: Up to 360mm, Top: Up to 360mm, Rear: Up to 140mm |
| Maximum GPU Length | 435 mm |
| Maximum CPU Cooler Height | 190 mm |
| Dust Filters | Front, Top, Bottom |
| Motherboard Support | ATX, Micro-ATX, Mini-ITX |
| Expansion Slots | 7 |
| Front I/O Ports | 1x USB 3.1 Gen 2 Type C, 2x USB 3.0, Audio In/Out, Power Button, Reset Button |
| Cooling Support | Front: 3 x 120mm or 2 x 140mm, Top: 3 x 120mm or 2 x 140mm, Rear: 1 x 120mm or 140mm |
| Pre-installed Fans | Front: 2x 140mm, Rear: 1x 140mm |
| Weight | 13.5 kg |