Mechanical Instructions
EN 19LC8.1U LA 4.
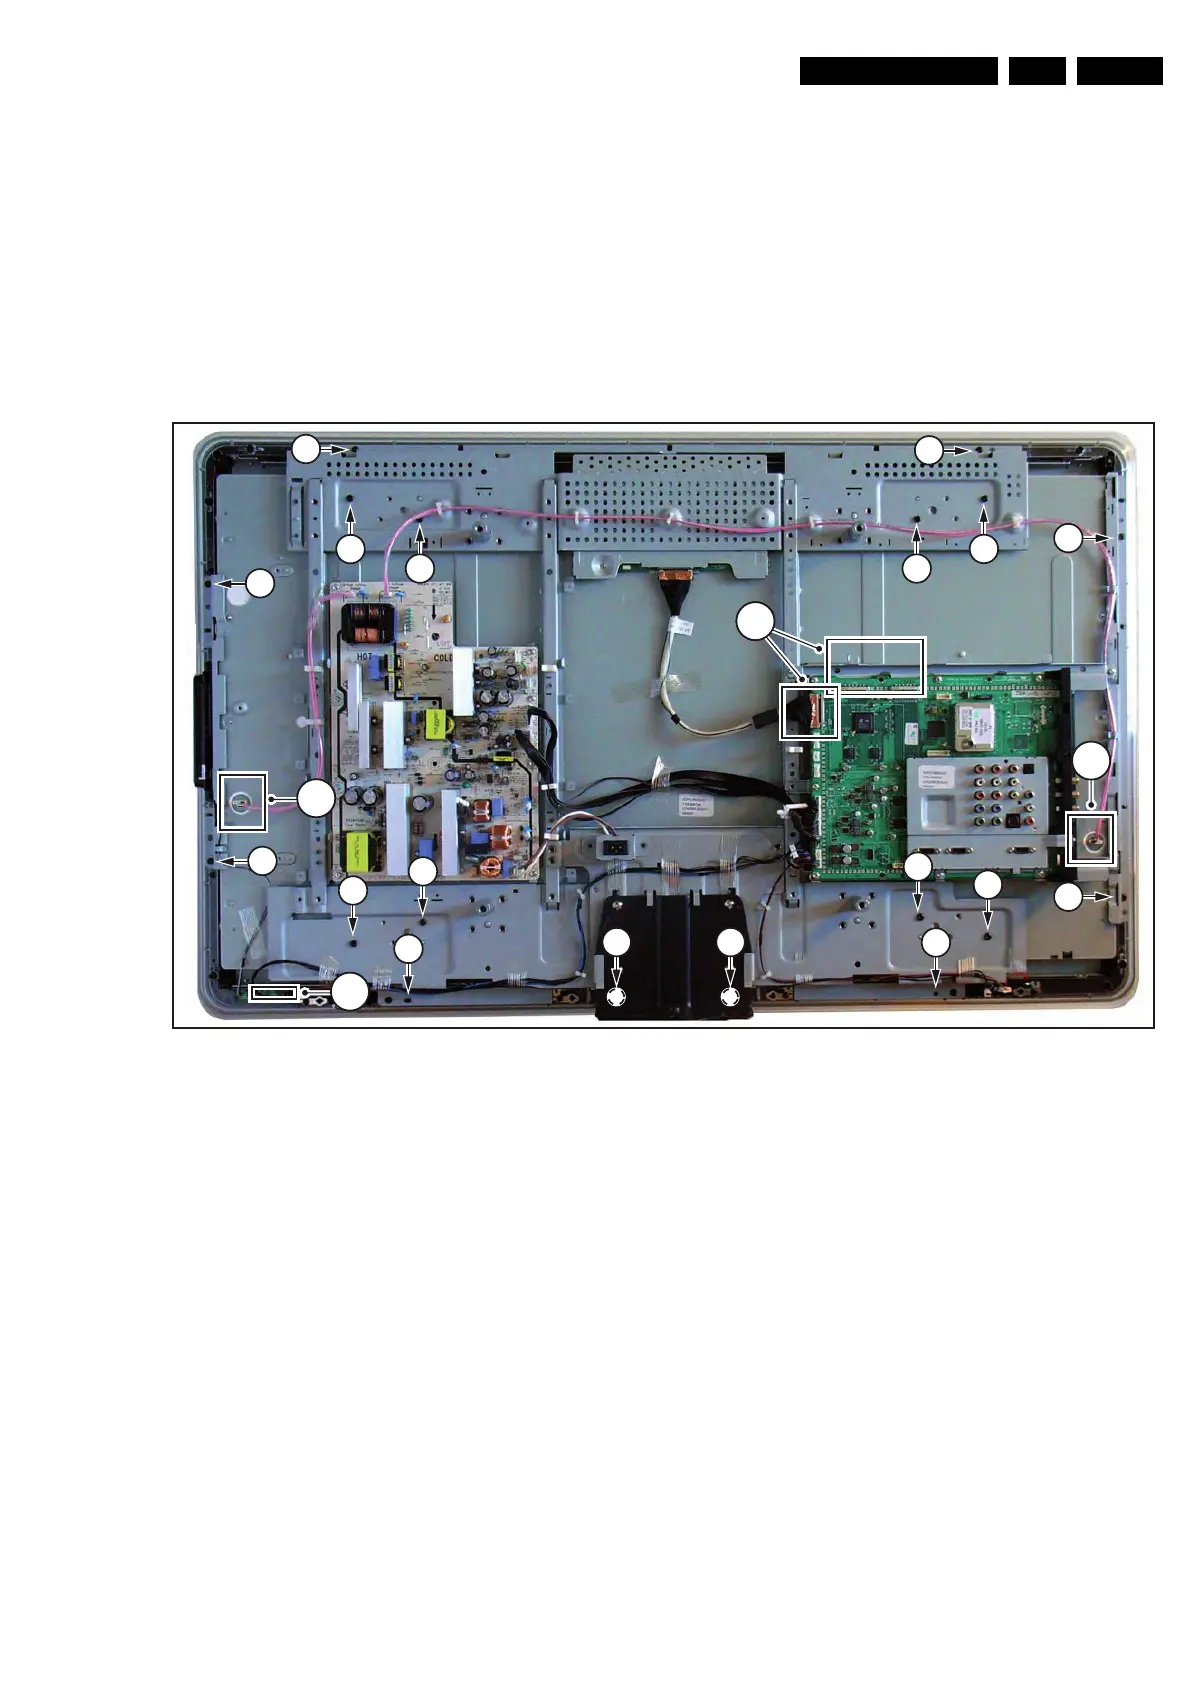
4.3.10 LCD Panel
Refer to next figures for details. The figure used is from a 42-
inch model, but the other screensizes have similar
constructions.
1. Remove the stand.
2. Unplug the LVDS connector(s) [1].
Caution: be careful, as this is a very fragile connector!
3. Unplug the connectors [2].
4. Remove the fixation screws [3] from rim.
5. Take the rim from the set.
6. Remove the fixation screws [4] and [5].
7. Lift the subframe from the set.
8. The LCD panel can now be lifted from the front cabinet.
Figure 4-19 LCD Panel (example from 42’’ model)
4.4 Set Re-assembly
To re-assemble the whole set, execute all processes in reverse
order.
Notes:
• Important: While re-assembling, make sure that all cables
and cable tapes are placed in their original position. See
figure “Cable dressing”.
• Pay special attention not to damage the EMC foams on the
SSB shields. Ensure that EMC foams are mounted
correctly.
H_17740_020.eps
230108
4
4
4
5
5
5
5
4
4
5
5
4
4
3
3
5
5
2
2
2
1
4