65BDL6005X
31
5. Operation
NOTE: The control button described in this section is mainly on
the remote control unless specied otherwise.
5.1. Watch the Connected Video Source
1. Press the [ ] SOURCE button.
2. Press [ ]
or [ ] button to select a device, then press [ ]
button.
5.2. Change Picture Format
You can change the picture format to suit the video source.
Each video source has its available picture formats.
The available picture formats depend on the video source:
1. Press [ ] FORMAT button to select a picture format.
• PC mode: {Full} / {4:3} / {1:1} / {16:9} / {21:9}/ {Custom}.
• Video mode: {Full} / {4:3} / {1:1} / {16:9} / {21:9}/
{Custom}.
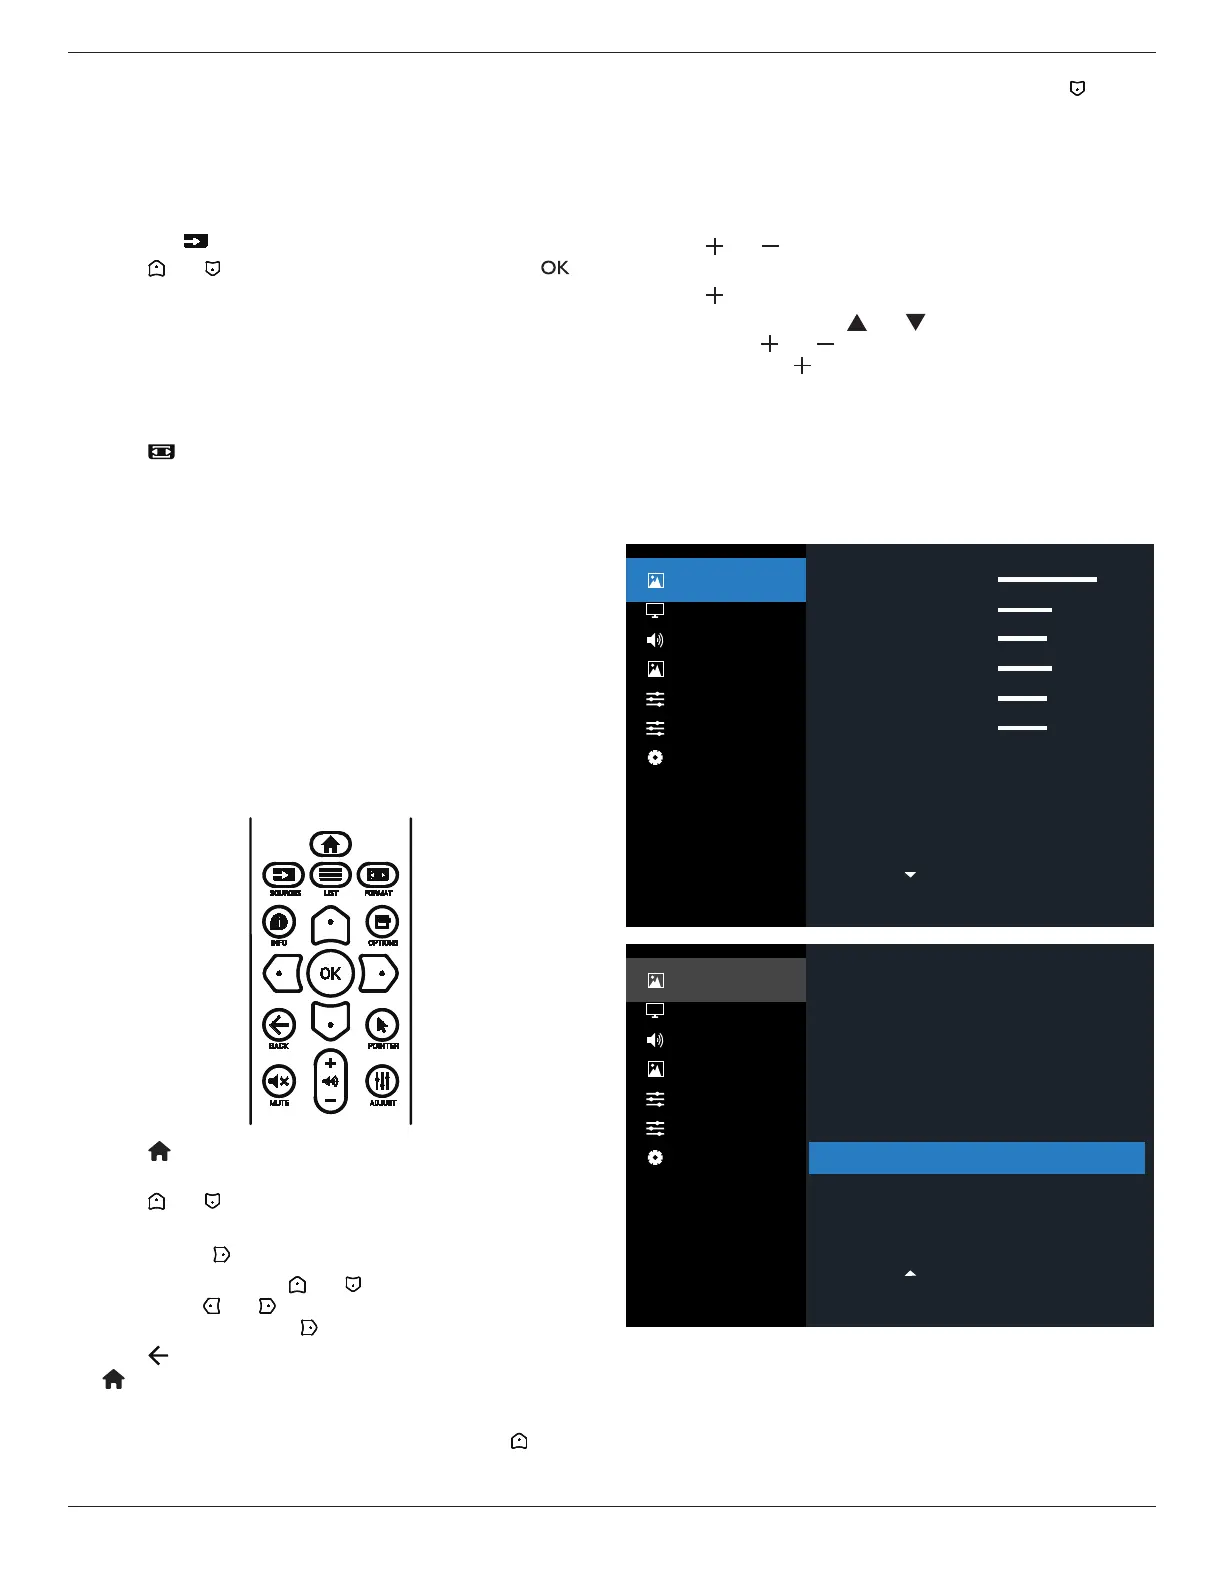
6. OSD Menu
An overall view of the On-Screen Display (OSD) structure
is shown below. You can use it as a reference for further
adjustment of your display.
6.1. Navigating the OSD Menu
6.1.1. Navigating the OSD menu using the remote
control
1. Press [ ] button on the remote control to display the OSD
menu.
2. Press [ ] or [ ] button to choose the item you want to
adjust.
3. Press [OK] or [ ] button to enter the submenu.
4. In the submenu, press [ ] or [ ] button to toggle among
items, press [ ] or [ ] button to adjust settings. If there is a
submenu, press [OK] or [ ] button to enter the submenu.
5. Press [ ] button to return to the previous menu, or press
[ ]button to exit the OSD menu.
NOTES:
• When there is no OSD menu on the screen, press [ ] to
display the menu of {Smart picture}.
• When there is no OSD menu on the screen, press [ ] to
display the menu of {Audio source}.
6.1.2. Navigating the OSD menu using the
display’s control buttons
1. Press [MENU] button to display the OSD menu.
2. Press [ ] or [ ] button to choose the item you want to
adjust.
3. Press [ ] button to enter the submenu.
4. In the submenu, press [ ] or [ ] button to toggle among
items, press [ ] or [ ] button to adjust settings. If there is a
submenu, press [ ] button to enter the submenu.
5. Press [MENU] button to return to the previous menu, or
press [MENU] button several times to exit the OSD menu.
6.2. OSD Menu Overview
6.2.1. Picture menu
Low
Native
10000K
Action
100
50
50
50
50
50
Picture
Screen
Audio
PIP
Configuration 1
Configuration 2
Advanced Option
Brightness
Contrast
Sharpness
Black Level
Tint
Color
Noise reduction
Gamma
Color temperature
Color Control
Picture
Screen
Audio
PIP
Configuration 1
Configuration 2
Advanced Option
Standard
Off
Auto
On
Off
Off
Action
Smart picture
Smart Power
Color Space
Local Dimming
Overscan
Uniformity
Picture reset
Brightness(Picture)
Adjust the overall image and background screen
brightness(backlight).
Contrast
Adjust the image contrast ratio for the input signal.