65BDL6005X
39
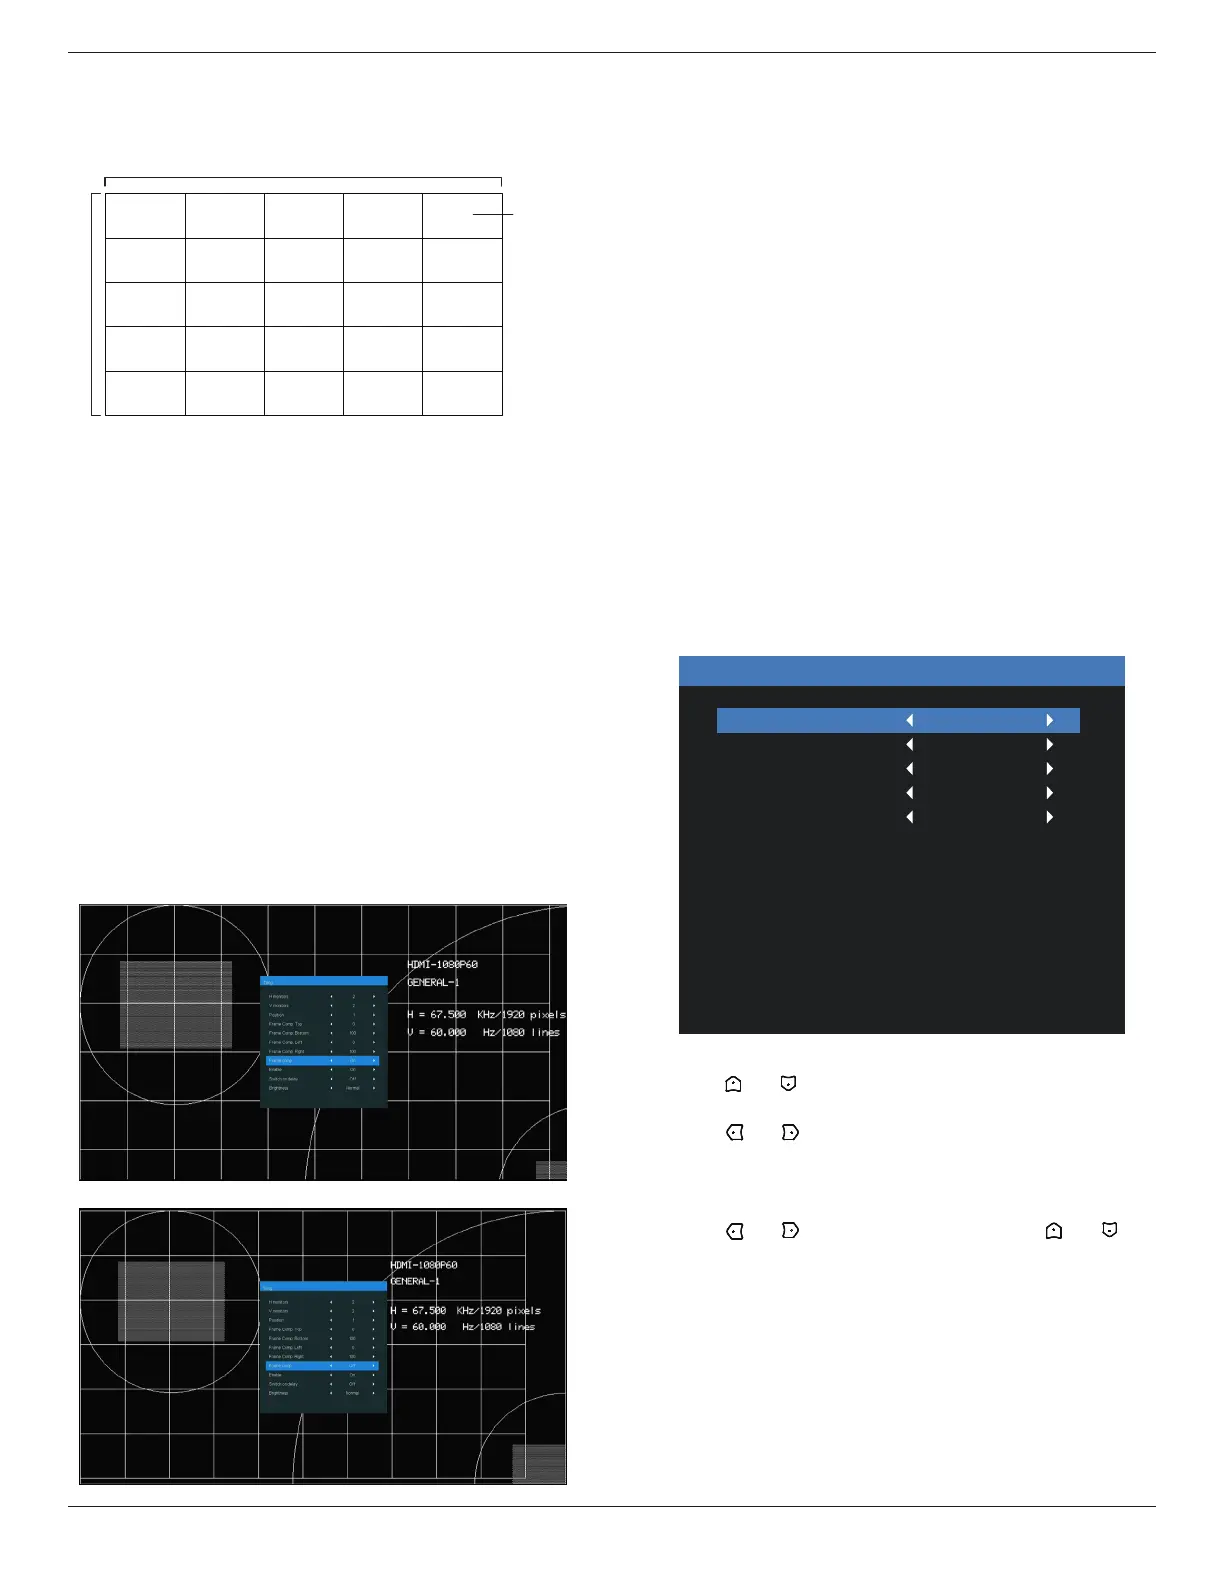
Example: 5 x 5 screen matrix (25 displays)
H monitors = 5 displays
V monitors = 5 displays
1 2
6 7
3 4
8 9
5
10
11 12 13 14 15
16 17 18 19 20
21 22 23 24 25
H monitors
V monitors
Position
• {H monitors} - Select the number of displays on the
horizontal side.
• {V monitors} - Select the number of displays on the
vertical side.
• {Position} - Select the position of this display in the screen
matrix.
• {Frame comp. Top} - set the pixel numbers of top frame
compensation
• {Frame comp. Bottom} - set the pixel numbers of bottom
frame compensation
• {Frame comp. Left} - set the pixel numbers of left frame
compensation
• {Frame comp. Right} - set the pixel numbers of right
frame compensation
• {Frame comp.} - Choose to turn the frame compensation
function on or o. If selected {Yes}, the display will adjust
the image to compensate for the width of the display
bezels in order to accurately display the image.
{On}
{O}
• {Enable} - Choose to enable or disable the Tiling function.
If enabled, the display will apply the settings in {H
monitors}, {V monitors}, {Position}, and {Frame comp.}.
• {Switch on delay} - Set the power-on delaying time (in
seconds). The default option {Auto} allows a sequential
powering-on for each display by their ID number when
multiple displays are connected. The options are: {O/
Auto/2-255}
• Brightness: {Normal}/{ACS}
{Normal}: Apply OSD brightness value (backlight)
{ACS}: Apply brightness value (backlight) which is adjusted
by MIC tool. The default value before adjustment is the same
as OSD brightness value, e.g., 70)
Some brightness (backlight) settings cannot be adjusted by
OSD. Please refer to Picture Menu Backlight setting priority.
• Output Content: Select DP out transfer source
{Current Video}: Transfer Current Video Source
{Displayport}: Forced to transfer source of Displayport
O Timer
Set automatically power o time (in hours).
Date and time
Adjust the current date and time for the display’s internal
clock.
Date and time
Year
Month
Day
Hour
Minute
Daylight saving time
Current date time
2022
2
22
12
22
2022:2:22:12:22:22
1. Press [OK] button to enter the submenu.
2. Press [ ] or [ ] button to toggle between {Year}, {Month},
{Day}, {Hour}, {Minute}, and {Daylight saving time}.
3. Press [ ] or [ ] button to adjust all settings except
{Daylight saving time}.
4. Press [OK] button to enter the {Daylight saving time}
submenu.
5. Press [ ] or [ ] button to select item, press [ ] or [ ]
button to adjust.
The Daylight saving time denition and behavior:
The current implementation of daylight saving is a reminder
tool for the customer which doesn’t know how to adjust the
clock for daylight saving on and o. It does not adjust the
real time clock automatically. Problem is that there are no
stable rules per region, or country when to adjust the clock.
To solve this the user must be able to set the daylight saving
start en stop date. When daylight saving correction is on (user