Mechanical Instructions
EN 9BP2.2U, BP2.3U 4.
4.3 Assy/Panel Removal
4.3.1 Metal Rear Cover
Caution: Disconnect the Mains/AC Power cord before you
remove the rear cover!
1. Place the TV set upside down on a table top, using the
foam bars (see part "Foam Bars").
Caution: do not put pressure on the display, but let the
monitor lean on the speakers or the Front cover.
2. Remove all T10 screws around the edges of the metal rear
cover: “parker” screws around the outer rim, “tapping”
screws around the connector plate.
3. Remove the four "mushrooms" from the rear cover.
4. Lift the metal rear cover from the set. Make sure that wires
and flat foils are not damaged.
4.3.2 Speaker Compartment Cover
After removing the metal rear cover, you gain access to the
Speaker Compartment covers.
1. Remove all T10 screws [1] around the outer rim of the
cover.
2. Remove the T10 screws [2] on top of the inner rim.
3. For sets with AmbiLight: Remove the T10 screws [3] at
the bottom of the inner rim.
4. After removal of all the screws, slightly push the top of the
cover inwards. This will lift the outer rim slightly up so you
can take the cover out.
Figure 4-4 Speaker compartment cover removal
To release the complete cover (only for models with the
AmbiLight feature, as in figure above):
• Lift the cover up; let it hinge at the top side.
• Now, unplug the cables [1] at the AmbiLight Inverter panel.
Figure 4-5 AmbiLight inverter panel connections
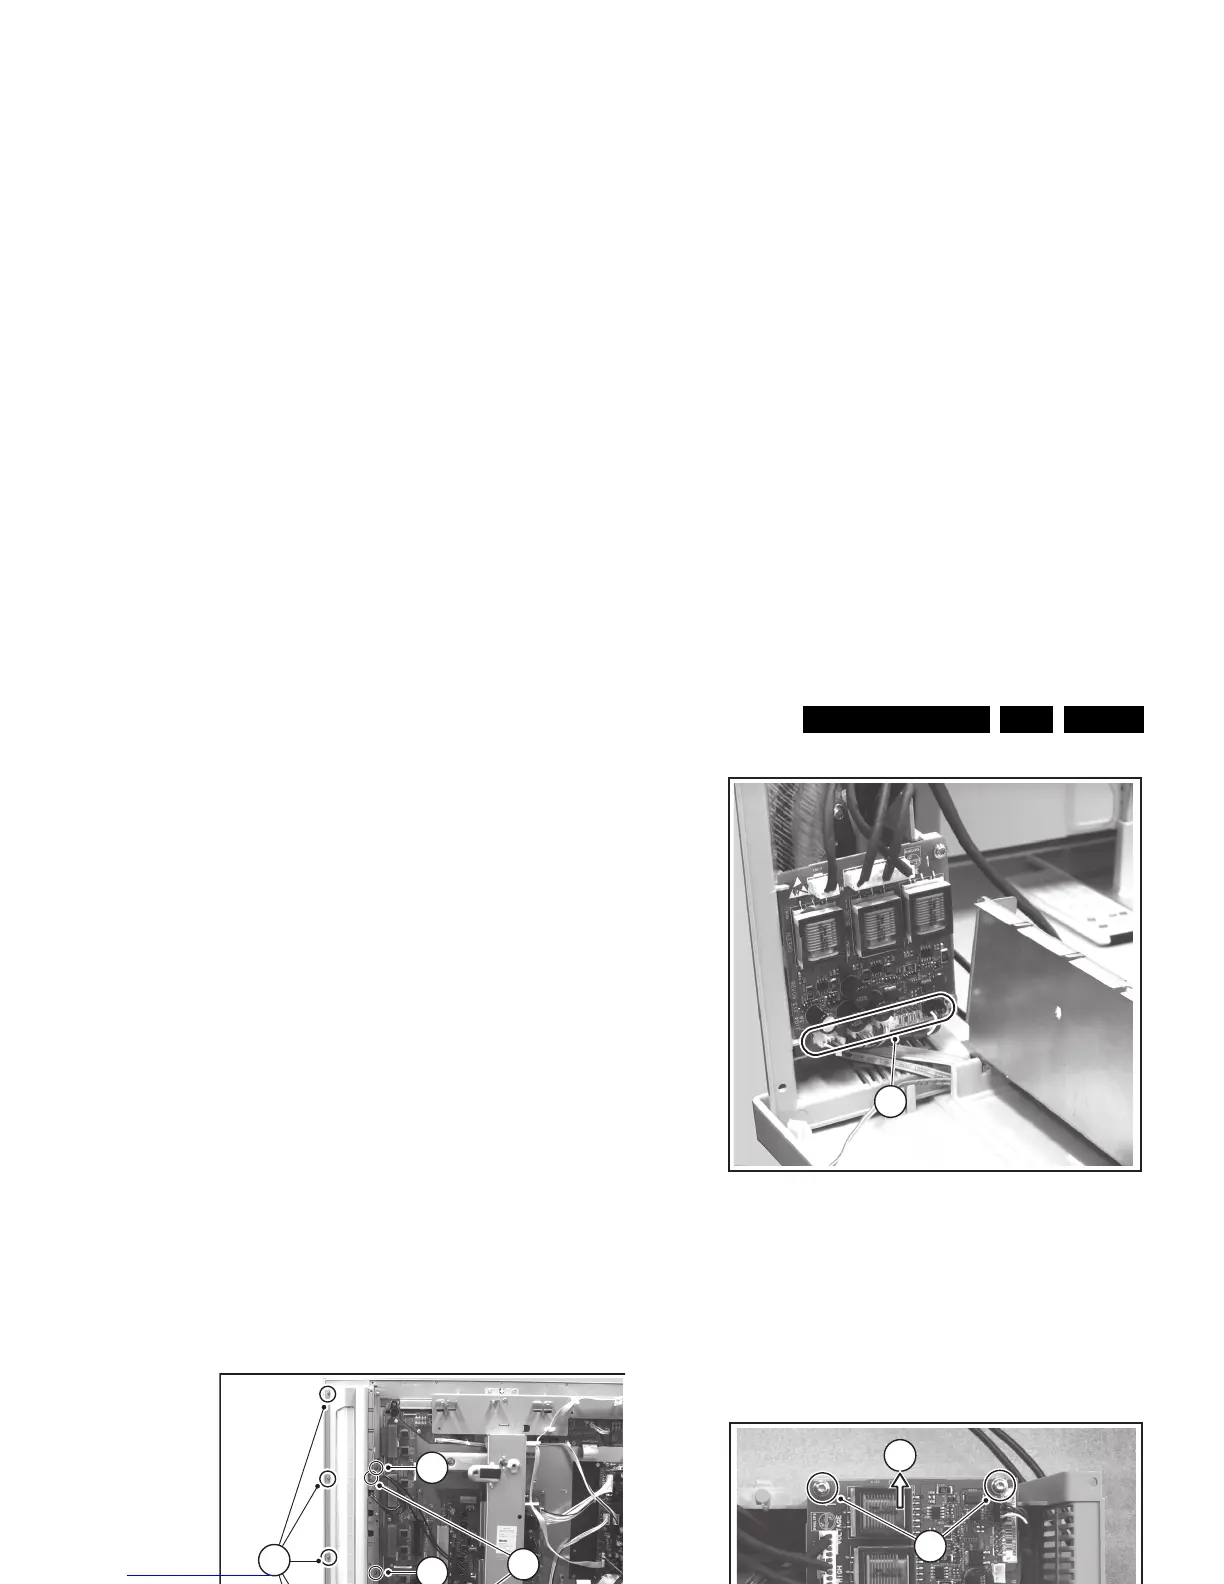
4.3.3 AmbiLight Inverter Panel (if present)
After removal of the Speaker Compartment Covers, this panel
is accessible.
1. Disconnect the cable(s) from the panel.
2. Remove the T10 mounting screws [1] that hold the assy.
3. Take out the panel from its bracket [2].
Figure 4-6 AmbiLight inverter panel removal
4.3.4 Control Panel
After removal of the Speaker Compartment Covers, this panel
is accessible. Release the clamps and take out the panel
4.3.5 Speakers
After removal of the Speaker Compartment Covers, you can
access the speakers.
F_15400_112.ep