English
18
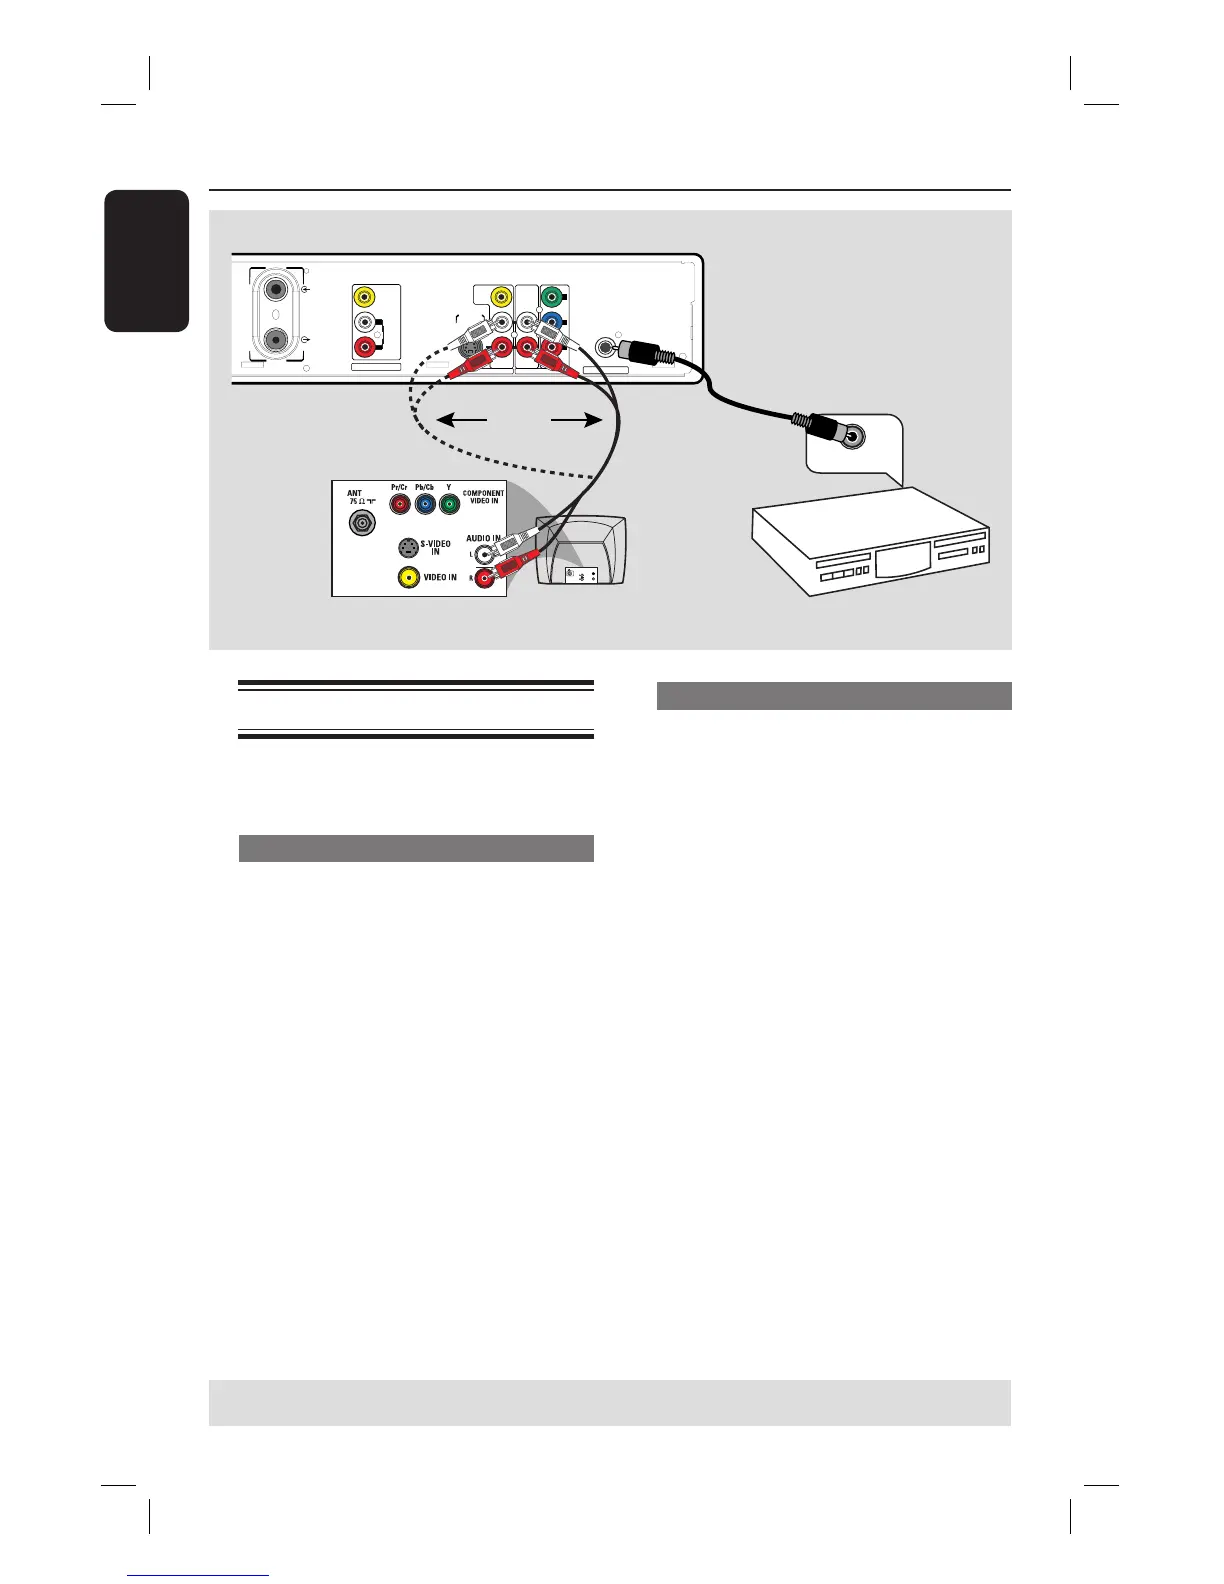
Connecting the audio cables
This connection enables you to listen to
the sound.
Option 1: Using an Audio cable
You can connect the recorder to a two
channel stereo system or receiver in
order to enjoy the stereo sound system.
Use the supplied audio cable (red/white
ends) to connect the AUDIO L/R
OUT1 or -OUT2 jacks to these devices
with the same input jacks.
Step 1: Basic Recorder Connections (continued)
ANTENNA
TV
EXT1
VIDEO
(
CVBS
)
AUDIO
S-VIDEO
(Y/C)
AUDIO
AUDIO
R
L
P
B
OUT 2
VIDEO
(
CVBS
)
OUT 1
Y
P
R
COAXIAL
DIGITAL AUDIO OUT
L
R
AU D IO
OUT
S-V ID E O
IN
VIDEO IN
TV
DIGITAL IN
OR
AV ampli er/
receiver
Option 1
Option 2
Option 2: Using a Coaxial cable
You can connect the recorder to an AV
ampli er/receiver in order to enjoy
multichannel surround sound.
Use a coaxial cable (not supplied) to
connect the COAXIAL jack to the
digital input on the AV ampli er/receiver
with a digital multi-channel sound
decoder.
Before you start operating, set the audio
settings accordingly (see page 67.)
If the AUDIO settings do not match your
ampli er’s capabilities, the ampli er may
produce a strong, distorted sound or no
sound at all.
Helpful Hint:
– Do not connect your TV’s audio output
jacks to the AUDIO L/R (IN-EXT) jacks on
this recorder, this may cause unwanted
noise.
TIPS: Before making or changing any connections, make sure that all the devices are disconnected
from the power outlet.