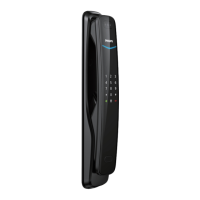
7
Remove the deco
cover at the top and
press the button at
the bottom of rear
escutcheon to remove
the battery cover,
then fasten the rear
escutcheon with two
M6 mounting screws.
Put the deco cover
back, install the
lithium battery, and
install the battery
cover along with the
strike.
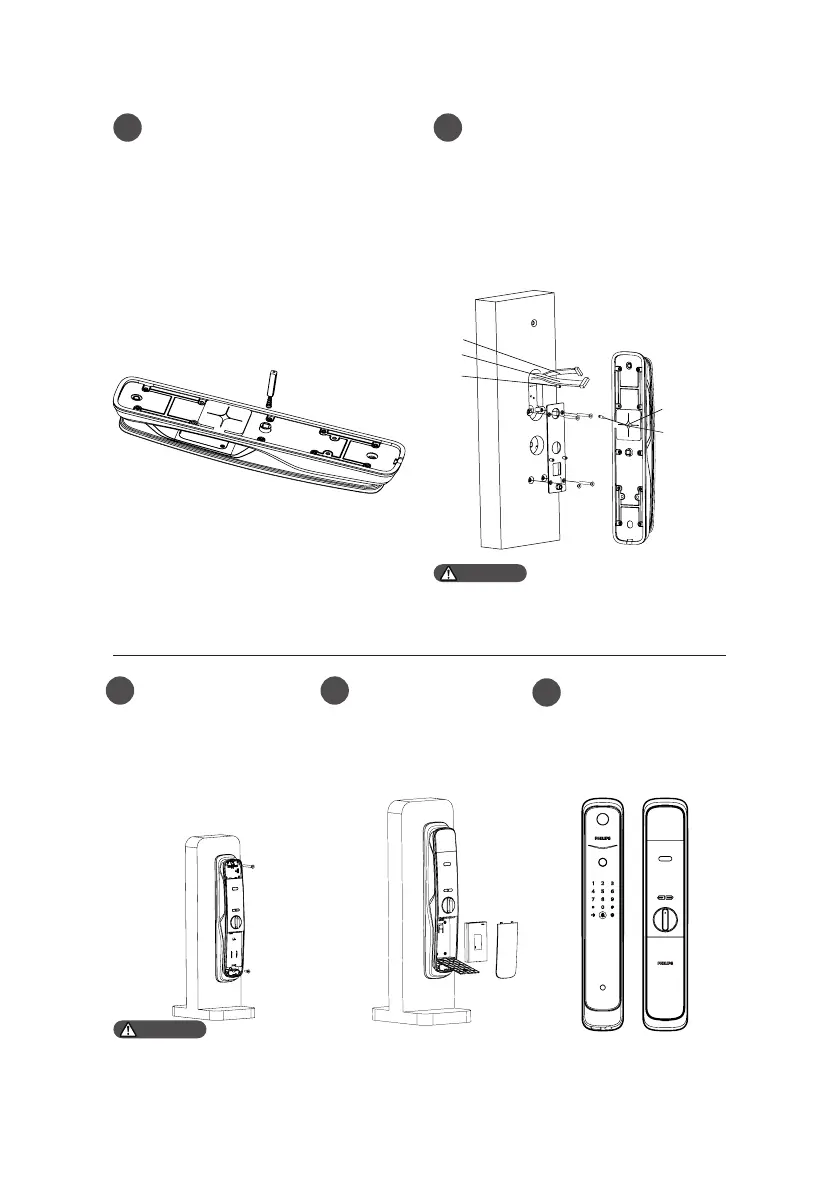
Check whether
the rotary knob,
mechanical key, and
all other components
work properly.
Put the compressed spring and
square shaft into the square shaft
hole of the inside escutcheon
accordingly.
5 6
Insert the cable of both outside
escutcheon and mortise into the
corresponding sockets on the
inside escutcheon. Then insert
the square shaft of the inside
escutcheon to the rotary hole
on the mortise until the inside
escutcheon is close to the surface
of the door.
Please hide the extra cables in the
door hole or the inside escutcheon.
Attention
After nishing the strike installation, please check whether the smart
door lock can be used normally.
Attention
7 8
9
Mortise cable
Mortise cable
connector
Escutcheon
cable connector
Front escutcheon cable
Wi-Fi antennas
 Loading...