This document is a user manual for the Philips EasyKey 9300, a push-pull smart door lock from the 9000 series. It provides comprehensive instructions on installation, setup, usage, and troubleshooting.
Function Description
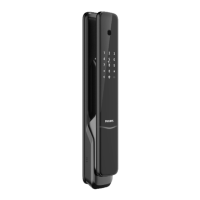
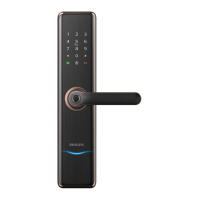
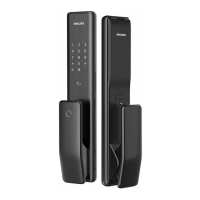
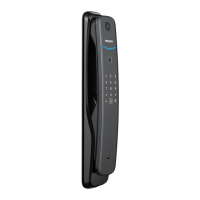
The Philips EasyKey 9300 is a smart door lock designed for enhanced security and convenience. It supports multiple unlocking methods, including PIN codes, fingerprints, key tags/cards, and mechanical keys. The lock can operate in two modes: general mode, where any registered identity method can unlock the door, and dual verification mode, requiring two registered identity methods for unlocking.
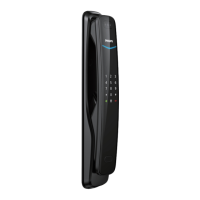
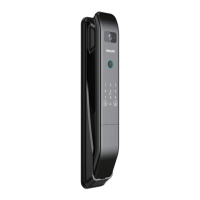
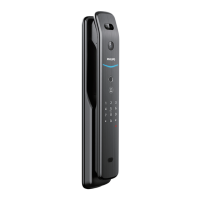
The lock features an outside escutcheon with a fingerprint sensor, keypad, mute button, outside forced lock button, lock status indicator, handle, card reader, low battery voltage indicator, reboot button, mechanical keyhole, and an emergency power supply port. The inside escutcheon includes a handle, battery cover, auto/manual mode switch, RESET button, network communication module interface, OPEN/CLOSE button, rotary knob, and a battery cover.
Key functions include:
- User Management: Ability to add, modify, and delete user PIN codes, one-time user PIN codes, fingerprints, and key tags. This allows for flexible access control for different users.
- System Settings: Configuration options for language (Chinese/English) and volume (high, low, mute).
- Extended Functions: Supports network connectivity, allowing for integration with smart home systems.
- System Query: Provides information on the product's security code and software version.
- Bluetooth Settings: Enables or disables Bluetooth functionality for connectivity with the Philips EasyKey app.
- Locking Mechanisms: Supports both auto and manual locking modes. In auto mode, the latch bolt pops up automatically when the door is closed. In manual mode, the latch bolt remains retracted until manually engaged.
- Indoor Deadlock: A security feature that locks all functions of the outside escutcheon, preventing unauthorized entry from the outside.
- Mechanical Key Opening: Provides a traditional backup method for unlocking the door in emergencies.
- Indoor Infrared Sensor Unlock: Allows for easy unlocking from the inside by holding the handle's sensor modules.
- Mute Mode: Temporarily silences voice prompts for quiet operation.
- Outside Forced Lock: Triggers an alarm if the door is unlocked from the inside while this mode is active, enhancing security when leaving the premises.
Usage Features
The Philips EasyKey 9300 offers a variety of features designed for ease of use and security:
Unlocking from Outside:
- PIN Code: Wake up the keypad, enter a registered user PIN code, and confirm with [#]. The door will open after a "Door opened" voice prompt.
- Fingerprint: Place a registered finger on the sensor. After a "Door opened" voice prompt, push or pull the handle.
- Key Tag/Card: Place a registered key tag or card against the card reader. After a "Door opened" voice prompt, push or pull the handle.
Unlocking from Inside:
- Rotary Knob: Simply rotate the rotary knob to unlock the door.
- Functional Button: Double-press the [OPEN/CLOSE] button within one second, then push or pull to unlock.
- Infrared Sensor: Hold the handle's sensor modules on both the front and rear inductive positions simultaneously to unlock. This feature can be enabled or disabled.
Locking:
- Auto Mode: The latch bolt automatically pops up when the door is closed, locking it.
- Manual Mode: The latch bolt remains retracted when the door is closed. To lock, a successful verification (PIN, fingerprint, or key tag) is required from outside, or the [CLOSE] button must be pressed from inside.
User Settings:
- Adding User PIN Code: Enter master mode, select "add user record," then "add new user PIN code." The system assigns a number, and the user enters a 6-12 digit PIN code twice, confirming with [#] each time.
- Adding One-time User PIN Code: Similar to adding a regular PIN code, but specifically for one-time use.
- Adding Fingerprint: Enter master mode, select "add user record," then "add user fingerprint." Place the finger against the sensor multiple times as prompted.
- Adding Key Tag: Enter master mode, select "add user record," then "add user key tag." Place the key tag against the card reader until a beep is heard.
- Modifying Master PIN Code: Enter master mode, select "modify master PIN code," and enter the new PIN code twice.
- Deleting User Records: Users can delete single user PIN codes, all one-time PIN codes, single fingerprints, all fingerprints, single key tags, or all key tags through the master mode menu.
System Settings:
- Language: Choose between Chinese and English.
- Volume: Adjust the volume of voice prompts (high, low, or mute).
- Dual Verification Mode: Switch between single and dual verification methods for unlocking.
Indicators:
- Lock Status Indicator: Blue when awake, green when unlocked/open, red when locked/closed.
- Low Battery Voltage Indicator: Flashes red with a voice prompt when batteries are low.
- Outside Forced Lock Indicator: Glows white when enabled or in use.
- Mute Indicator: White when mute mode is off, green when on.
- Inside Deadlock Indicator: Keypad shows "15937(X)" with a voice prompt when active.
- System Lock-up Indicator: The lock will be locked for 1, 2, or 3 minutes after 5 consecutive incorrect entries within 5 minutes.
- [OPEN/CLOSE] Indicator: Two red flashes for locking, two green flashes for unlocking, one red flash for deadlocking.
- Infrared Sensor Unlock Indicator: Fast green flashing when on, fast red flashing when off.
Maintenance Features
The manual outlines several maintenance and troubleshooting aspects to ensure the longevity and proper functioning of the Philips EasyKey 9300:
Battery Management:
- Low Battery Alarm: The system automatically checks battery voltage upon waking up. If low, a red light flashes, and a voice prompt "Low battery voltage. Please replace all batteries" is issued. All batteries should be replaced immediately.
- Battery Replacement: The lock is powered by four 1.5V alkaline batteries, with two sets of working power stations for a total of eight batteries to extend battery life. The battery cabinet is located at the bottom of the inside escutcheon and can be accessed by pushing the cover upwards. Ensure correct polarity (+/-) when installing new batteries.
Emergency Procedures:
- Emergency Power Supply: If the battery voltage is insufficient and the door cannot be opened from the outside, a 5V power bank can be connected to the Micro USB interface for emergency power. Batteries should be replaced immediately after opening the door.
- System Reboot: In case of a system crash, the [RES] button can be pressed and released to reboot the system.
- Mechanical Key: A mechanical key is provided for emergency unlocking, such as when batteries are dead, the PIN code is forgotten, or the system malfunctions. It is not recommended for daily use.
Troubleshooting and Alarms:
The lock is equipped with various alarms to alert users to potential issues:
- Inside Unlocking Alarm Under Outside Forced Lock: Triggers if the door is unlocked from the inside while outside forced lock mode is active. The alarm repeats continuously and can be turned off by successful verification.
- Anti-dismantling Alarm: Triggers if the door is pried open and the sensor latch bolt pops up, or if there is no close fit in the door. The alarm repeats continuously and can be turned off by successful verification or normal unlocking.
- Deadbolt Abnormality Alarm: Triggers if the deadbolt malfunctions, failing to lock or unlock. The alarm repeats continuously and turns off automatically.
System Initialization:
- To restore the lock to default settings and clear all user information, double-press the [RES] hole with a sharp object after removing the battery cover. A voice prompt "Restoring to default settings" will confirm the action.
Installation Guidelines:
- It is crucial to read and understand all instructions before using the Philips EasyKey.
- Only manufacturer-specified accessories/components and alkaline batteries of the same specification should be used.
- Installation should be performed by a professional technician following the provided guidelines.
- The default master PIN code should be modified immediately after installation and debugging.
- The fingerprint sensor should not be scraped with sharp objects to prevent permanent damage.
- The product should not be exposed to water leakage, splashing, or corrosive substances.
- Objects should not be hung on the handle, as this may affect normal lock operation.
- The product should be cleaned with a soft cloth.
- Batteries should not be removed during setup and operation.
- The relevant sealed stickers should be kept properly, and password information should not be easily disclosed.
- Used products and batteries should be disposed of according to local regulations, ideally at Philips authorized service centers or designated collection systems.