This document is a user manual for the Philips EasyKey Alpha series Smart Video Door Lock, model Alpha-VP-5HWS.
Function Description
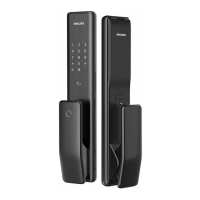
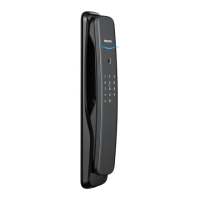
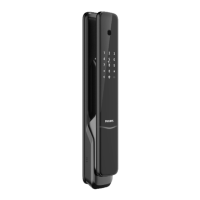
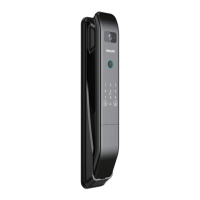
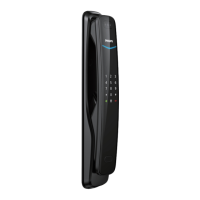
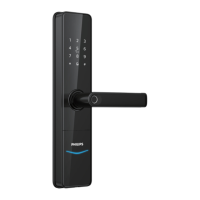
The Philips EasyKey Alpha-VP-5HWS is a smart video door lock designed for enhanced home security and convenience. It offers multiple unlocking methods, including PIN code, fingerprint, key tag, and mechanical key. The lock integrates video intercom functionality, allowing users to view visitors and communicate with them remotely via a mobile app. It also features an indoor infrared sensor for easy unlocking from the inside and an "outside forced lock" mode for added security. The system includes various alerts such as low battery, anti-dismantling, anomalous deadbolt, and motion sensor alerts to keep users informed of the lock's status and potential security breaches.
Important Technical Specifications
- Door Thickness Compatibility: The default installation kit is suitable for door thickness of 60-90mm. For other thicknesses, users are advised to contact support.
- Battery: The lock is powered by a 5000mAh lithium battery.
- Charging: The lithium battery can be charged via a charging cable. In emergencies, a 5V power bank can be plugged into the micro USB port to power up the lock.
- Network Connectivity: The Philips EasyKey is compatible with routers using dedicated 2.4 GHz Wi-Fi (5 GHz Wi-Fi is not supported). The recommended distance between the door lock and the router is less than 10 meters to ensure optimal connectivity.
- PIN Code Length: One-time PIN codes can be 6 to 12 digits long.
- System Lockup: Consecutive incorrect inputs (fingerprint, PIN code, or Keytag) 5 times within 5 minutes will lock the system for 100 seconds.
Usage Features
Unlocking Methods:
- From Outside:
- PIN Code: Touch the keypad, enter the registered PIN code, and confirm with [#]. Push or pull the handle to unlock.
- Fingerprint: Place a registered finger on the fingerprint sensor. Push or pull the handle to unlock.
- Keytag: Place a registered key tag against the keytag reader. Push or pull the handle to unlock.
- From Inside:
- Rotary Knob: Rotate the rotary knob to unlock.
- Functional Button: Double-press the [OPEN] functional button within one second, then push or pull to unlock.
- Infrared Sensor: Touch the sensing area on the rear and front sides of the handle simultaneously to unlock when the sensor is triggered.
- Mechanical Key: In emergencies (dead battery, forgotten PIN code, system malfunction), a mechanical key can be used. The key is accessed by cutting a mechanical box and pushing aside a cover. Insert the key vertically into the keyhole, turn the key shell 90 degrees, then twist 180 degrees clockwise to align the key shell horizontally, and rotate the key cover to unlock.
Locking Methods:
- Automatic Locking: The latch bolt automatically pops up when the door is closed, accompanied by a "Door Close" voice prompt.
- Interior Lockout: Long-press the [CLOSE] button on the inside to enable "inside deadlock enabled" mode. In this mode, the front escutcheon is locked, and all operations from the front are disabled. Master PIN code verification or mechanical key is required to release.
- Outside Forced Lock: After successfully locking the door, long-press the number key "8" for 2 seconds to enter this mode. Unlocking from the inside will trigger an alert.
User Management:
- Master Mode: Wake up the keypad, enter [#] twice, then enter the master PIN code and [#]. Alternatively, place a registered master fingerprint on the sensor after waking up the keypad and entering [#] twice.
- Change Master PIN Code: In master mode, enter [1] then [5]. Enter the new PIN code twice, confirming with [#] each time.
- Add New User: In master mode, enter [1] then [1]. Add a PIN code, fingerprint, or key tag.
- Add One-Time PIN Code: In master mode, enter [1] then [2]. Enter a 6-12 digit PIN code twice, confirming with [#] each time.
- Add/Change Master Fingerprint: In master mode, enter [1] then [4]. Place a finger on the sensor to enroll or replace a master fingerprint.
- Delete User Information: In master mode, enter [1] then [6]. Choose to delete a single PIN code [1], fingerprint [2], key tag [3], or all user information [5].
System Settings:
- Language Settings: In master mode, enter [2] then [1]. Choose Chinese [1] or English [2]. Default is English.
- Volume Settings: In master mode, enter [2] then [2]. Choose high volume [1], low volume [2], or mute mode [3]. Default is high volume.
- Eco Mode: In master mode, enter [2] then [3]. Enter [1] to turn on or off eco mode. Default is off.
- Dual Verification Mode: In master mode, enter [2] then [4]. Enable or disable dual verification mode. Default is single verification. Dual verification requires a combination of two different verifications (PIN code, Key tag, or fingerprint) to unlock.
- Infrared Sensor: In master mode, enter [2] then [5]. Enable or disable the infrared sensor. Default is on.
- Network Connection: In master mode, enter [4] to join a network.
Video Intercom and Screen:
- Doorbell: When a visitor presses the doorbell, an indoor chime sounds, the camera captures a video clip, and a notification is sent to the paired mobile app, allowing remote viewing. The smile curve indicator flashes blue when the doorbell key is pressed.
- Two-way Video Intercom: View the front door situation and talk to visitors via the mobile app when integrated.
- Screen: The rear escutcheon screen turns on when the doorbell is pressed, allowing users to view the front door. Screen timeout and brightness can be set via the mobile app.
Indicators:
- Door Lock Status: Blue (system awake, ready for operation), Green (unlocked, door open), Red (locked, door closed).
- Low Battery Voltage: Red flash and "Low battery voltage, please replace battery" voice prompt when voltage is too low.
- Outside Forced Lock: Number key "8" glows white when enabled.
- Interior Lockout: Keypad shows "15937(X)" with "inside deadlock enabled" voice prompt when manually woken up.
- System Lockup: Number key "2" flashes for 2 minutes, then number key "1" flashes for 1 minute if there are 5 consecutive incorrect inputs within 5 minutes.
Maintenance Features
- Cleaning: Clean the product with a soft cloth.
- Battery Replacement: Replace all batteries immediately upon low battery alarm, ensuring correct pole matching (+/-). The 5000mAh lithium battery is located in the upper part of the rear escutcheon; push the cover upward to remove and replace.
- Emergency Charging: If the battery is low and the door cannot be opened, plug a 5V power bank into the micro USB port.
- Restore to Default Settings: Double-click the [RES] button with a sharp object to empty all user information and restore factory settings.
- Product Registration: Register the product at www.philips.com/support for support.