18
HP L1502
Display Adjustment
Display Adjustment:
Press and button simultaneously while power ON.
Adjust OSD menu to lower position of screen (i.g. adjust OSD H-
Position and OSD V-Position to 0 at OSD setup sub-menu. Then
press or button to move the cursor to
item ( see yellow circle on table 1). Press button to access
to factory mode (see table2.). Check the code of CPU version if it
is not right version, then ISP new one (7301). After pre-check,
aging 1 hour at least. Programming Analog DDC data into
Monitor. Check # serial number to meet bar code label.
+
Down Up Factory Entrance
Menu
Table 2. The content of Factory setting.see table 2.
Cursor can move on gray color area
1. Auto color adjustment:
Apply a 48.36kHz/60Hz signal with white pattern. Set brightness
at 100% and contrast at 50%. Move the cursor by pressing or
button to ( see red circle on table 2 ), press OK
button to do auto color, scaler would calibrate offset1,offset2 and
gain itself then display OK. Check the 64-gray level is
distinguishable.
Up
Down AutoColor
Table 1.
2. Color temperature adjustment:
Apply a 48.36kHz / 60Hz signal with white pattern.Set brightness
control at 100% and contrast control at 50%. Adjust the R.G.B
gain to reach special color temperature on center of screen.
Keep one color fixed gain to maximum at least.
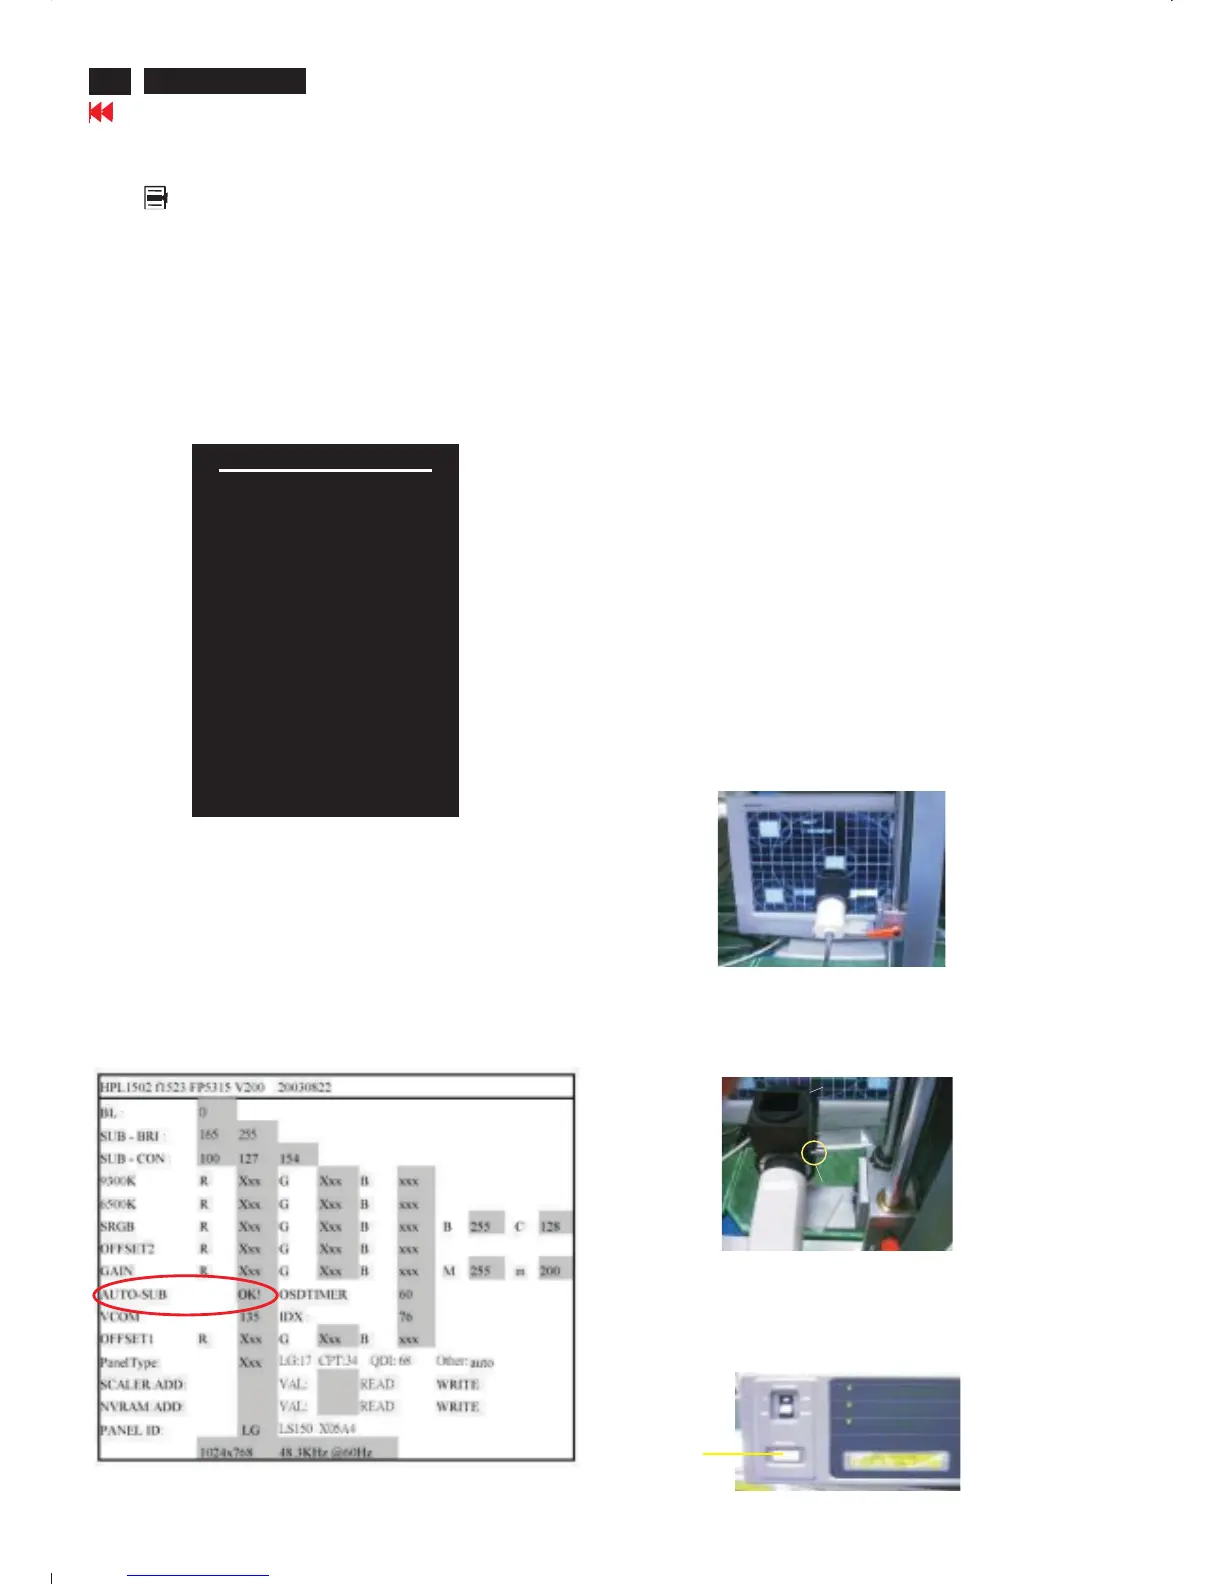
2 .1 Aim the probe CA-A30 at the center of screen as Fig. 1
2 .2 Remove the lens protective cover of probe CA-A30.
2 .3 Set Measuring/viewing selector to Measuring position for reset
analyzer. (Zero calibration) as Fig. 2
2 .4 Turn on the colour analyzer (CA-110).
2 .5 Press 0-CAL button to start reset analyzer. See Fig.3
Table 2.
Measurement/viewing selectorMeasurement/viewing selector
cover (black)cover (black)
Fig. 1
Fig. 2
Fig. 3
0-CAL
Go to cover page
Main manu
Brightness
Contrast
Image control
Color
Language
Management
OSD control
Factory reset
Exit F
<-------------Factory mode indicator
<------Version of code indicator