11
Note:
y If the front panel or the shaping disc is not properly assembled, a safety switch will
prevent the appliance from working.
y Make sure the front panel is completely fastened before using the appliance.
7 Close the mixing chamber lid. (Fig. 17)
Using the Pasta maker
Preparing the ingredients and starting the pasta making
program
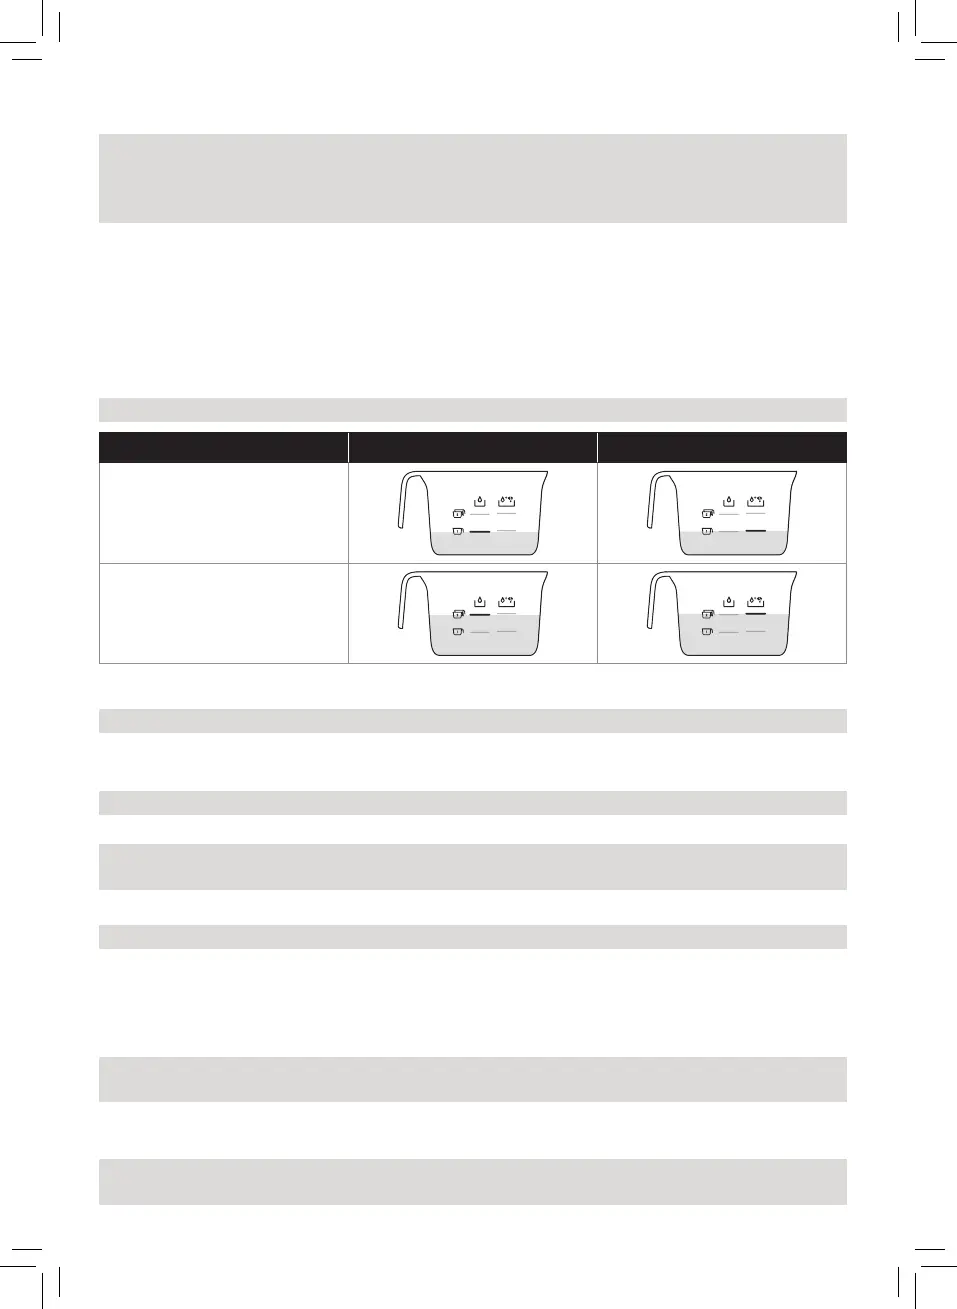
Note: Use the supplied our/water cup to measure our and liquid.
Flour Water Water + Egg
1 cup of our
(~250 g / 8.8 oz)
2 cups of our
(~500 g / 17.6 oz)
1 Use a kitchen scale for the correct amount of our and liquid. (Fig.15)
Note: Refer to chapter “Recipe” for the correct ratios.
2 Remove the mixing chamber lid. (Fig.3)
3 Pour the our into the chamber. (Fig.16)
Note: Refer to chapter “Recipe” for the correct ratios.
4 Close the mixing chamber lid. (Fig.17)
Note: If the mixing chamber lid is not properly installed, the safety switch will prevent the
appliance from working.
5 Measure the required amount of liquid according to the our you have used. (Fig.18)
Note: Refer to chapter “Recipe” for the correct ratios.
6 Put the plug in the power socket. The appliance sounds once, and all indicators ash once.
(Fig.19)
7 Press the On/o button to switch on the appliance. (Fig.20)
8 Press the Start/pause button to start the automatic pasta making program. (Fig.21)
Note: If the appliance is not in the automatic mode, press the Automatic button before
pressing the Start/pause button.
9 After the mixing starts, slowly pour in the liquid along the entire length of the slot in the
lid. (Fig.22)
Note: During dough mixing, do not add other ingredients after you have poured in the
liquid. Otherwise, it will aect the result of the pasta texture.