10
Introduction
Congratulations on your purchase, and welcome to Philips!
To fully benet from the support that Philips oers, register your product at
www.philips.com/welcome.
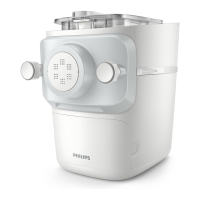
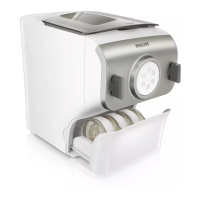
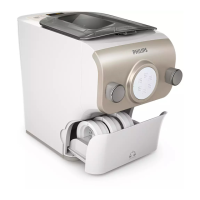
Product overview (Fig.1)
a
Mixing chamber lid
j
Pasta cutter
b
Safety switch hole of the mixing
chamber lid
k
Front panel knobs
c
Power cord
l
Front panel
d
Disc holder safety switch
m
Shaping disc
e
Main unit
n
Disc holder
f
Shaping disc storage
o
Disc holder safety switch lever
g
Water cup
p
Mixing paddle
h
Cleaning brush
q
Mixing chamber
i
Angel hair shaping disc cleaning brush
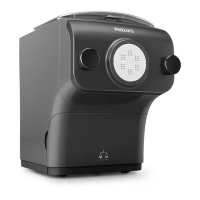
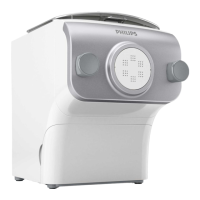
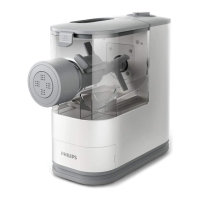
Control panel overview (Fig.2)
a
On/o button
d
Start/pause button
b
Program selection button
e
Display
c
Extrusion only button
This appliance allows you to make the pasta you need in the way you want.
• Default pasta making function
Choose a program with the Program selection button, and then press the Start/pause
button.
• Extrusion only function
Press the Extrusion only button, and then the Start/pause button.
Applies when there is leftover dough in the mixing chamber, and you want some extra
extrusion.
• Skip-scaling function
Press and hold the Start/pause button for 5 seconds.
Applies when the device jumps into error mode or when you need to skip the scale
function and start the mixing process directly.