EN 214.LX9000RDismantling Instructions
Dismantling
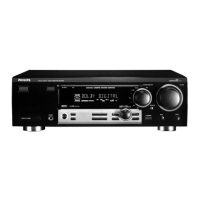
Knobs of the Rotary Encoders
• Dismantle ornamental Aluminium Front as described before.
• Turn the knob to a position as shown in picture 35.
• Put a flat screwdriver in between the black plastic part of the rotary
encoder and the transparent plastic part of the knob
→ see picture 35.
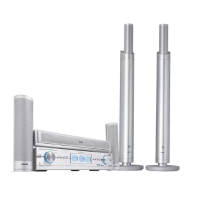
• Turn the screwdriver in order to press the transparent part of the
knob over the catch on the encoder → see picture 36.
(this may need some force)
• Repeat 3x, the knobs are caught 4 times.
picture 35
picture 36
Mounting
Knobs onto the Rotary Encoders
• Align guidings and simply push the knob onto the rotary encoder
until the catches engage.
ATTENTION:
Be aware that when the knob has to be replaced by a new one,
pos. 149, 151 and 152 respectively pos. 152, 177 and 178 have to
be ordered.
The 3 parts have to be mounted together by the repair technician.
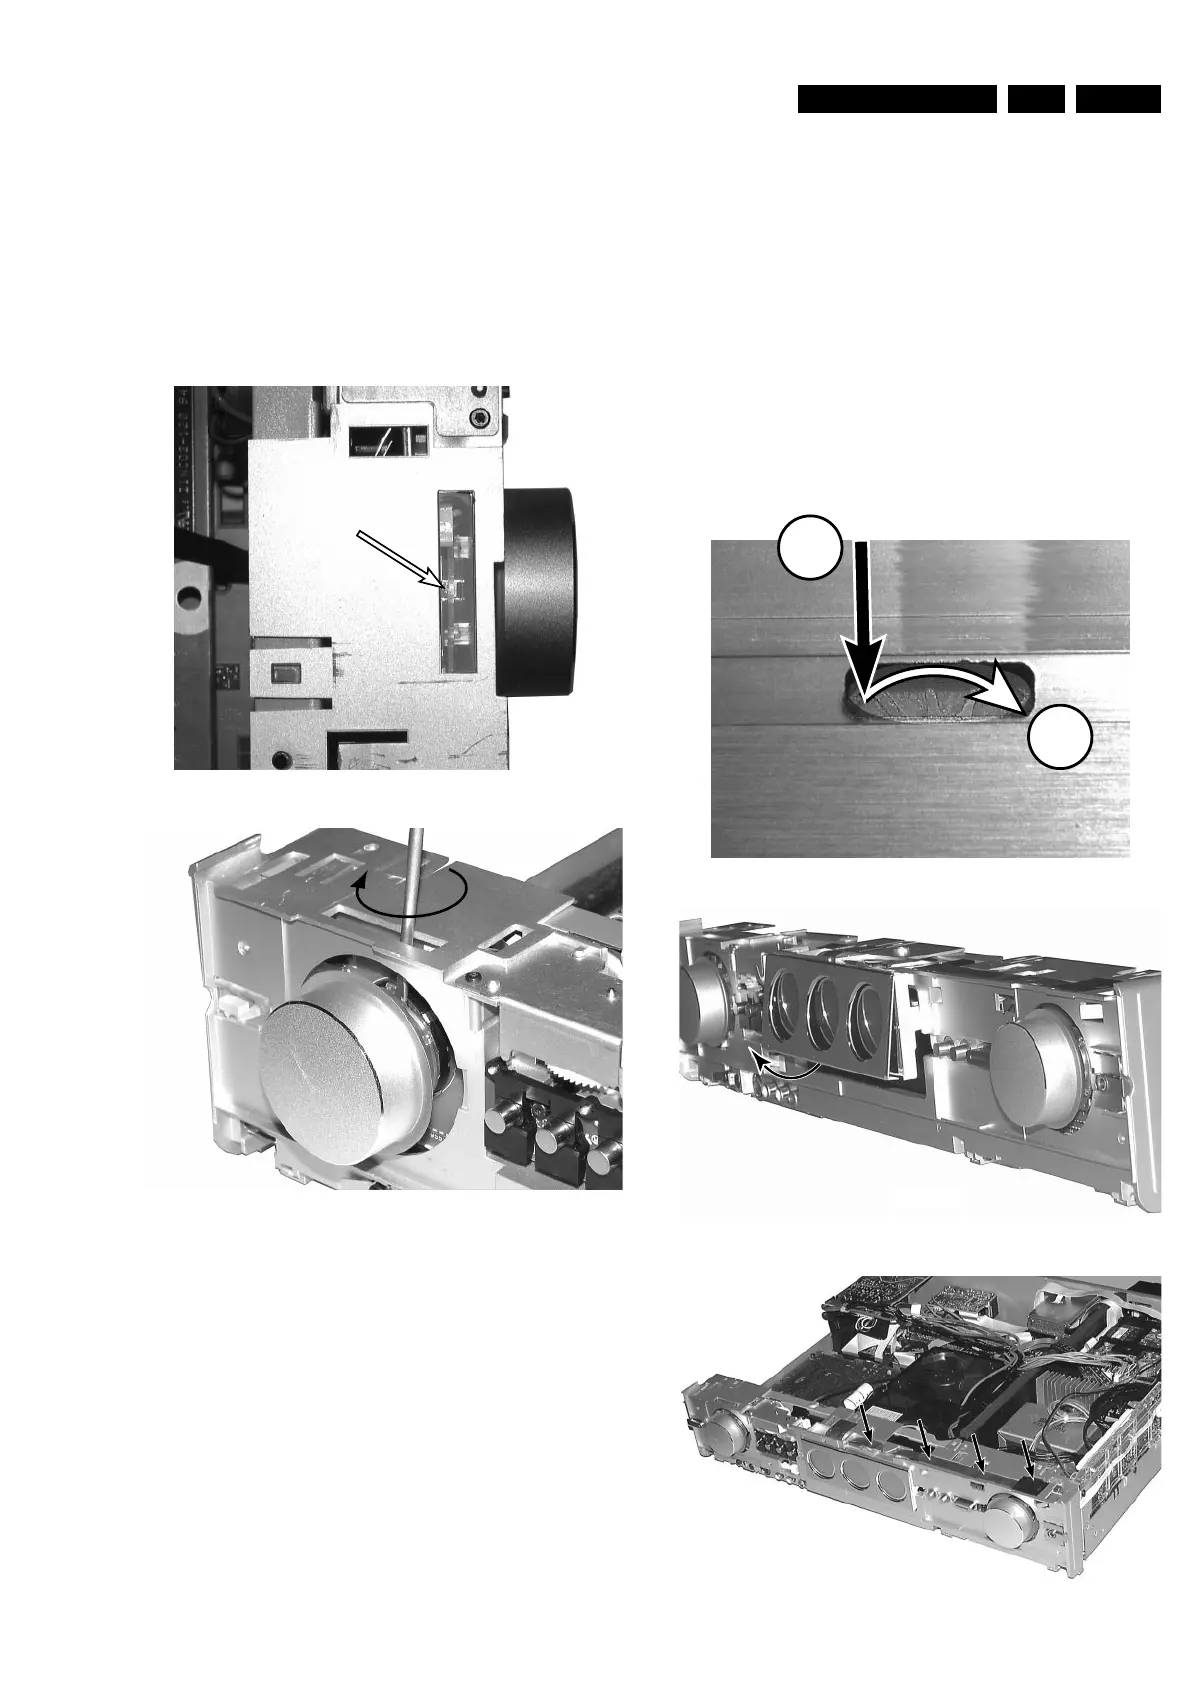
Dismantling the
Display
picture 39
• Dismantle ornamental Aluminium Front as described before.
• Move the display manually up by means of a screwdriver.
Through a slot on the top side of the front cabinet the gear wheel
of the moving mechanism can be accessed.
Push the gear wheel down in order to dis-engage the motor. Then
turn the wheel clockwise → see picture 37.
Repeat as long as the display has moved completely out.
• Loosen 3 screws on the bottom side of the display.
• Remove the ornamental cover as shown in picture 38.
• Move the display manually down as described before, but turning
the gear wheel counter clockwise.
• Plug off the connection cable from the Control Board and loosen it
carefully from the adhesive tapes → see picture 39.
• Now thread the connection cable out of the plastic front cabinet
and remove display.
 Loading...