5. Repeat step 1 - step 3 for the second aileron
linkage.
2. Make the same way for the plastic linkball to the
other side of the pushrod wire.
3. Plug the aileron servo into the receiver and
center the servo. Install the servo arm onto the
servo. The servo arm should be perpendicular
to the servo and point toward the middle of the
wing.
4. Center the aileron and hold it in place using a
couple of pieces of masking tape. Adjust the
linkage until the aileron and the servo arm are
both centered and then tighten the nut against
the clevis. Install the plastic linkball to the servo
arm. Remember use thread locking compound
to secure.
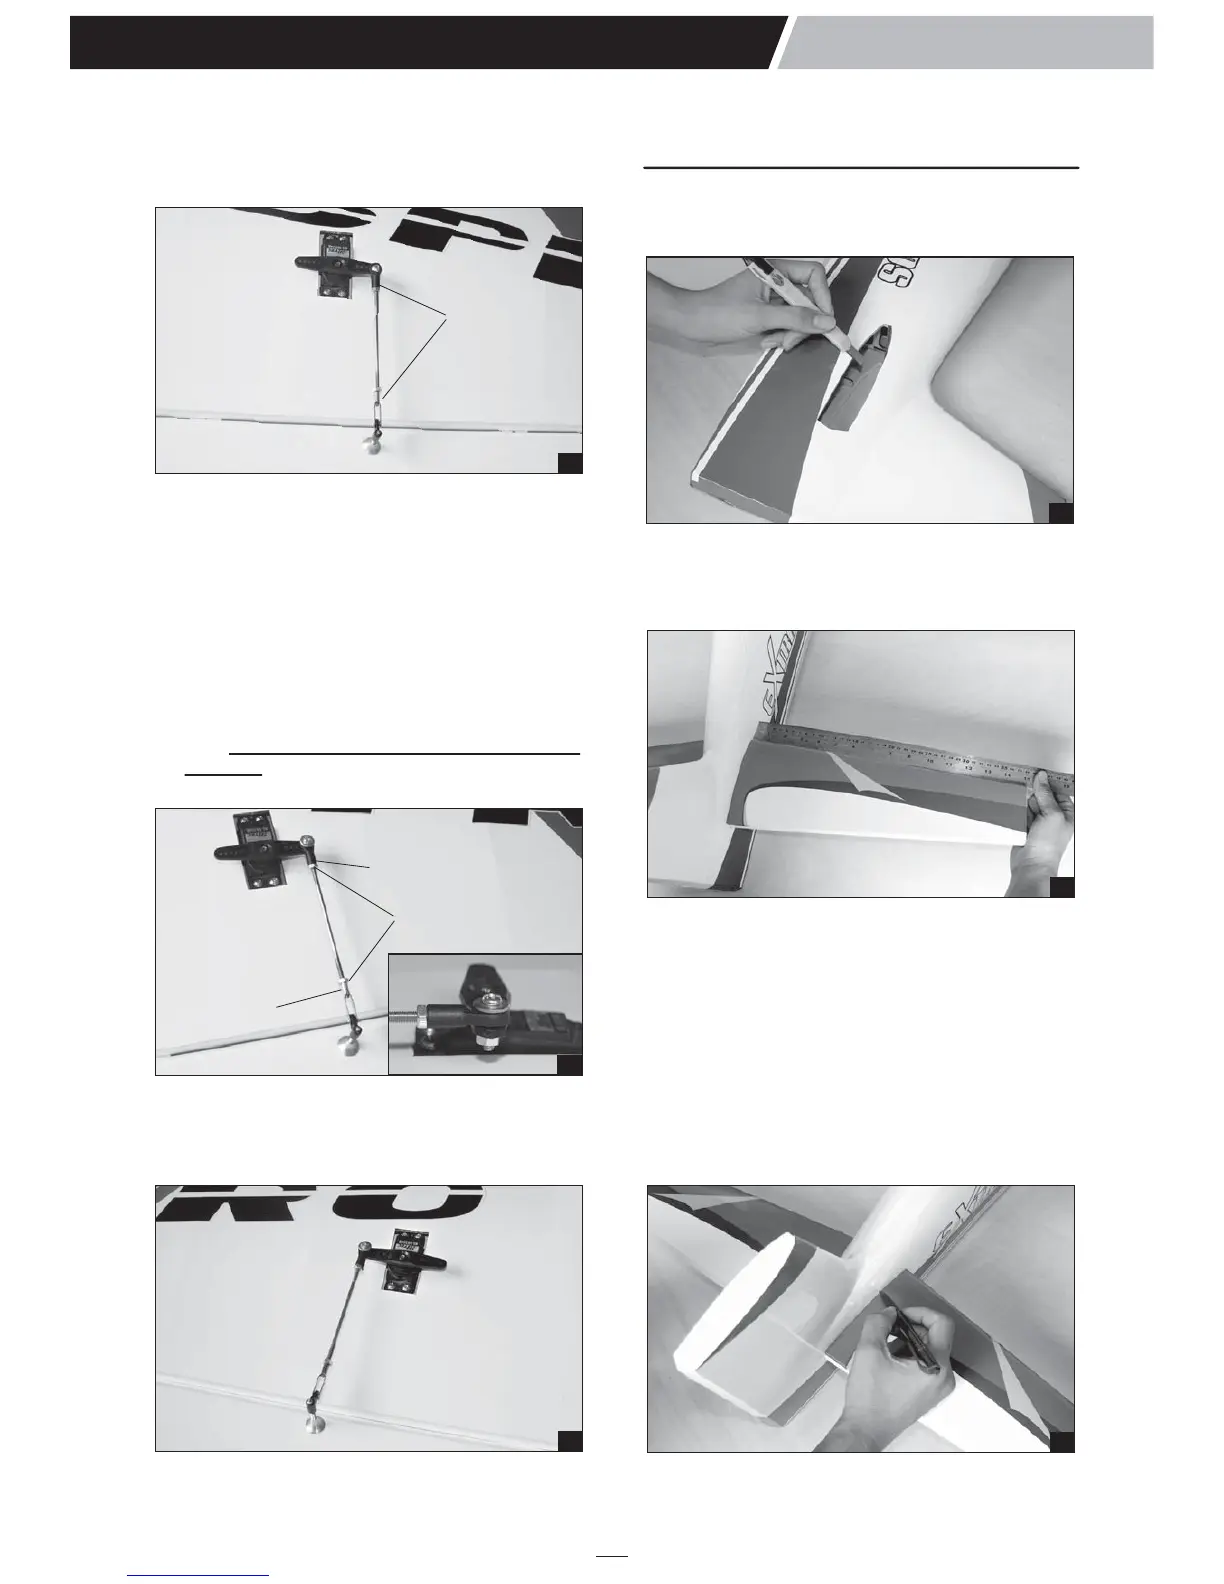
INSTALLING THE HORIZONTAL STABILIZER
1. Using a modeling knife, cut away the covering from
the fuselage for the stabilizer and remove it.
13
14
5
EXTRA 300S
Instruction Manual
16
3. Check the fit of the horizontal stabilizer in its
slot. Make sure the horizontal stabilizer is
square and centered to the fuselage by taking
measurements, but don't glue anything yet.
4. With the horizontal stabilizer correctly aligned,
mark the shape of the fuselage onto the bottom
and into the top of the horizontal stabilizer
using a water soluble/ non-permanent felt-tip
pen.
2. Draw a center line onto the horizontal stabilizer
and slide it into the fuselage.
15
11
Adjust
the linkages
12
Link ball
M3 nut
M3 clevis