PIPER SENECA II SERVICE MANUAL
01/01/09 XIV - ACCESSORIES AND UTILITIES
3C22C
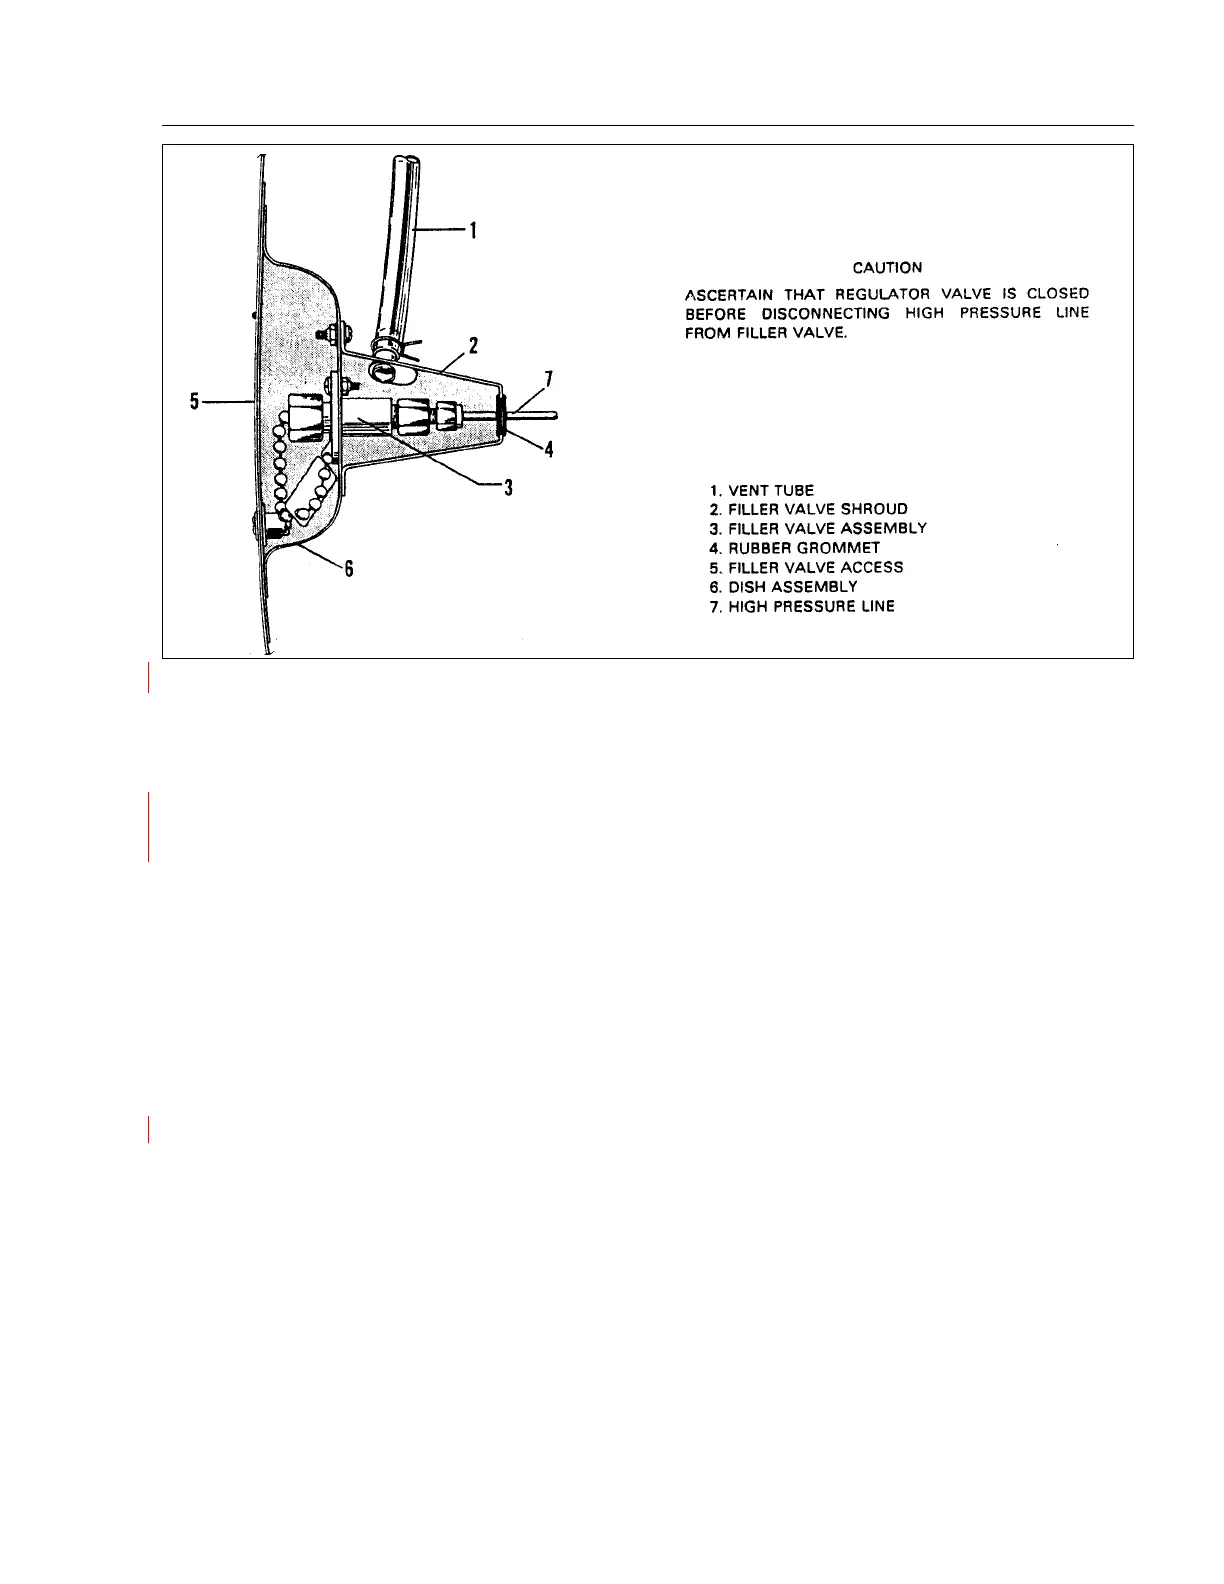
Figure 14-23. Oxygen System Filler Valve Installation
14-84. FILLER VALVE. (Figure 14-23)
14-85. REMOVAL.
a. Remove the rear bulkhead access panel.
b. Ascertain that the valve on the regulator is closed:
c. Remove the three screws and washers which secure the filler valve shroud (2) to the filler valve dish
(6) assembly. Slide shroud away from dish.
d. Disconnect the high pressure line (7) from the filler valve (3).
e. Remove the three screws, washers and nuts which secure the filler valve (3) to the dish assembly (6)
and remove the filler valve.
14-86. INSTALLATION.
a. Place the valve into position and secure with three nuts, washers and screws.
b. Connect the high pressure line (7) to the valve (3).
c. Slide the filler valve shroud (2) into position and secure with screws and washers.
d. Install the rear bulkhead access panel.
1. VENT TUBE
..
7.
 Loading...


