Section Two: OPERATION
NOTE:
Always clean or check your burn pot before each use. This
will ensure proper ignition, heat output and many continuous
happy grilling experiences
.
Automatic Start Up
1. Ensure the POWER switch is in the “OFF” position.
2. Plug the POWER CORD into a 110V grounded ou
tlet.
DO NOT bre
ak the ground end off the cord or
use a
non
-grounded outlet or extension cord.
NOTE:
When plugged into a GFI, ensure it is at
least 15
amps. Lo
wer quality GFI’s may trip, try plugging appli
ance
into a surge p
rotected power bar first.
3.
Open the
HOPPER LID. Ensure there are NO foreign
obje
cts in the hopper or AUGER fe
ed system.
Fill hopper with d
ry all natural hardwood bbq wood pellets
.
4.
Open the COOKING LID. This lid MUST be open dur
ing
the START
-UP and COOL DOWN cycl
es.
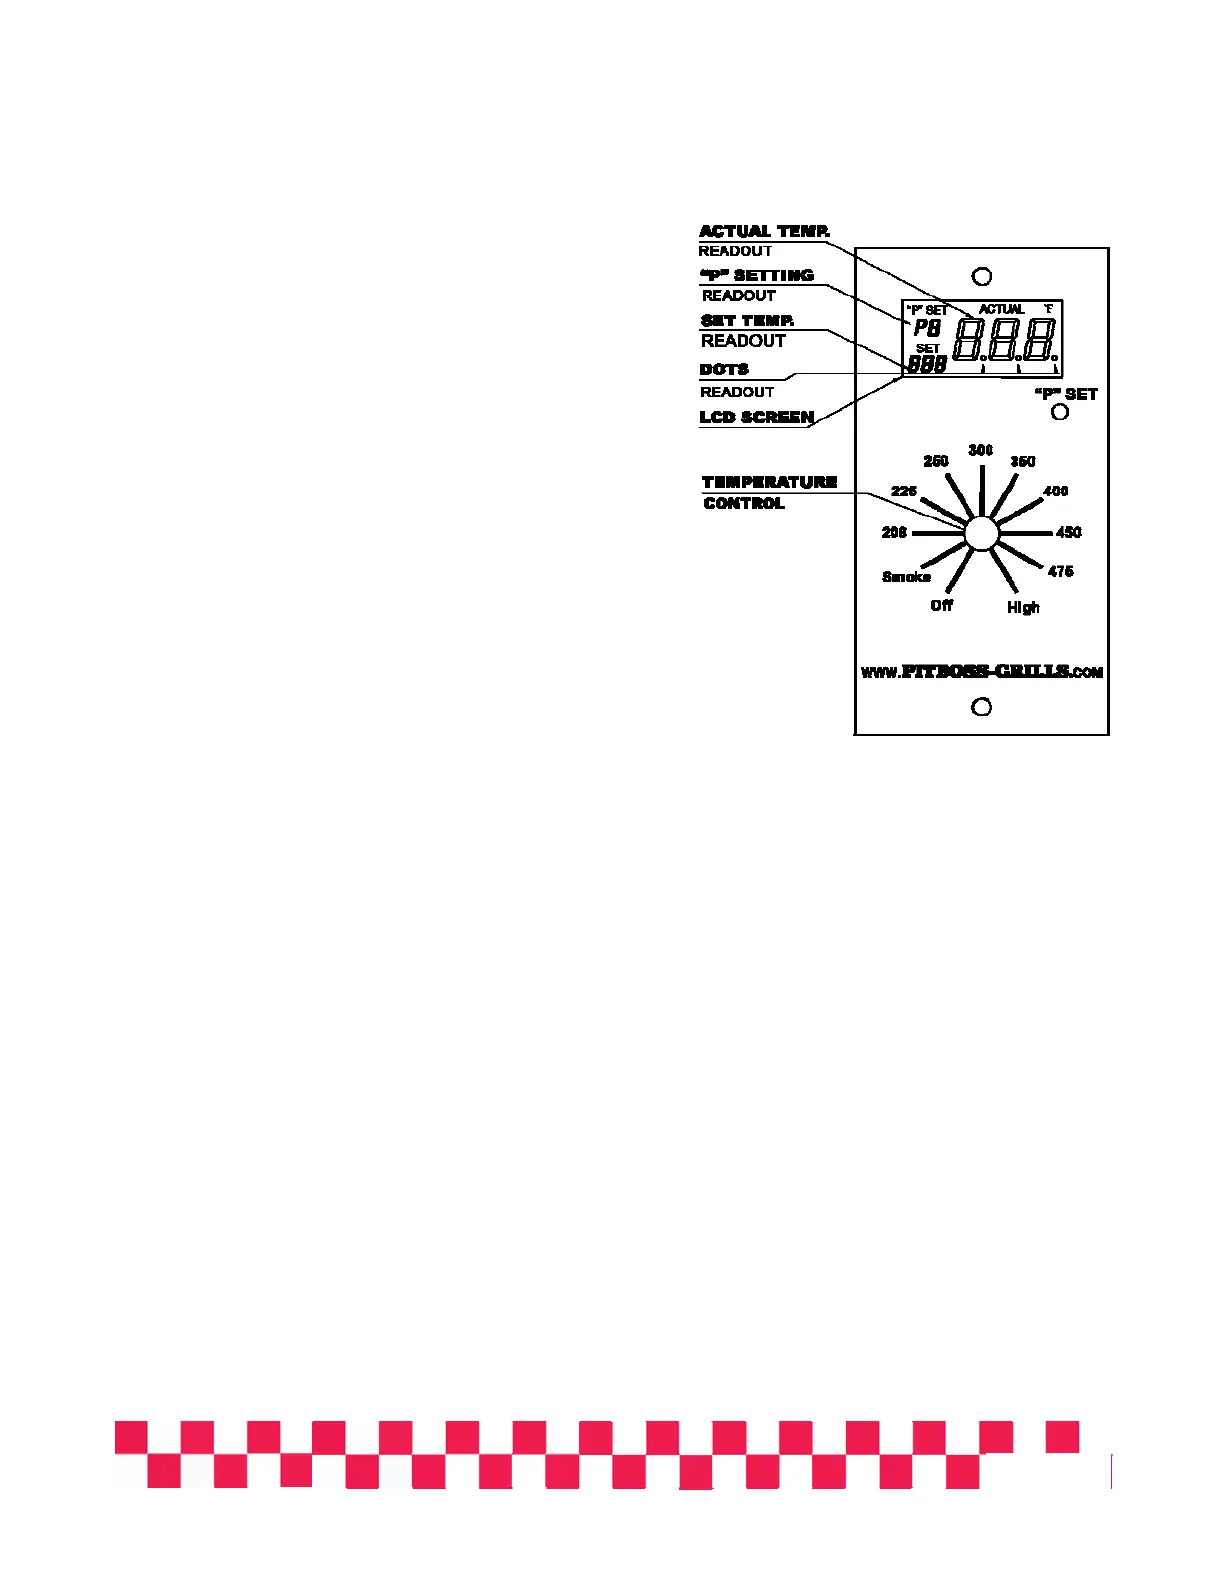
5. Turn the Tempe
ratur
e Dial to SMOKE.
This act
ivates the start up cycle. The feed system will start to turn, the igniter will begin to glow and th
e
fan will supply air to the fire pot.
Your gri
ll will begin to produce smoke while the start up cycle is taking place.
The pellets have ignit
ed once the smoke has cleared. To confirm, with your cookin
g lid still open, you
will hear a torchy roa
r and begin to feel some heat being produced
.
6.
Close the lid. Turn the Temperature Dial to HIGH, to allow the unit to preheat for approximatel
y15 to 20
minutes.
CAUTIO
N: If excessive flame is visible, i.e the flavor plate is glowing red, turn the feed control down.
7.
After the pre-heating is complete, you are now ready to enjoy the pellet grill advantage.
Remember that lower temperatures
produce more flavor and less chance of flare-ups.
NOTE: Different wood pellets will produce different temperatures; as well the outside temperature and
weather conditions will also affect your cooking temperatures.
The settings and read outs on the control and thermometers are APPROXIMATE.
IF GRILL FAILS TO IGNITE:
1.
Turn the Temperature Dial to OFF. Open the lid, remove the Cooking Grids and Flame Broile
r.
2. Remove all u
nburned pellets and ash from the Fire Po
t.
DO NOT touch the Igni
ter. This item gets extremely HOT and will cause burn
s.
3.
When all cleaned, turn Temperature Dial to SMOKE. Check the following:
A. Vis
ually confirm the Igniter is working, by placing your hand above the burn po
t.
B. Visually confirm Pellets are
droppi
ng
in the Fire Pot from Auger.
C. Confirm t
he Fan is working.
4.
If one or all of the above are not working, see the trouble shooting se
ction or
contact Customer Service. 1-877-303-3134
Page 19
STANDARD LIGHTING PROCEDURE