ENGLISH
8
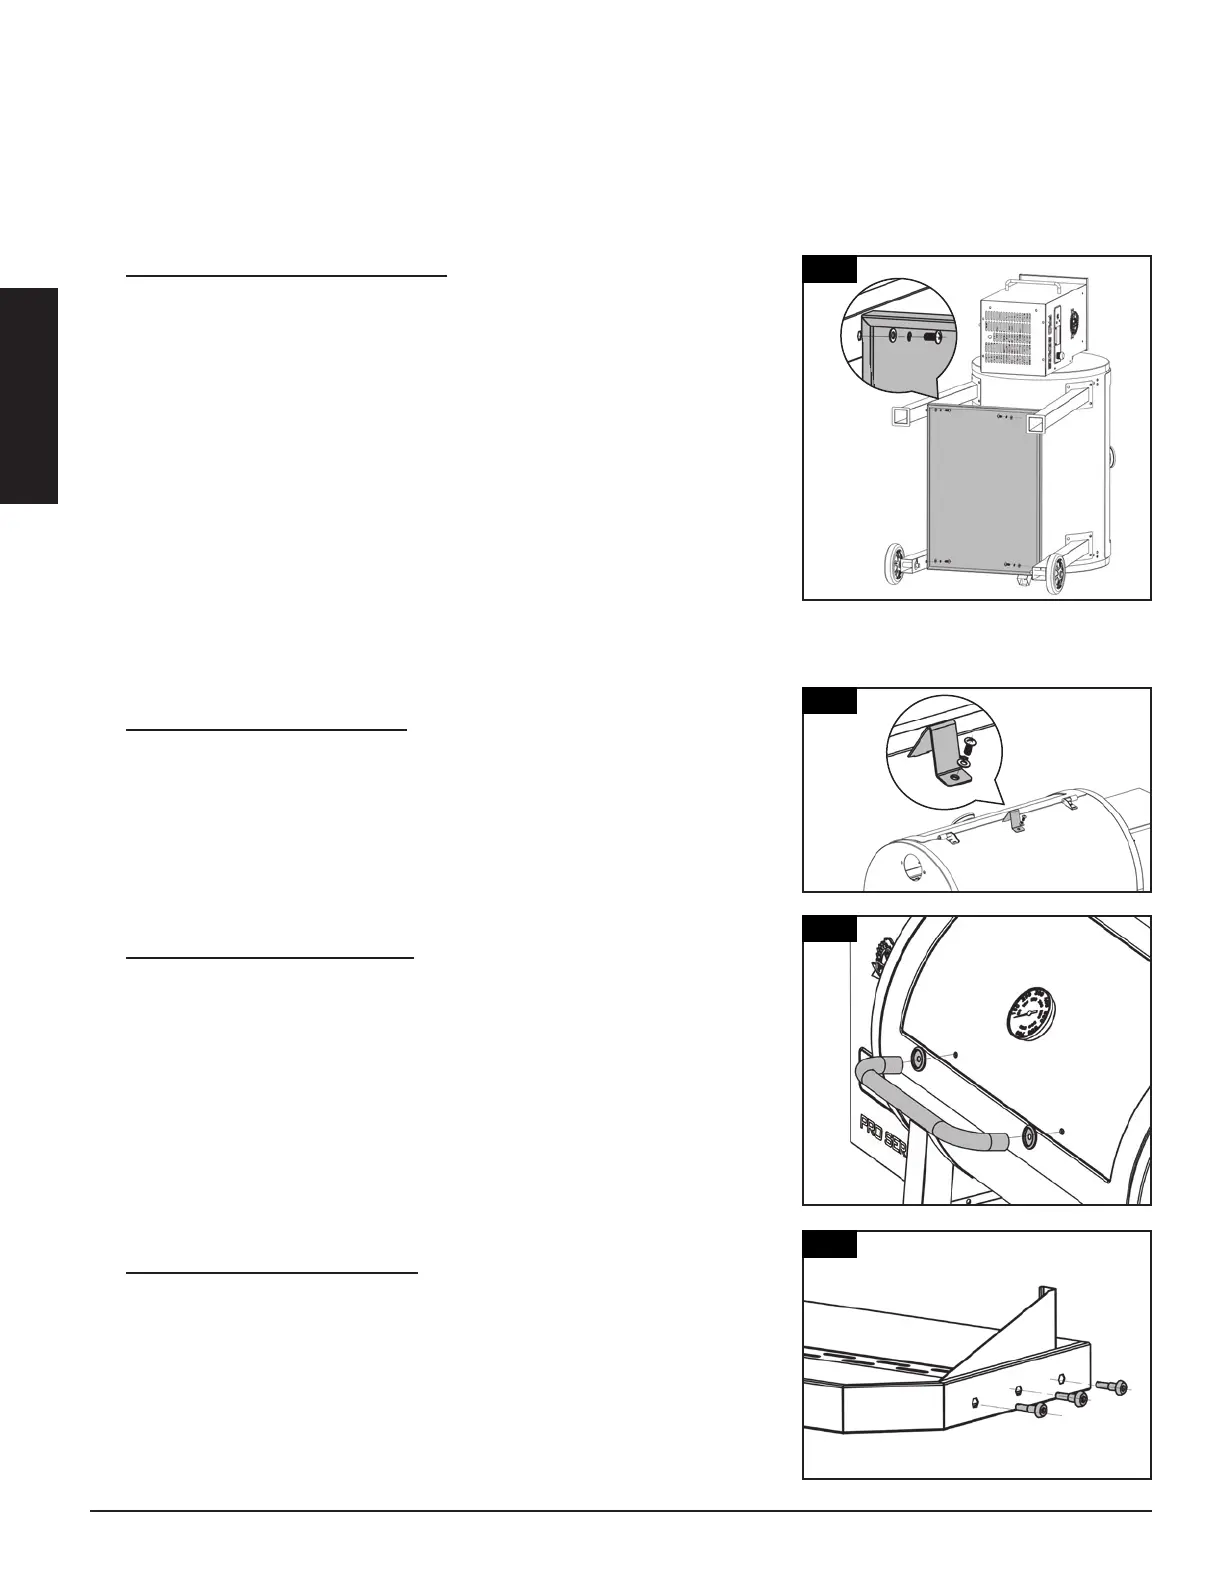
• Mount one stationary support leg to the hopper end of the main barrel
using four screws, locking washers, and washers, through the four pre-
drilled holes. Repeat installation for second stationary support leg.
NOTE: Fasten screws of the support legs only half-way to allow
easier installation of bottom shelf in next step.
3.
Parts Required:
1 x Bottom Shelf
(#19)
4 x Screw
(#A)
4 x Locking Washer
(#C)
4 x Washer
(#B)
Installation:
• From underneath, mount the bottom shelf to each support leg using a
screw, locking washer, and washer. Ensure the flat surface of the shelf
is facing up towards the grill barrel.
NOTE: Fasten screws of the bottom shelf only half-way all screws
have been installed. Once all screws are installed, then tighten
securely into the support legs.
• Once the bottom shelf is secure, carefully lift grill into an upright position.
4.
Parts Required:
1 x Lid Stopper
(#3)
Installation:
• Secure the lid stopper onto the top of the main barrel using the pre-
installed screw on the top of the main barrel.
5.
Parts Required:
1 x Lid Handle
(#11)
2 x Lid Handle Bezel
(#10)
Installation:
• Remove the pre-installed screws from the lid handle. From inside the
barrel lid, insert one screw to protrude to the outside. Add a bezel on the
screw, then hand-tighten the screw (from the inside) into the lid handle.
• Repeat same installation for other end of lid handle.
6.
Parts Required:
1 x Side Shelf
(#12)
3 x Tool Hook
(#)
Installation:
• Turn the side shelf upside down. On the edge of the side shelf with three
holes, install the tool hooks into each hole along the edge. Tool hooks will
3
19
4
5
6
3
10
10
12
11


 To Next Page