17
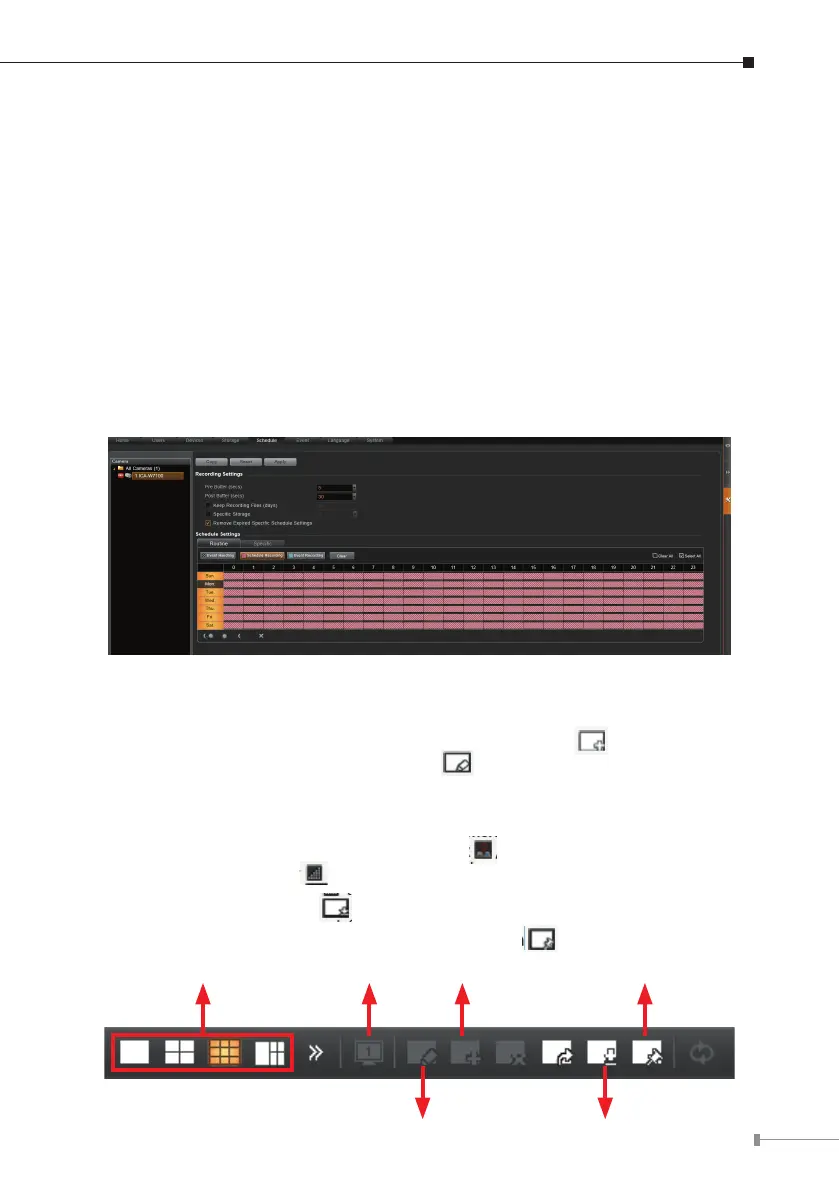
2.9 Set Recording Schedule
The recording service automatically starts full-time recording for a newly added
camera. You can modify the recording schedule to suit your needs.
1. Go to the Setup page and the Schedule tab. Select the camera from the
Camera List.
2. Choose a recording mode: Schedule Recording or Event Recording.
Schedule Recording: Records video continuously during the scheduled session.
Event Recording: Records video based on specic triggers such as when a
motion is detected by the camera.
3.Dragonthetimetabletodenethetimesession.
4. Click “Apply”.
2.10 Customize Views
1. Go to the Live View page. On top of the screen, click for the view tool
bar to create a new layout and then click to enter edit mode.
2. Select a layout style.
3. To add a camera view, pull a camera from the Camera List to a channel. To
add a map view, select a channel and click ; upload the map and drag the
lower right corner. Click to adjust channel size.
4. On the view tool bar, click to save this view.
5. You can set this view as default view by clicking on
Layout Styles Stream Switch
Edit View Save View
Add View Set as Default View