!"#$%&Y
English
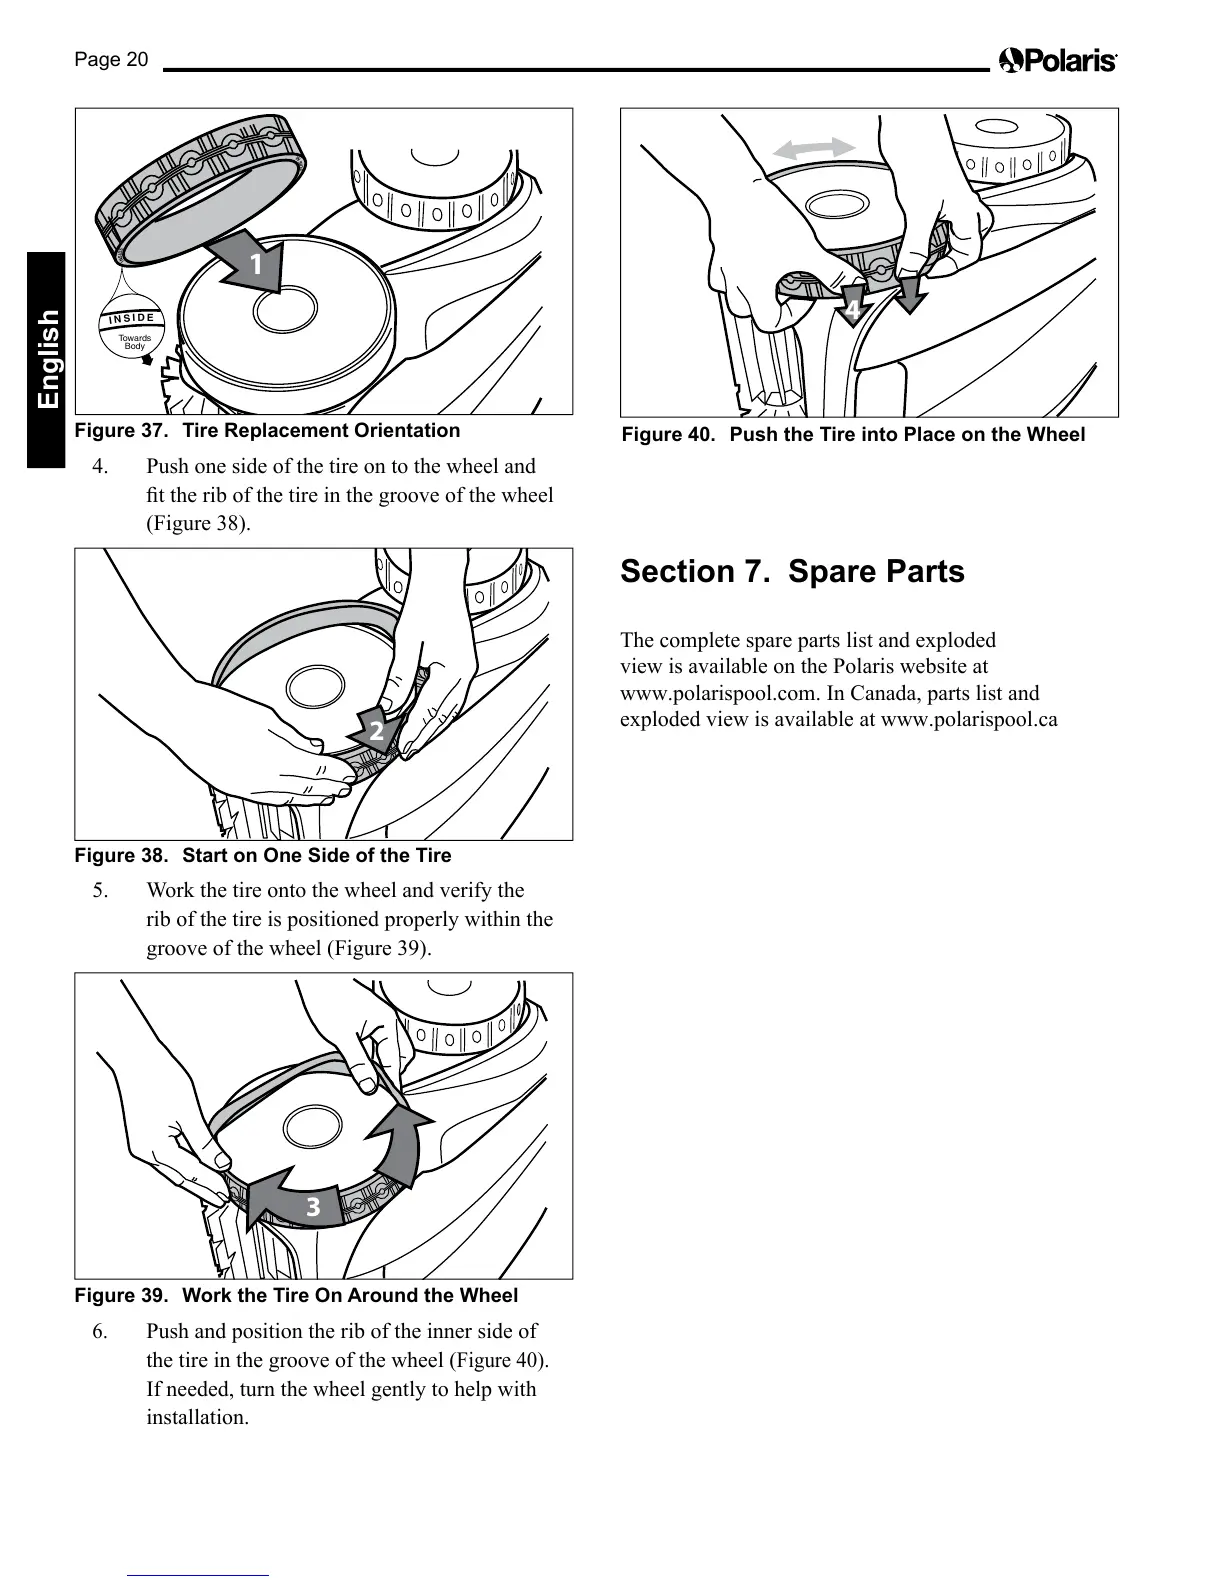
1BM;<>([hS( 6B<>(%>?EAH>G>C=(!<B>C=A=B:C
1
I
N
S
I
D
E
Towards
Body
I
N
S
I
D
E
I
N
S
I
D
E
4. Push one side of the tire on to the wheel and
¿WWKHULERIWKHWLUHLQWKHJURRYHRIWKHZKHHO
(Figure 38).
2
1BM;<>([jS( '=A<=(:C(!C>('BF>(:N(=L>(6B<>(
:RUNWKHWLUHRQWRWKHZKHHODQGYHULI\WKH
rib of the tire is positioned properly within the
groove of the wheel (Figure 39).
3
1BM;<>([ZS( ":<q(=L>(6B<>(!C(*<:;CF(=L>("L>>E
6.
Push and position the rib of the inner side of
the tire in the groove of the wheel (
Figure 40).
If needed, turn the wheel gently to help with
installation.
4
1BM;<>(^]S( 3;IL(=L>(6B<>(BC=:(3EAH>(:C(=L>("L>>E
'>H=B:C(hS( '?A<>(3A<=I
The complete spare parts list and exploded
view is available on the Polaris website at
www.polarispool.com. In Canada, parts list and
exploded view is available at www.polarispool.ca

 Loading...