BRAKES
6.12
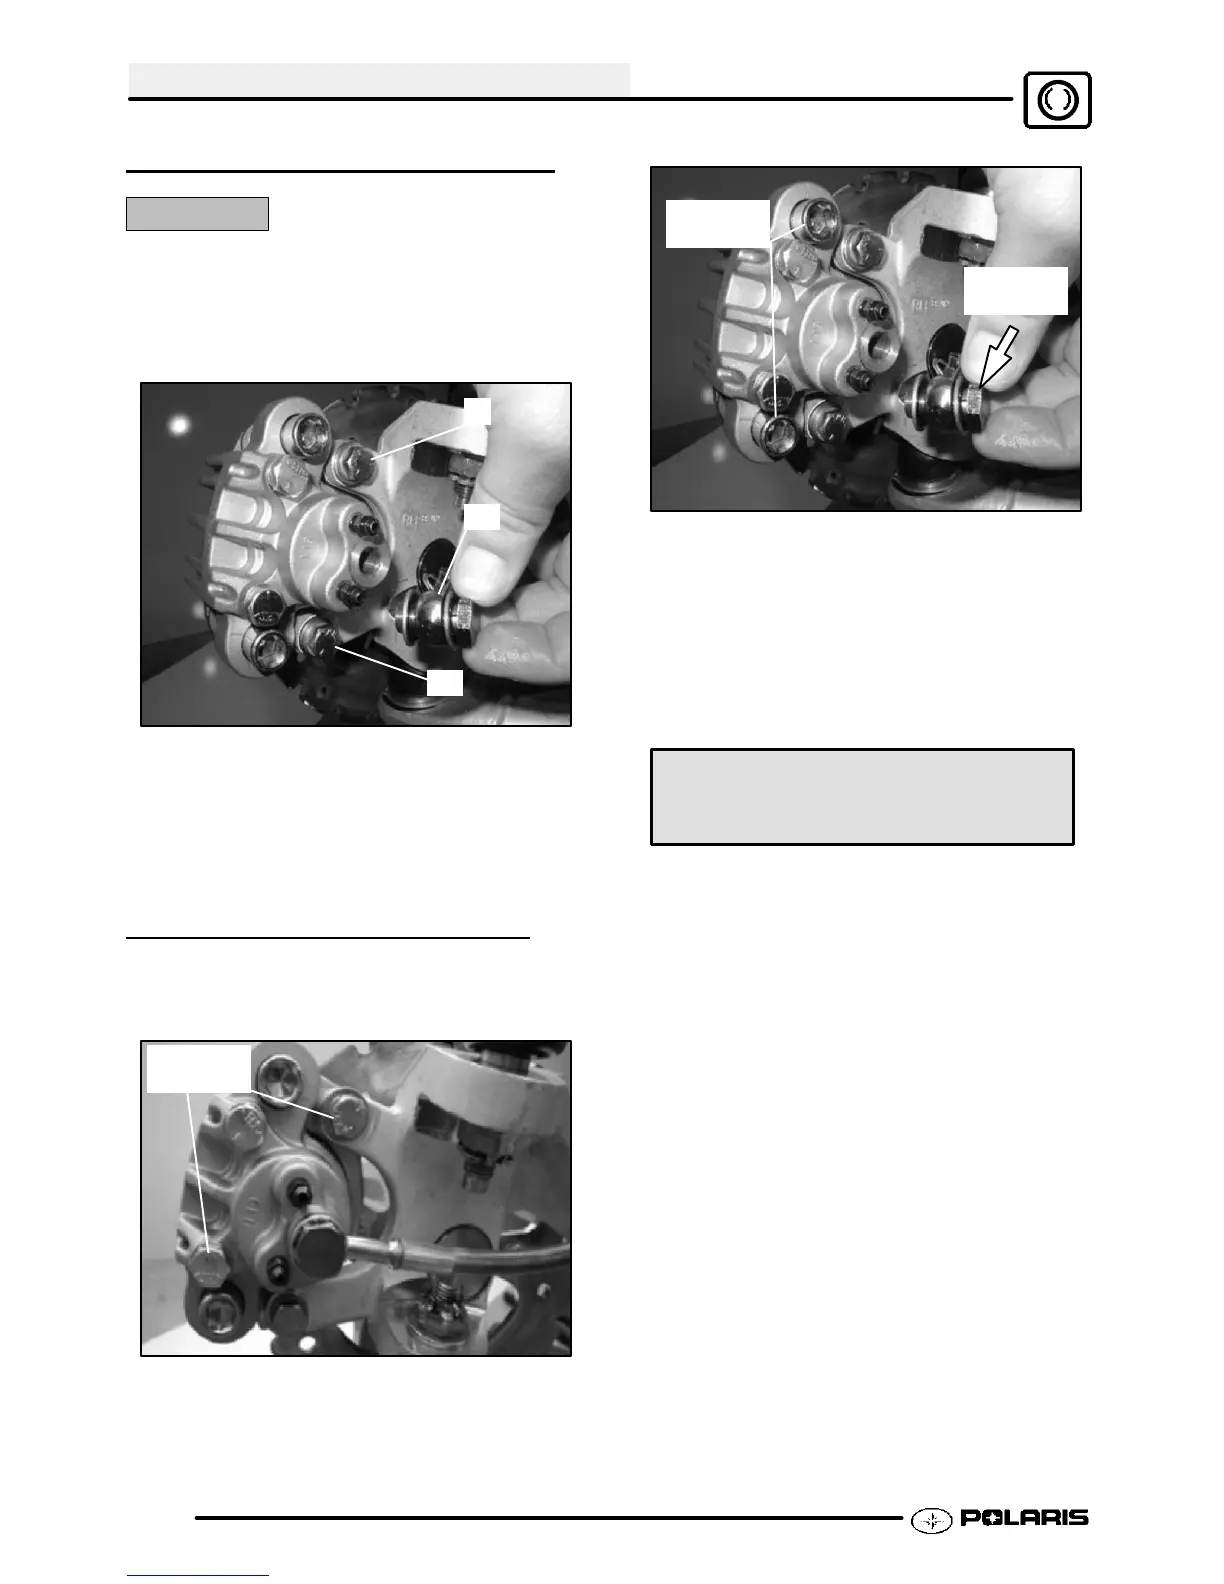
FRONT CALIPER REMOVAL
CAUTION:
Use care when supporting vehicle so that it does not
tip or fall. Severe injury may occur if machine tips or
falls.
1. Remove brake pads. See Page 6.8.--6.9.
A
B
B
2. Using a line wrench, loosen and remove brake
line (A) to caliper. Place a container under caliper
to catch fluid draining from brake line. Drain the
fluid into the container.
3. Remove the two brake caliper mounting bolts (B)
and remove the brake caliper.
FRONT CALIPER INSTALL
1. Install caliper on hub strut, and torque mounting
bolts to 18 ft.lbs. (25 Nm).
18 ft.lbs.
(25 Nm)
2. Install brake line and tighten securely with a line
wrench.
33 ft.lbs.
(45 Nm)
15 ft.lbs.
(21 Nm)
3. Torque the caliper slide bolts to 33 ft.lbs. (45
Nm). Torque the banjo line bolt to 15 ft.lbs. (21
Nm).
4. Follow brake bleeding procedure outlined on
Pages 6.5-6.6.
5. Install wheels and torque wheel nuts to
specification.
Front Wheel Nut Torque
20 ft. lbs. (28 Nm).
NOTE: BRAKE BURNISHING: It is recommended
that a burnishing procedure be performed after
installation of new brake pads to extend service
life and reduce noise. Start machine and slowly
increase speed to 30 mph. Gradually apply brakes
to stop machine. Repeat this procedure 10 times,
allowing brakes to cool sufficiently after each
run.
Enfocus Software - Customer Support
Enfocus Software - Customer Support
 Loading...