Activate walk assistance
Press and hold the button (Ő); walk assistance is activated and it moves
the bicycle. In the main menu the “bike” symbol of the walk assist will
be visible.
! ATTENTION: level of assistance must not be zero.
Disable walk assistance
Release the button (Ő); walk assistance is deactivated. In the main menu
the “bike” symbol of walk assist will no longer be visible.
6.0 HEADLIGHTS INSTALL ADDITIONAL LIGHTS
If the lights are installed on the bike, use the dedicated button to activate
or deactivate them.
Switch on: briefly press the lights button; the symbol on the display
indicates the lighting status.
Switching off: briefly press the lights button; the symbol on the display
goes off.
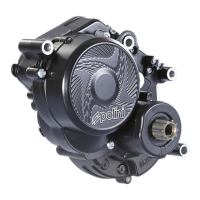
Additional lights installation
A terminal block is installed on the right side of the motor body for the
lights wiring which must have the following characteristics:
1. Lights voltage: 6 Vdc o 12Vdc (the choice of voltage is made through a
special software that can be downloaded from the site)
2. The sum of the lights powers must not exceed 9 W if a voltage of 6 Vdc
is selected; or 18 W if the lights are 12 Vdc.
3. The block is equipped with two cable fixing points identifiable as +
(red) and - (black). Connect the + of the motor to the + of the front and
rear lights. Connect the - of the motor to the - of the front and to the – of
the rear lights. Fix the 3+3 cables between the two small metallic plates
placed on the terminal block and tight them using the proper screws.
7.0 MAINTEINANCE ERRORS DETECTION
Lubricate the motor gear every 5000 km for maximum noise reduction.
• remove the crown-holder if necessary
• unscrew the cap of the grease tank and add about 2/3 grams of
Polini specific grease code 955.435.001
• fit all the parts again paying attention to tight the crown holder
screw properly (5/6Nm torque)
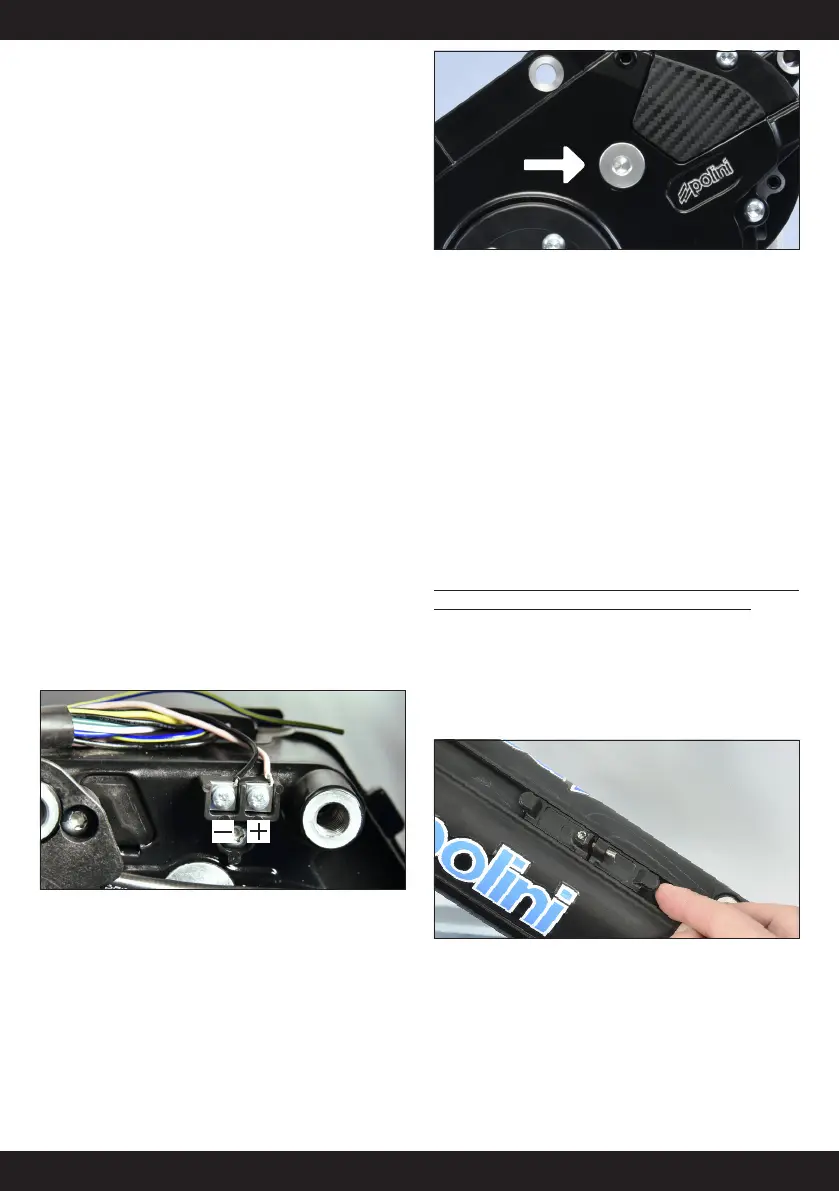
The display does not read the speed
Verify the distance between speed sensor and magneto (maximum 15mm)
in the position indicated by the line. If it is not enough or too much or if
the speed sensor hasn’t been properly connected the E-P3+ motor works
in the emergency mode.
In this case, loosen the screw of the magneto and fix the magneto on the
ray so that it is at a correct distance respect to the speed sensor symbol.
If even after this operation the speed has not been displayed, contact an
authorized bicycles’ dealer.
The e-bike does not work
First turn the e-bike off, remove the battery from its place (paragraph
3.3), turn on and off the disconnected battery. If it does not work contact
your dealer.
7.1 CLEANING THE MOTOR
It is FORBIDDEN to clean all the parts of the E-P3+ system using pressure
water, pressure water jets or to immerse the motor in the water.
After washing the motor, carefully dry all the parts to avoid possible
damages or malfunctioning. In case of problems coming from water
infiltrations, immediately turn to an official dealer.
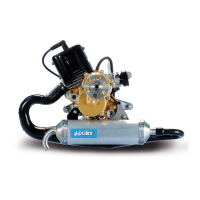
8.0- ASSEMBLY OF THE WATER BOTTLE HOLDER
Insert the water bottle supports in their housing on the battery.
Place the water bottle holder on the supports and screw the dowel using
the key supplied till the connection feathers of the holder are fixed on the
battery and the water bottle holder does not slide on the guide anymore.