3.2 INDICATIONS OF THE BATTERY CHARGE LEVEL
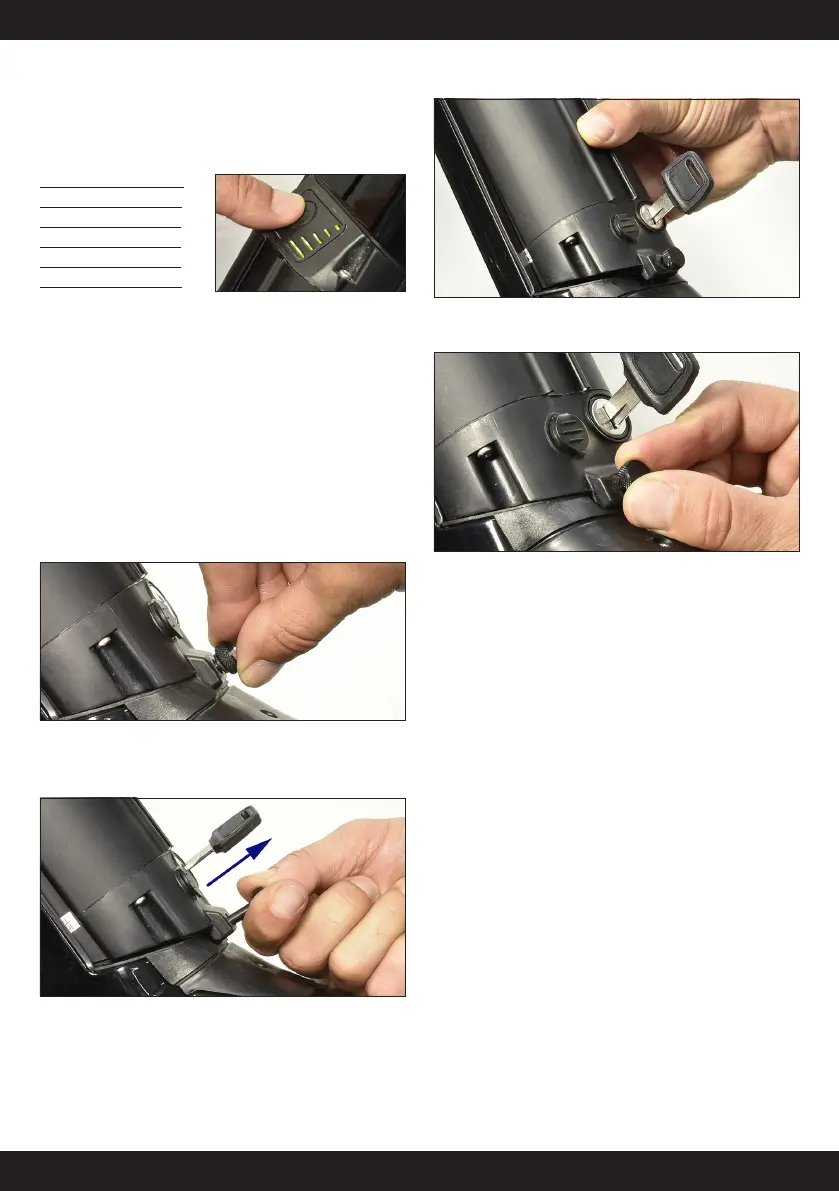
After pushing the LED light button, the five LED lamps indicate the charge
level. Each LED corresponds to 20% of capacity. You can check the current
charging status on the LED lamp on the battery (state of charge). When
charging the battery, the LED lamps are blinking.
LED Charge Level
| 0 - 20 %
|| 20 - 40 %
||| 40 - 60 %
|||| 60 - 80 %
||||| 80 -100 %
! WARNING
When the battery charge level is at 10%, the system manages independently
the motor assistance to exploit the residual charge at the best.
When the battery charge is not enough to give assistance to the motor,
the system will stop independently the motor to grant the use of the light
and of the display.
3.3 INSTALLING AND REMOVING THE BATTERY
Ÿ CAUTION -
always turn the battery off before removing or installing it.
REMOVING THE BATTERY
1. Unscrew the security screw
2. Insert the key in the cylinder on the battery holder.
3. To open it, turn the key while pulling the battery upwards.
4. Grab the upper side of the battery and remove it from the holder.
INSTALLING THE BATTERY
1. Insert the battery into the battery mount paying attention not to
damage the rubber gasket.
2. First insert the upper part of the battery and then the bottom part of
the electric connectors.
3. Press the battery until a click is heard to lock it. Battery may be
assembled even if the key is not inserted.
4. Proceed carefully and without too much strength to avoid damaging
the electric connectors.
5. Tighten the safety screw.
6. Remove the key and store it in a safe place.o
! DANGER - Do not ride the bicycle with the key inserted, to prevent
the battery from falling out and avoid loosing the key.
Ÿ CAUTION - Before riding your bicycle, make sure that the battery is
locked in place and charging port cap is closed.
Ÿ CAUTION - before carrying the bicycle remove the battery and
store it in a dry place. Protect the bicycle electric contacts from atmospheric
agents. We recommend using the battery housing lid, item 955.520.009.
3.4 BATTERY KEY
Ÿ CAUTION - if you lose the keys, contact your dealer to replace the
whole key lock.
3.5 CLEANING THE BATTERY
• Do not use thinner or other solvents to clean any of the products.
These substances may damage the surfaces.
• Use a damp cloth, with the water well wrung-out, when cleaning
the battery and plastic cover.
• Batteries are not guaranteed against natural wear or deterioration
from normal use.
• This battery is designed to be fully waterproof and to be used
when raining while properly installed on the bicycle. Do not put
the battery in contact with water when not installed on the bicycle
because the electric terminals, in these conditions, are not protected.
• Do not clean the battery using high pressure water jets. If the water
penetrates inside the parts, some problems may result.
• Before cleaning the E-Bike, always remove the battery.