POLYCOM REALPRESENCE COLLABORATION SERVER V.8.6 APPLIANCE EDITION INSTALLATION
INSTALLING THE REALPRESENCE COLLABORATION SERVER (RMX) 2000
P
OLYCOM REALPRESENCE COLLABORATION SERVER GETTING STARTED GUIDE 31
– Fasten the RealPresence Collaboration Server to the rack with
screws through the four holes in the RealPresence Collaboration
Server front mounting brackets.
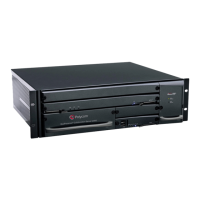
Figure 1-9: Install the RealPresence Collaboration Server (RMX) 2000 on a shelf
Connecting Cables to the RealPresence Collaboration Server (RMX)
2000
Do not remove the protective caps from LAN1, LAN3 and ShMG ports when
you connect the cables to RMX 2000.
Connect the following cables to the back panel:
• Power cable.
• On the RTM IP card, connect the LAN cable to LAN 2.
A RealPresence Collaboration Server (RMX) 2000 always requires that an
RTM IP card be installed in the bottom slot on the rear of the RealPresence
Collaboration Server (RMX) 2000.
• RTM LAN card connections in MPMRx Card mode:
In MPMRx Card mode, an MPMRx card on the front of the RMX must
always be seated or connected opposite to either an RTM LAN-4 ports or
RTM ISDN card on the rear of the chassis. The RTM LAN-2 port card is
not supported with MPMRx card.
If the RTM LAN-4 ports card is selected to install with the MPMRx card.
Perform following steps to finish the LAN connections on the RTM LAN
card:

 Loading...