Polycom® RealPresence® Group Series Media Center Setup Sheet
12
12
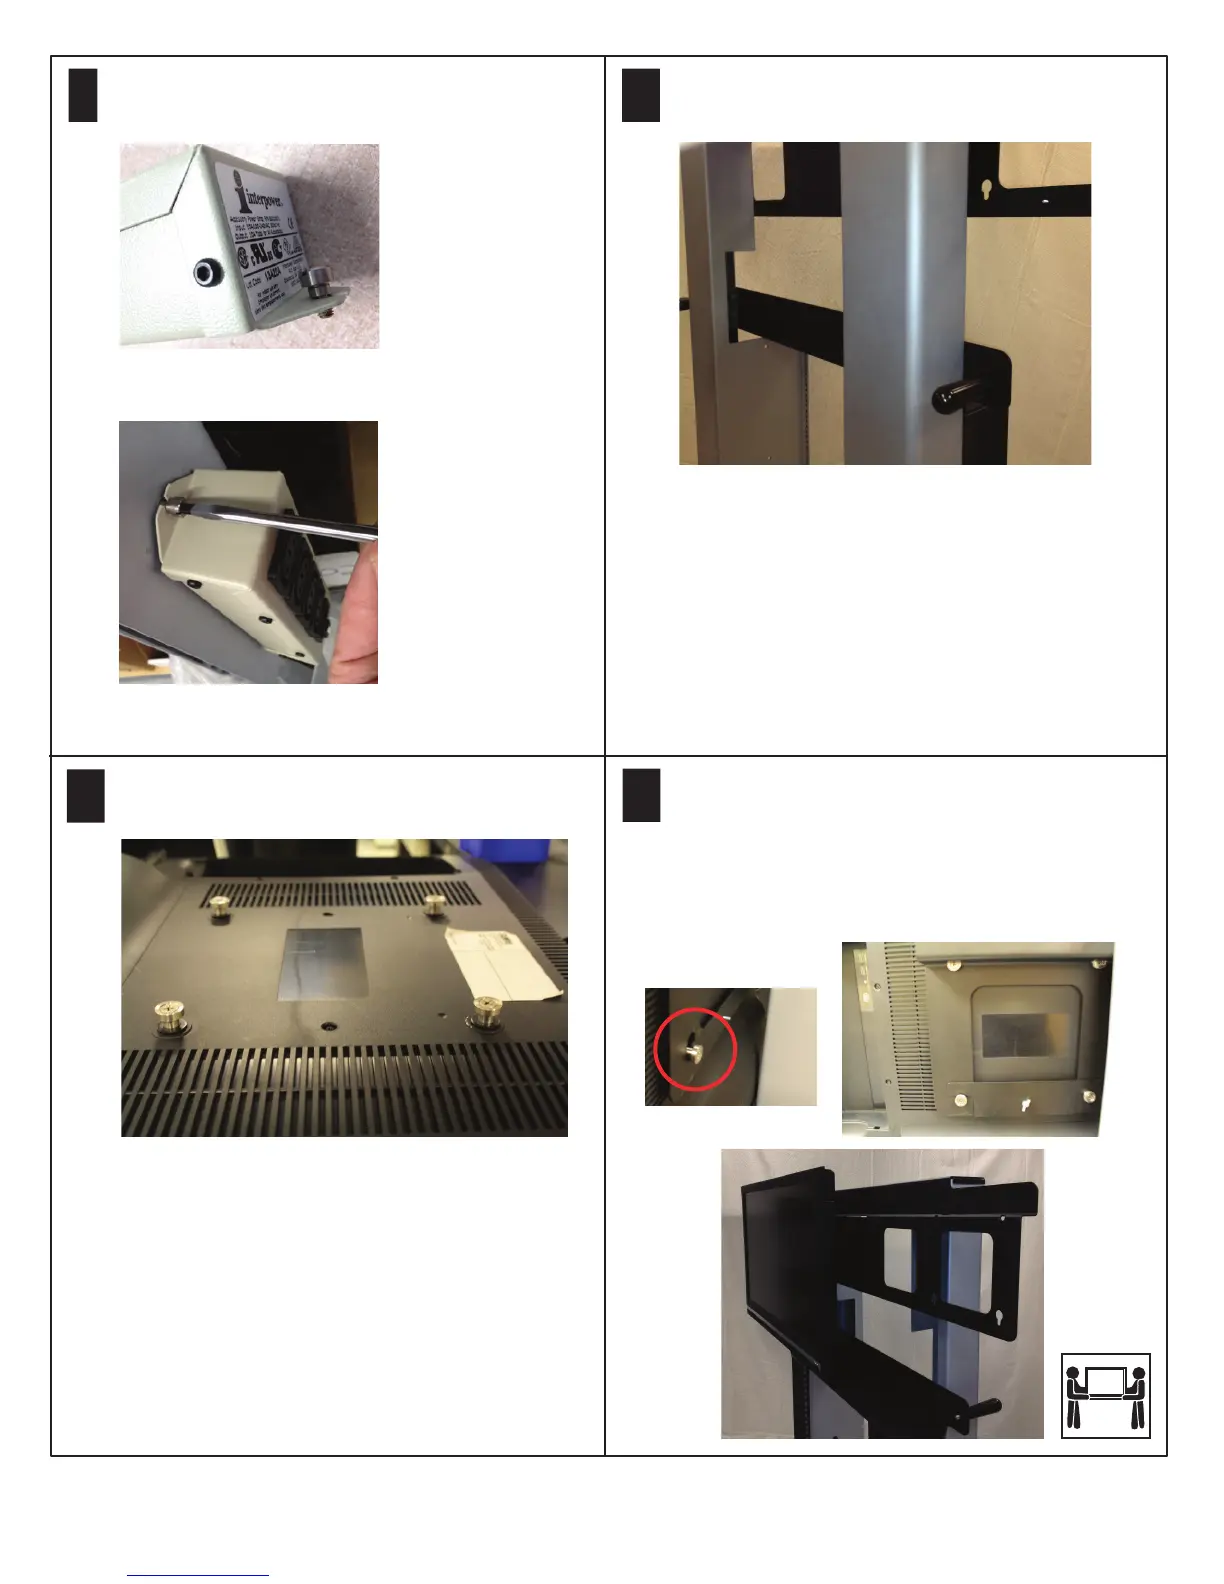
With the assistance of another person, lift one of the
displays and slide the display T-nuts into the keyhole
slots in the upper display rail. Repeat with the second
display.
Attach the retainer bracket to the back of the upper
display rail using one wing nut on each end of the
display rail.
11
Install four M6 x 25 Phillips flat screws, four washers,
and four T-nuts on the back of each display.
Insert a shoulder screw onto the flange on both ends of
the power strip. Note that the flange should be between
the shoulder and the threads of the shoulder screw.
Install the power strip to the left vertical support, using
the two shoulder screws. Install the power brick.
9
Install a handle on both ends of the bottom display
rail on the back side.
10

 Loading...