Polycom
®
RealPresence
®
Group Series
Media Center Setup Sheet
Polycom
®
RealPresence
®
Group Series Media Center with Dual 42” AIO Displays
Base
Legs (4)
M10 x 50 flanged head cap screw (8)
Glides (4)
Flat washer (4)
Lock washer (4)
Optional: Casters (4)
Flat washer (4)
Lock washer (4)
Vertical Support (2)
M10 x 25 flanged head cap screw (6)
Lower display rail
M10 x 25 flanged head cap screw (4)
Handle (2)
Upper display rail
M10 x 25 flanged head cap screw (8)
Front door
Nylon spacer
10-32 x 1/2” pan head screw (2)
Mesh grill (2)
10-32 x 1/2“ pan head screw (6)
Display (2)
T-Nut (8)
M6 x 25 Phillips flat head screw (8)
Flat washer (8)
Display mount bracket (4)
M8 x 20 button head cap screw (8)
1/4-20 x 3.5” socket head cap screw (4)
M5-10 screw (4)
EagleEye IV camera
M3 x 6 phillips flat head screw (4)
Camera mount bracket
1/4-20 x 5/8 socket head cap screw (4)
Flat washer (4)
Lock washer (4)
1U shelf
Clip-on rack nut fastener (4)
10-32 x 1/2” pan head screw (4)
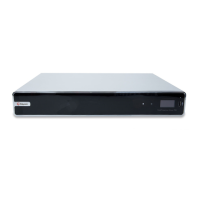
RealPresence Group Series 500 codec
M3 x 10 screw (2)
Power strip
Shoulder screw (2)
Power brick
Rear panel
Polycom-supplied tools:
L-Key for M8 screw
L-Key for M6 screw
L-Key for M10 screw
L-Key for 1/4-20 screw
User-supplied tools:
9/16” wrench
11/16” wrench
Phillips screwdriver (medium drive)
Phillips screwdriver (small drive)
The Media Center components are heavy. Polycom recommends that two people perform the installation.
For more information about the components of the RealPresence Group Series Media Center, refer to the documentation at
http://support.polycom.com/PolycomService/support/us/support/video/group_series/group_packaged_solutions.html.
9

 Loading...