Polycom® RealPresence® Group Series Media Center Wall-Secured Setup Sheet Supplement
3
Note that some previously assembled items are not shown
for clarity.
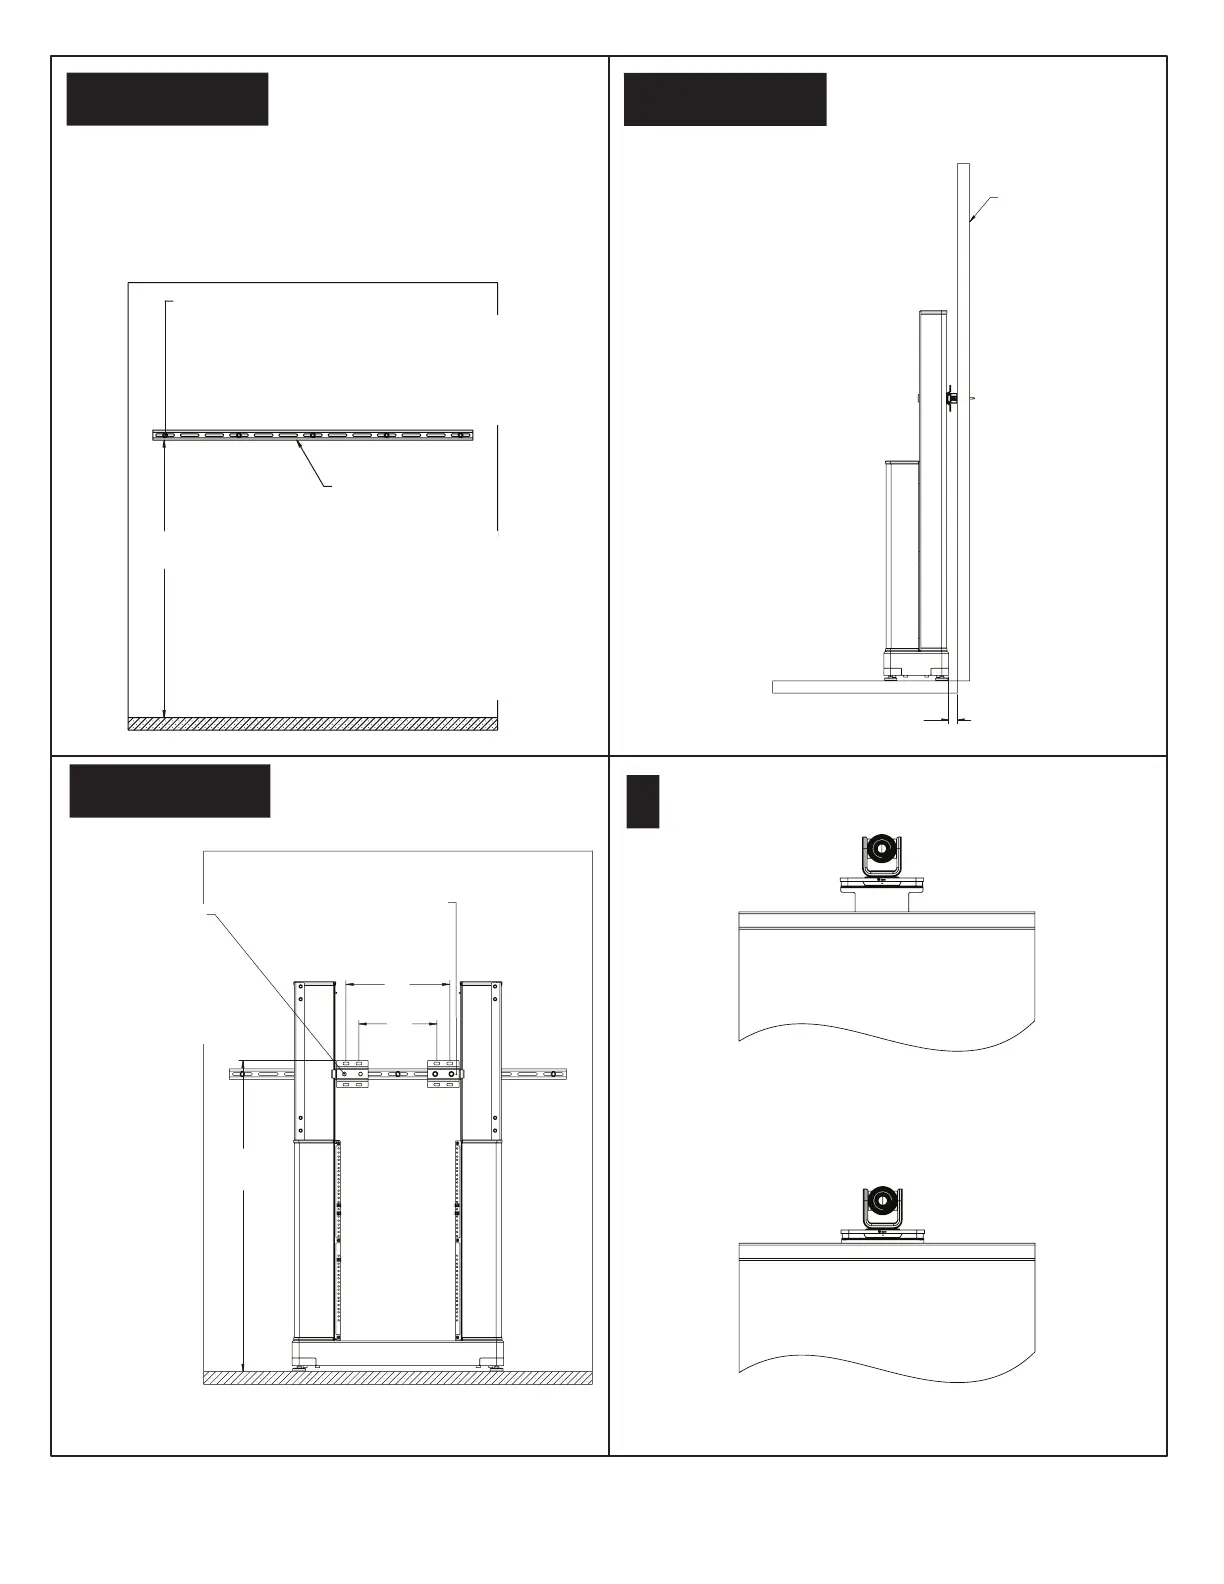
The second option to brace the Media Center frame is with a
unistrut. At the predetermined location, mount the unistrut to
the wall as shown.
6a - Option 2
Position the Media Center frame away from the wall
as shown.
6b - Option 2
Room Wall
1.4”
(36 mm)
Unistrut
1310-28152-001
45.1”
(1145 mm)
Use an appropriate combination of wall
mounting hardware supplied with kit.
Recommended for solid wall applications:
(5) 1/4 x 3.0” Hex Lag Screw 1601-12988-001
(5) 1/4“ Washer 1602-61465-001
Recommended for drywall applications:
(5) 1/4-20 x 2-1/2” Hex Head Bolt 1601-61806-001
(5) 1/4“ Washer 1602-61465-001
(5) 1/4-20 Toggle Anchor Insert 1650-28296-001
IMPORTANT: The Unistrut should be able to withstand
a horizontal pull force (away from wall) of at least 500N
(114 lbs) when installed.
Attach the frame to the unistrut using the supplied hardware
as shown.
6c - Option 2
48”
(1219 mm)
(2) Wall Brace Bracket
1342-68996-001
16”
(407 mm)
12”
(305 mm)
(4) 3/8-16 x 1” Hex
Head Screw Bolt
1601-25072-001
(4) 3/8-16 Flat Washer
1602-25065-001
(4) 3/8-16 Spring Nut
1600-25083-001
Refer to the Polycom RealPresence Group Series Wall
Mount Setup Sheet and perform steps 11 through 21.
Attach the EagleEye IV camera to the camera mount
bracket using four M3 x 6 Phillips flat head screws.
7
Lower the camera mounting bracket from its extended
position by loosening the two screws installed in step 9.
When the camera is in the final position, tighten the
two screws.

 Loading...