QUICK REFERENCE GUIDE • Polycom
®
VVX
®
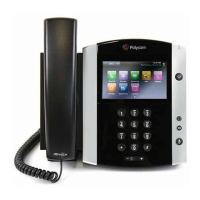
601 Business Media Phone
3
To split the conference call into individual calls:
1. Press the Split soft key. Both calls will be placed
on hold individually.
2. Select the line to pick up and press the Resume
key.
3. To place both calls back into the conference,
press the Join soft key.
View Recent Calls
You can view placed, received, and missed calls.
To view recent calls:
• Tap or Directories > Recent Calls.
View the Contact Directory
You can view other HPBX contacts in the Contact
Directory.
To view the contact directory:
• Tap Directories > Contact Directory.
Listen to Voicemail
When you have new voicemail messages, the
amount of new messages displays on the messages
icon .
To listen to voicemail:
1. Tap or Messages.
2. Follow the prompts.
Enable Do Not Disturb
You can enable Do Not Disturb when you do not
want to receive calls.
To enable or disable Do Not Disturb:
• On the Home Screen, tap DND.
• The DND icon displays on the line key and in
the status bar.
Handle Video Calls
If video is enabled, you can receive video during
calls. If you have a VVX
®
Camera attached to your
phone, you can send video during calls.
To stop sending video during a call:
• Tap Video > Stop Video.
To start resending video:
• Tap Video > Start Video.
USB Features
The VVX
®
601 is equipped with two USB ports that
can be used to connect a headset or a USB drive.
To connect a USB headset:
1. Connect the USB headset connector into the
USB port on the back of the phone or under the
cover on the top of the phone.
2. The display will show the prompt “Digital Headset
Connected”.
3. To use the headset, press the Headset button
located above the speaker key.
To set a custom display background image:
To set a custom background image, a USB drive
with the desired image is required. The images
must not reside in a folder on the USB drive.
1. Connect a USB drive to the USB port on the back
of the phone.
2. The display will show the prompt “Storage Media
Attached”.
3. Press the Home button.
4. Browse to Settings > Features > Removable
Storage Media > Picture Frame.
5. Press the soft key with a Play arrow. This will start a
slide show of the images available.
6. When the desired image is displayed, press the
soft key with the Pause icon.
7. Press the soft key with the Picture Frame to set the
image as the background.