1.
2. 3. 4. 5.
6.
1.
2.
3.
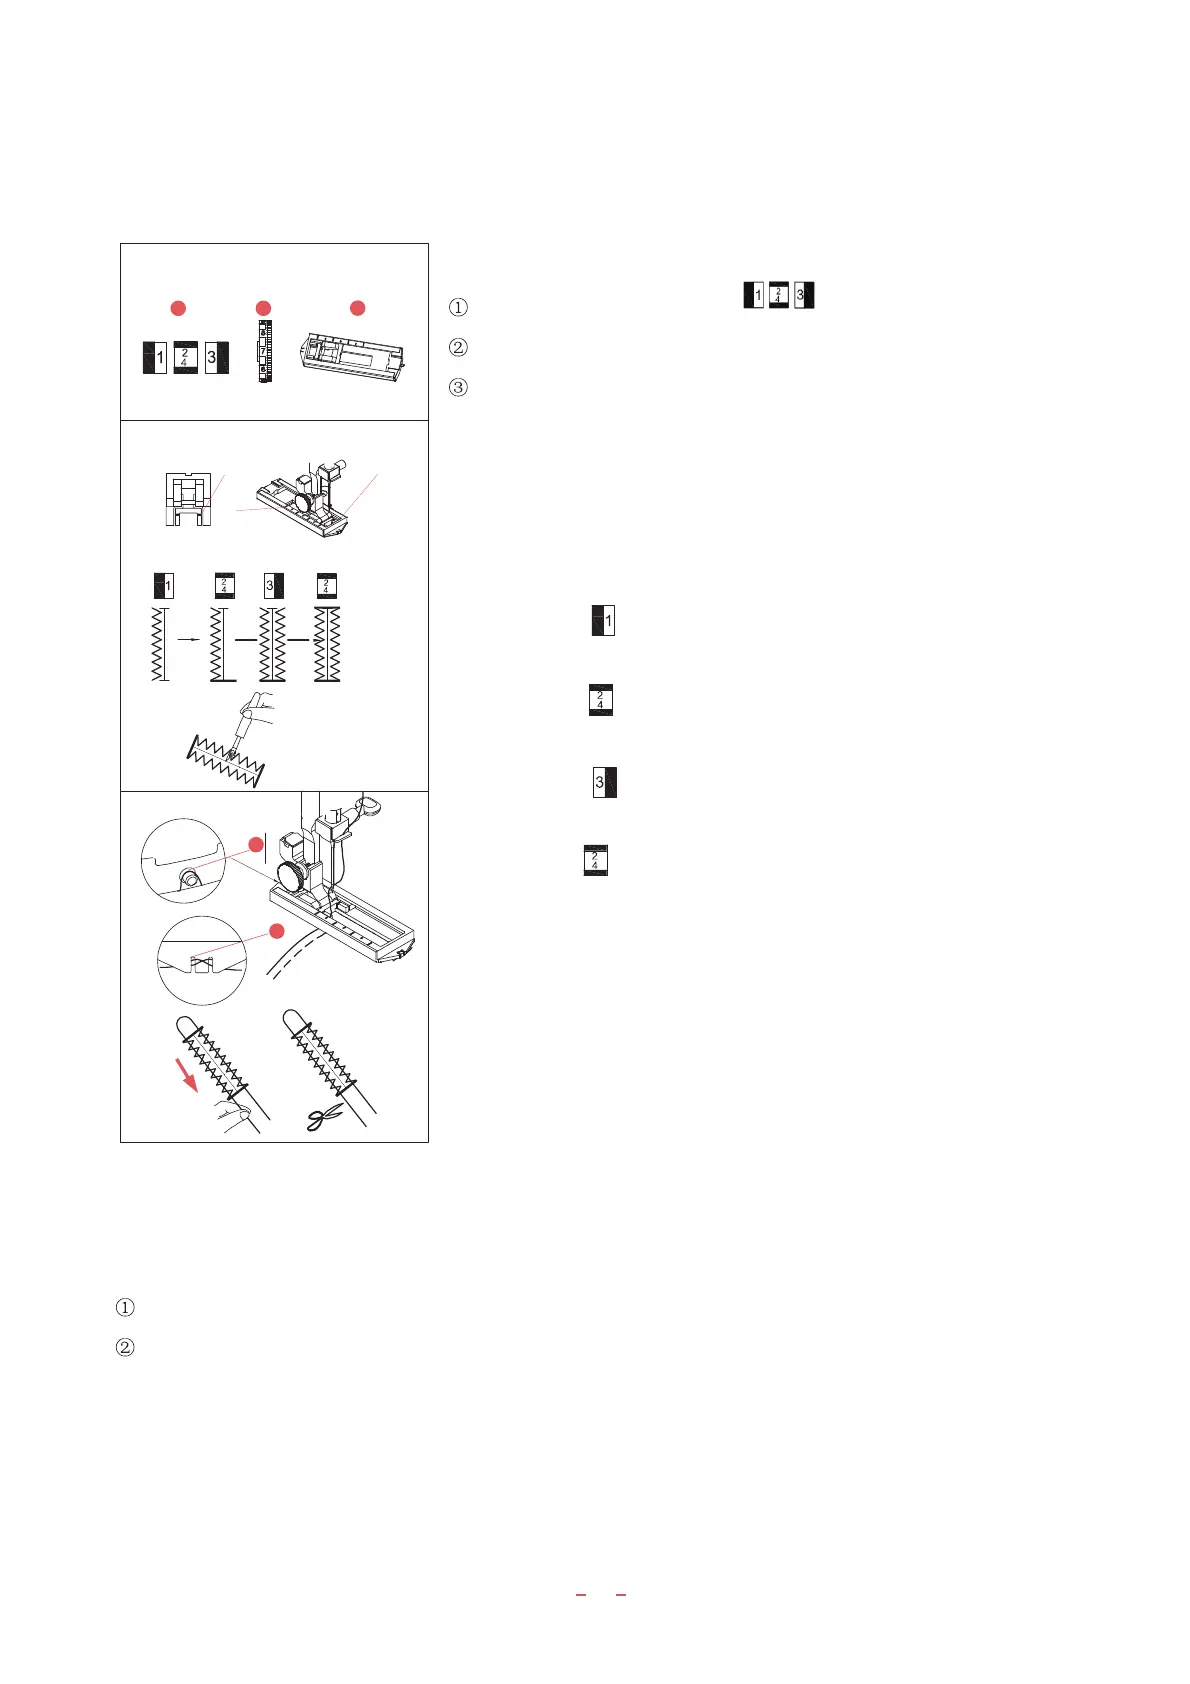
Part V Buttonhole stitching
Buttonhole stitching
Selection of stitch
Thread tension dial 1~5
Presser Buttonhole stitching presser
Starting sewing
1.Fix buttonhole stitching presser, mark the buttonhole length on the
fabric, place the fabric beneath presser with the buttonhole mark to the
operator, move slide A on the presser to the operator, align mark C at
the slide top with the beginning mark B and lower the presser.
2. Select stitch , make sewing forward till reaching front end of
buttonhole mark and stop the needle at left.
3. Select stitch , make sewing for 4 to 6 needles and stop the
needle at right.
4. Select stitch , make sewing to start of buttonhole stitch and stop
the needle at right.
5. Select stitch , make sewing for 4 to 6 needles and stop the needle
at left.
6. Move out the fabric, place a pin on b
ottom of buttonhole to avoid
cutting of barring stitch, and cut off the buttonhole with the ripping knife.
Note:
Stitch the buttonhole at fabric margin as follows:
Corded buttonhole
1. Lift the buttonhole stitching presser, place the cord on rear fork of presser, pull the cord forwards beneath
the presser to front fork of presser, and bind the cord at intersection of front fork.
Rear fork
Front fork
2. Interlocking the buttonhole as above. After stitching the buttonhole, move out the fabric and cut off the
sewing thread.
3. Tighten the left cord, move the cord to back of fabric with hand needle and then cut off the cord.
1
1
2
2
3
B
A
C
14