ENGLISH
8
Cold Weather Operation
WARNING: To reduce the risk of serious personal
injury, turn unit off and remove air supply before
making any adjustments or removing/installing
attachments or accessories. An accidental actuation
can causeinjury.
WARNING: Do not store tools in a cold weather
environment to prevent frost or ice formation on the
tools operating valves and mechanisms that could
cause toolfailure.
WARNING: Some commercial air line drying
liquids are harmful to “O”-rings and seals – do
not use these low temperature air dryers without
checkingcompatibility.
When operating tools at temperatures below freezing:
1. Make sure compressor tanks have been properly drained
prior touse.
Depth Adjustment (Fig. A, E)
WARNING: To reduce the risk of serious personal
injury, turn unit off and remove air supply before
making any adjustments or removing/installing
attachments or accessories. An accidental actuation
can causeinjury.
The depth that the fastener is driven can be adjusted using
the depth adjustmentwheel.
1. To drive the fastener shallower, rotate the depth
adjustment wheel
6
to theright.
2. To drive a fastener deeper, rotate the depth adjustment
wheel
6
to theleft.
Clearing a Jammed Nail (Fig.A, H, I)
WARNING: Disconnect the tool from the air supply
and remove fasteners from magazine before making
adjustments or personal injury mayresult.
If a nail becomes jammed in the nosepiece, keep the tool
pointed away from you and follow these instructions toclear:
1. Disconnect the tool from the airsupply.
2. Release magazine release
6
from behindnails.
3. Push down jam clearing latch
2
then pull up to open
front door
16
.
4. Remove bent nail, using pliers ifnecessary.
5. If driver blade is in the down position, insert screwdriver
or other rod into nosepiece and push driver blade back
inposition.
6. Remove rod and close frontdoor.
7. Lift latch to secure door tonosepiece.
8. Reinsert nails into magazine (see Loading theTool).
9. Release magazine release
6
.
10. Reattach airsupply.
NOTE: Should nails continue to jam frequently in nosepiece,
have tool serviced by an authorized servicecenter.
Actuating Tool
WARNING: To reduce the risk of injury, Always wear
proper eye [ANSI Z87.1 (CAN/CSA Z94.3)] and hearing
protection [ANSI S12.6 (S3.19)] when operating
thistool.
The tool can be actuated using one of two modes:
single sequential action trigger mode and bump action
triggermode. The trigger installed on the tool as described
in the Trigger section of this manual determines the mode
ofoperation.
Sequential Action Trigger - Gray
Trigger (Fig.A)
The sequential action trigger’s intended use is for
intermittent fastening where very careful and accurate
placement isdesired.
To Operate the Nailer in Sequential Action Mode
1. Depress the contact trip firmly against the worksurface.
2. Pull thetrigger.
WARNING: A fastener will be driven each time the
trigger is pulled as long as the contact trip remains
depressed which could result in accidentaldriving.
Bump Action Trigger - Black Trigger
(Fig.A)
The bump action trigger’s intended use is for rapid fastening
on flat, stationarysurfaces.
Using the bump action trigger, two methods are available:
place actuation and bumpactuation.
To Operate the Tool Using the Place ActuationMethod
1. Push the contact trip against the worksurface.
2. Pull thetrigger.
3. Release the trigger and allow the tool to recoil off
theworkpiece.
To Operate the Tool Using the Bump ActuationMethod
1. Pull thetrigger.
2. Push the contact trip against the work surface. As long
as the trigger is pulled, the tool will drive a fastener every
time the contact trip is depressed. This allows the user to
drive multiple fasteners insequence.
Loading Fasteners (Fig.G)
WARNING: Keep the tool pointed away from yourself
and others. Serious personal injury mayresult.
WARNING: Never load fasteners with the contact trip
or trigger activated. Personal injury mayresult.
WARNING: Always disconnect the tool from the air
supply before making any adjustments or attemping
any repairs to thetool.
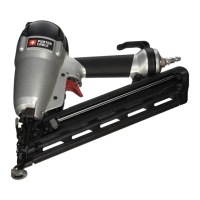
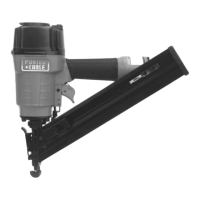
The PORTER‑CABLE finish nailers are equipped with load and
lockmagazines.
Load And Lock Method
1. Lock‑off trigger
1
.
2. Insert fasteners into the rear of the magazine
5
.
3. Pull pusher
7
back until the nail follower falls behind
thenails.
WARNING: Do not keep trigger pulled when tool is
not inuse.