9
ENGLISH
Register Online
Thank you for your purchase. Register your product nowfor:
• WARRANTY SERVICE: Registering your product will
help you obtain more efficient warranty service in case
there is a problem with yourproduct.
• CONFIRMATION OF OWNERSHIP: In case of
an insurance loss, such as fire, flood or theft, your
registration of ownership will serve as your proof
ofpurchase.
• FOR YOUR SAFETY: Registering your product will
allow us to contact you in the unlikely event a safety
notification is required under the Federal Consumer
SafetyAct.
• Register online at www.portercable.com
Repairs
WARNING: To assure product SAFETY and RELIABILITY,
repairs, maintenance and adjustment (including brush
inspection and replacement, when applicable) should
be performed by a PORTER-CABLE factory service center
or a PORTER-CABLE authorized service center. Always
use identical replacementparts.
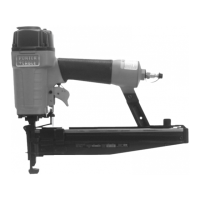
Belt Hook (Fig.J)
The PORTER‑CABLE nailers include an integrated belt hook
8
and can be rotated to either side of the tool to accommodate
left‑ or right‑ handed users. It can also be rotated out of the
way when not inuse.
If the hook is not desired at all, it can be removed from
thetool.
To Remove Belt Hook
1. Lock‑off trigger
9
.
2. Disconnect the tool from airsupply.
3. Using the appropriate hex wrench, remove the end cap
screws from the end cap
17
of thetool.
4. Remove the belt hook
8
.
5. Replace end cap and gasket. Ensure that the three screws
aretight.
6. Replace and tighten airfitting.
Accessories
WARNING: Since accessories, other than those
offered by PORTER-CABLE, have not been tested with
this product, use of such accessories with this tool
could be hazardous. To reduce the risk of injury, only
PORTER-CABLE recommended accessories should be
used with thisproduct.
Recommended accessories for use with your tool are available
at extra cost from your local dealer or authorized service
center. If you need assistance in locating any accessory, please
contact PORTER‑CABLE call 1-888-848-5175 or visit our
website: www.portercable.com.
Cleaning
WARNING: Blow dirt and dust out of all air vents with
clean, dry air at least once a week. To minimize the risk
of eye injury, always wear ANSI Z87.1approved eye
protection when performingthisprocedure.
WARNING: Never use solvents or other harsh
chemicals for cleaning the non-metallic parts of the
tool. These chemicals may weaken the plastic materials
used in these parts. Use a cloth dampened only with
water and mild soap. Never let any liquid get inside the
tool; never immerse any part of the tool into aliquid.
Action Why How
Drain compressor
tanks and
hoses daily.
Prevents
accumulation of
moisture in
compressor
and nailer.
Open petcocks or
other drain valves on
compressor tanks. Allow
any accumulated water to
drain from hoses.
Clean magazine,
magazine release
and contact
trip mechanism.
Permits smooth
operation of
magazine,
reduces wear and
prevents jams.
Blow clean with
compressor air. The use of
oils, lubricants periodically
or solvents is not
recommended as they
tend to attract debris.
Before each use,
check to insure all
screws, nuts and
fasteners are tight
and undamaged.
Prevents jams, leaks
and premature
failure of tool parts.
Tighten loose screws
or other
fasteners using the
appropriate hex wrench
or screwdriver.
MAINTENANCE
WARNING: To reduce the risk of serious personal
injury, turn unit off and remove air supply before
making any adjustments or removing/installing
attachments or accessories. An accidental actuation
can causeinjury.
Your power tool has been designed to operate over a long
period of time with a minimum of maintenance. Continuous
satisfactory operation depends upon proper tool care and
regularcleaning.
Hot Weather Operation
Tool should operate normally. However, keep tool out
of direct sunlight as excessive heat can deteriorate
bumpers, o‑rings and other rubber parts resulting in
increasedmaintenance.
2. Keep tool as warm as possible prior touse.
3. Make certain all fasteners have been removed
frommagazine.
4. Lower air pressure to 80p.s.i.g. (5.6kg/cm2) orless.
5. Reconnect air and and load fasteners into magazine.
6. Actuate the tool 5or 6times into scrap lumber to
lubricate o‑rings.
7. Turn pressure up to operating level [not to exceed
120p.s.i.g. (8.5kg/cm2)PORTER‑CABLE.
8. Always drain the compressor tanks at least once adaily.