ENGLISH
11
Straight Cuts
1. Using a marker or grease pencil, mark the area to be cut
ontile.
2. Place the tile on the cutting cart against the cutting cart
fence
9
and align your mark with theblade.
3. Pull the on/off switch up to turn the saw on and wait for
the blade to be completely covered withwater.
4. Ease the cutting cart toward the blade then slowly feed
the tile into the blade. Continue pushing until the blade
cuts completely through thetile.
NOTE: The flip hood on the splash hood can be rotated
up to help align the line on the tile with the blade.
5. Turn off thesaw.
Diagonal Cuts
Diagonal cuts are also referred to as “long point to long
point cuts.”
1. Install the edgeguide.
2. Align the point of the tile closest to the cutting cart
fence
9
with the cut indicator
32
.
3. Align the front of the tile to the blade and hold against
the edgeguide.
4. Turn the saw on and make thecut.
5. Turn off thesaw.
L-Cuts
An L-cut is a section that is removed from of a piece of tile
and is used when cutting a piece of tile to fit in a corner of a
cabinet or piece of trimmolding.
1. Outline the area to be cut on both sides of thetile.
2. Align the tile to the cutting cart fence and make the cut
far enough into the tile withoutovercutting.
3. Make a cut on the other mark on the tile
withoutovercutting.
4. Turn the tile over and make the cut along one of the
outlines, but this time an overcut can occur without
damaging the exposed surface of the tile due to the
radius of the blade. Overcut the other line and the cut
piece should be separate from the rest of thetile.
5. Turn off thesaw.
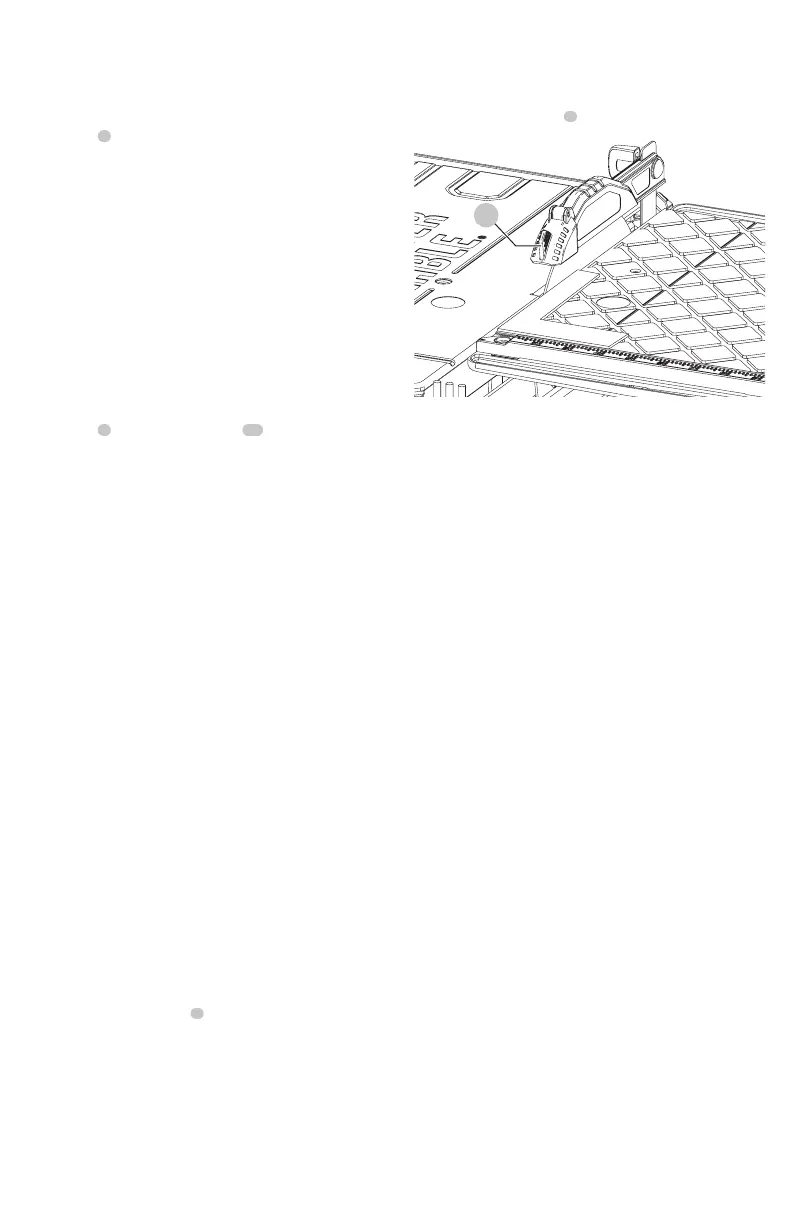
Adjustments (Fig.A, S)
The cutting cart fence and rails are properly aligned from
the factory. Shipping or prolonged use can cause them to
become misaligned and needadjustment.
Squaring the Cutting Cart Fence to the
Blade
1. Lay a 90º square flat on the blade surface with one end
against the cart fence
9
.
2. If the blade is not 90º to the cart fence, the rail will
needadjustment.
3. Loosen the cart fence adjustmentscrew.
4. Adjust the fence until it is square to theblade.
5. Tighten the cart fence adjustmentscrew.
Adjusting the Cutting Cart Parallel to
the Blade
1. Lay a 90º square flat on the blade surface with one end
against the cart fence
9
.
FIg. S
32
2. If the blade is not 90º to the cart fence, the rail will
needadjustment.
3. Loosen the three front and rear screws on the left guide
rail, and adjust rail until it is parallel to theblade.
4. Move the rail until the cart fence is square to theblade.
5. Tighten the three railscrews.
MAINTENANCE
WARNING: To reduce the risk of serious personal
injury, turn tool off and remove the battery pack
before transporting, making any adjustments or
removing/installing attachments or accessories.
An accidental start-up can cause injury. Make sure the
switch is in the OFFposition.
Lubrication
WARNING: NEVER spray or in any other way apply
lubricants or cleaning solvents inside the tool. This can
seriously affect the life and performance of the tool
and may result in personalinjury.
PORTER-CABLE tools are properly lubricated at the factory
and are ready for use. However, it is recommended that,
once a year, you take or send the tool to a certified service
center for a thorough cleaning andinspection.
Cleaning
WARNING: Blow dirt and dust out of all air vents with
clean, dry air at least once a week. To minimize the risk
of eye injury, always wear ANSI Z87.1 approved eye
protection when performingthis.
WARNING: Never use solvents or other harsh
chemicals for cleaning the non-metallic parts of
the tool. These chemicals may weaken the plastic
materials used in these parts. Use a cloth dampened
only with water and mild soap. Never let any liquid
get inside the tool; never immerse any part of the tool
into aliquid.