CHARGE Installation & Owner’s Guide | 9
INSTALLATION
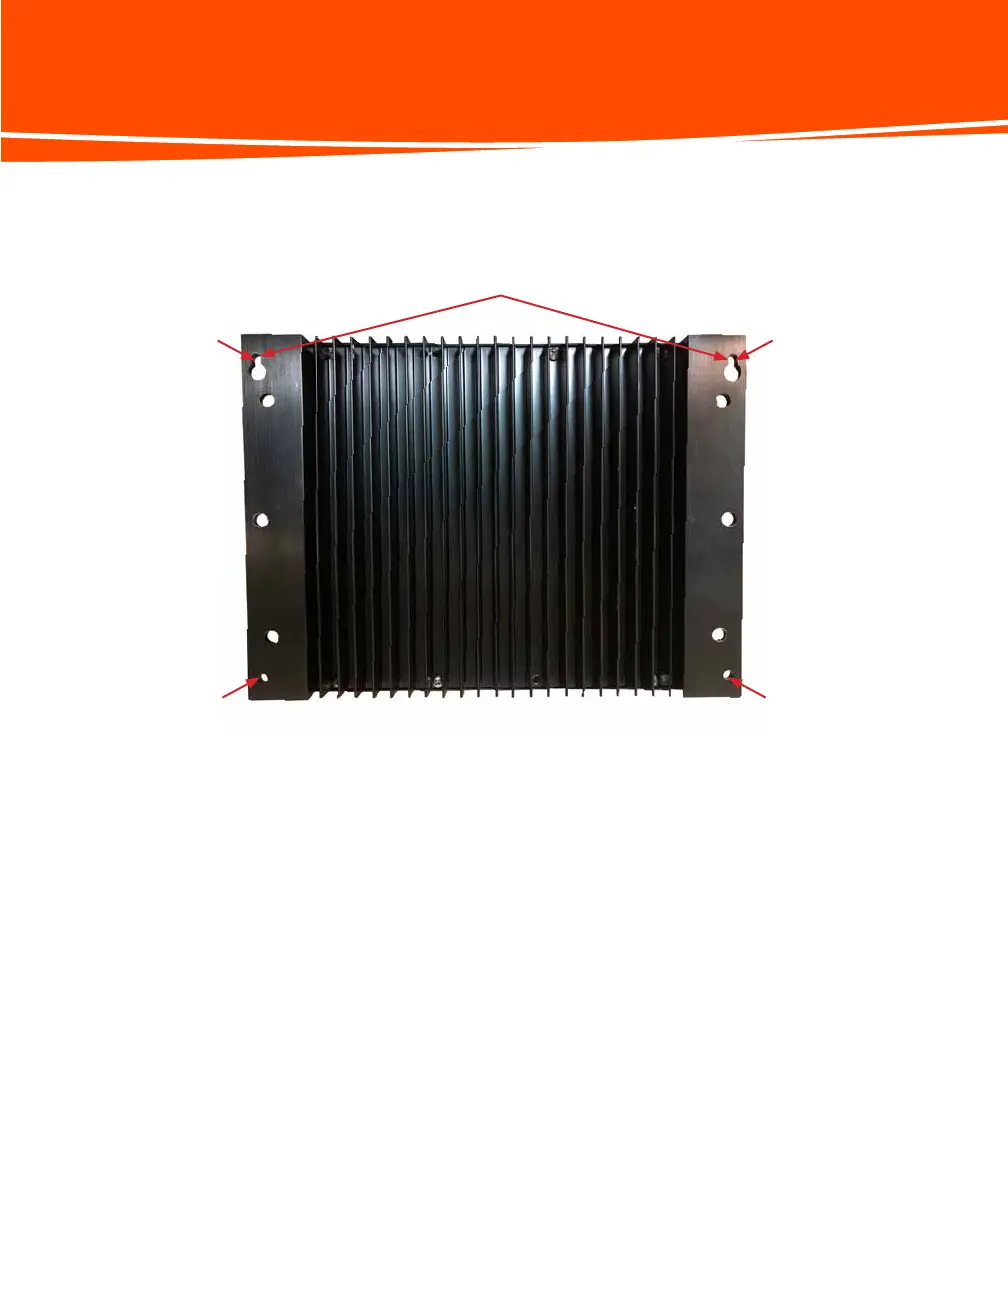
STEP 6: Hold the unit flush, drill holes, and completely install screws (B) in the bottom holes with a Phillips-
Head driver. Finish by fully tightening the upper two screws (B).
NOTE: Be sure not to over-tighten screws (B).
CONNECT CHARGE™ Cables
IMPORTANT:
• If you have a battery selector switch (1,2, all) wired to your trolling motor battery bank,
it must be removed or disconnected before wiring the CHARGE™.
• For optimal performance JL Marine Systems Inc. STRONGLY recommends the use of a Deep Cycle
Marine battery as your Engine Battery when using CHARGE™.
• All trolling motor batteries must be same age, chemistry and size
• Make sure all battery terminals are clean before installing. If terminals are dirty or show signs of
corrosion, follow cleaning instructions located in the MAINTENANCE & STORAGE section of this
manual.
• If you are changing battery configuration, you MUST fully power the CHARGE™ off by unplugging the
unit from AC power and removing the positive engine and trolling motor battery cables.
WARNING: Make sure the CHARGE™ is disconnected from AC power before connecting the batteries and
output cables.
Screw
Location
Figure 1
CHARGE™ Rear-View
Install Upper Screws First
Screw
Location
Screw
Location
Screw
Location