Scroll Enclosure Air Compressor 15-60 HP
Operating & Maintenance Manual
Powerex • 150 Production Drive • Harrison, OH 45030 • USA
P 1.888.769.7979 • F 513.367.3125 • www.powerexinc.com
IN596202AV • 21 February 2023
Page 10 of 32
Operation
Before Start Up
1. Make sure all safety warnings, labels and instructions
have been read and understood before continuing.
2. Remove any shipping materials, brackets, etc.
3. Conrm that the electric power source and ground have
been rmly connected.
4. Check the belts for tightness.
5. Be sure all pressure connections are tight.
6. Check to be certain all safety relief valves etc., are the
proper size.
7. Securely mount all panels and guards.
8. Check that all fuses, circuit breakers etc., are the proper
size.
9. Make sure the inlet lter is properly installed.
10. Secure the area around the compressor to prevent
unauthorized access during this check. Remove the panels
so the motor pulley on each set is visible.
Check motor rotation before
operating the unit.
Turn power on the unit and exercising extreme caution,
use the HMI display/input screen to jog each motor. (To
reach the JOG function, select SYSTEM STATUS from the
MAIN screen, then select PUMP INFO for each installed
pump/ motor set). Powerex wires the controls so all
motors rotate in the same direction. Correct rotation
is CW looking at the basemount, opposite the pulley
side. If all or any of the motors rotate incorrectly, lock
out the power, correct the input wiring and recheck. If
any motor wiring is ever disturbed or modied, recheck
each motor for proper rotation direction. Restore the
access panels before operating the unit.
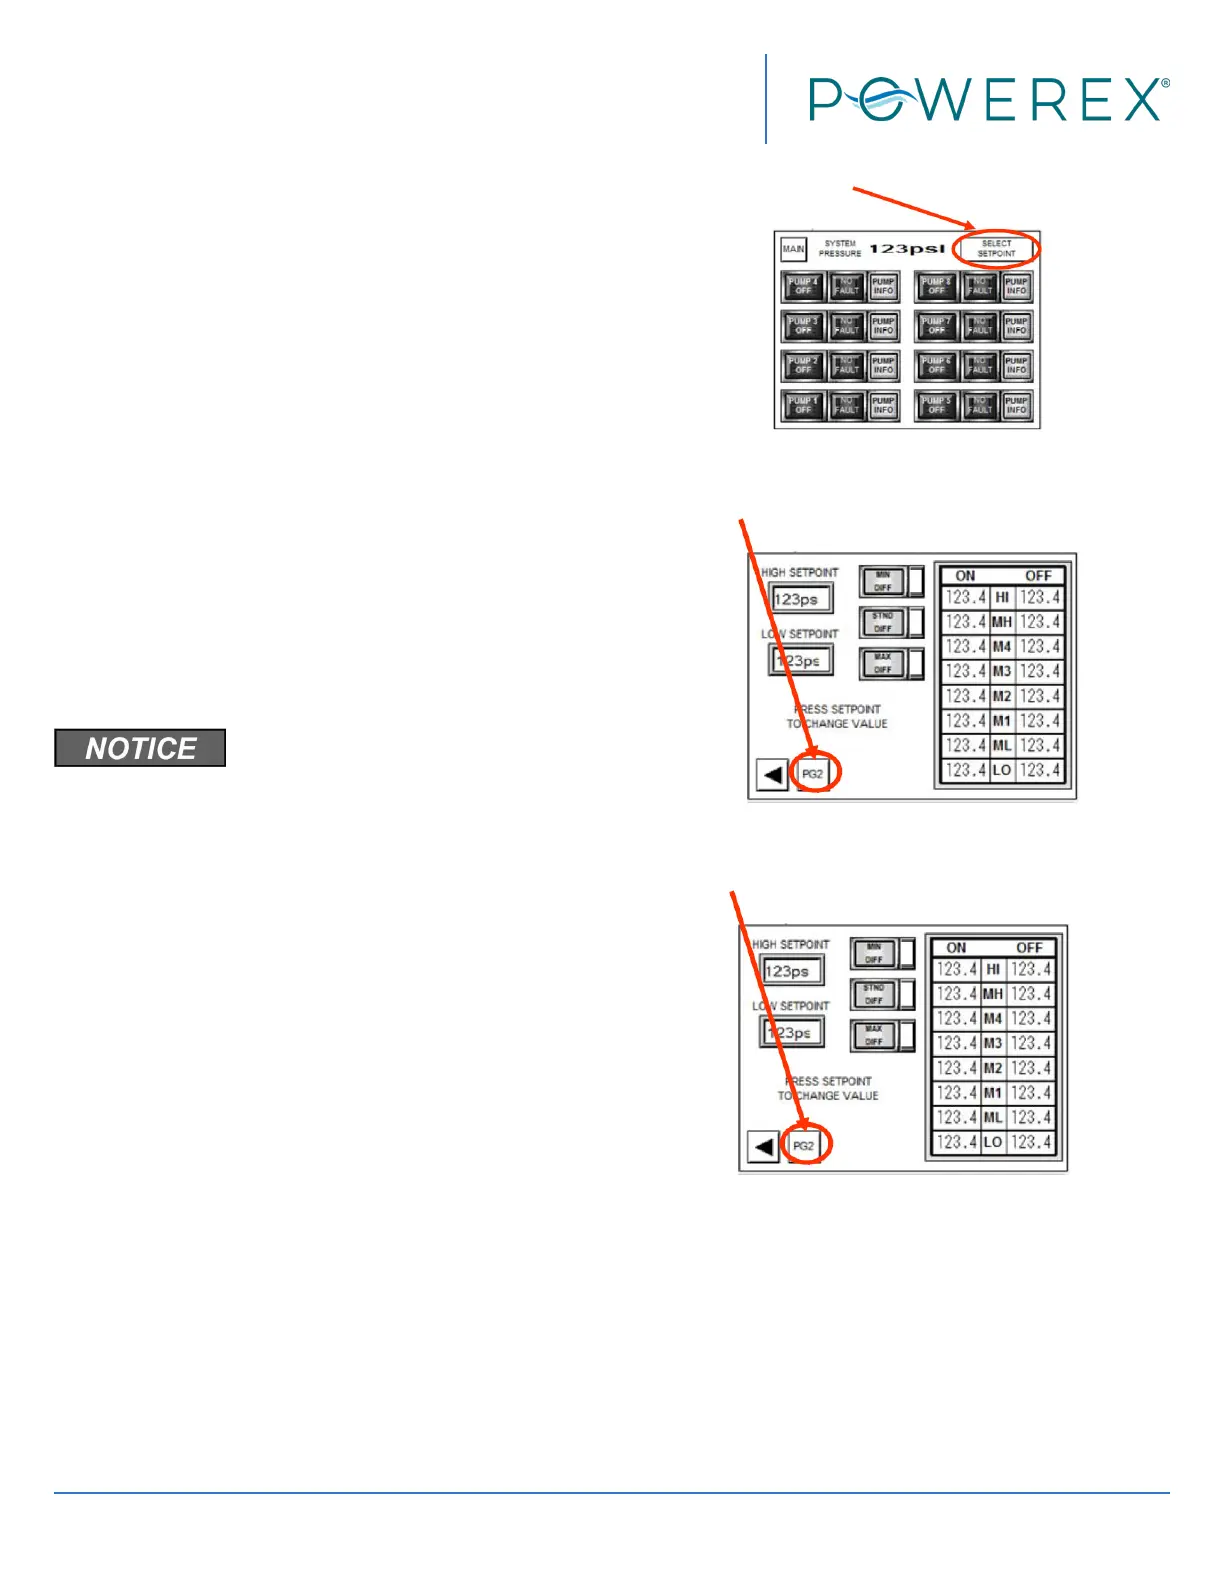
Initial Start Up & Set Up of the Control
The control is programmed at the factory and default
settings are installed. To access certain control functions
you will need to enter a seven digit authorization code.
You may select your own code. We recommend using
the last seven digits of the unit serial number.
To enter the code, from the SYSTEM STATUS screen
touch SELECT SETPOINT.
FIgure 8
Go to page 2 of the SELECT SETPOINT screen.
Figure 9
The second page of the SETUP screen will appear.
Figure 10
Touch the rectangle to enter the Authorization Code
and enter seven digits using the keypad that appears.
Powerex suggests using the last seven digits of the
serial number.
 Loading...