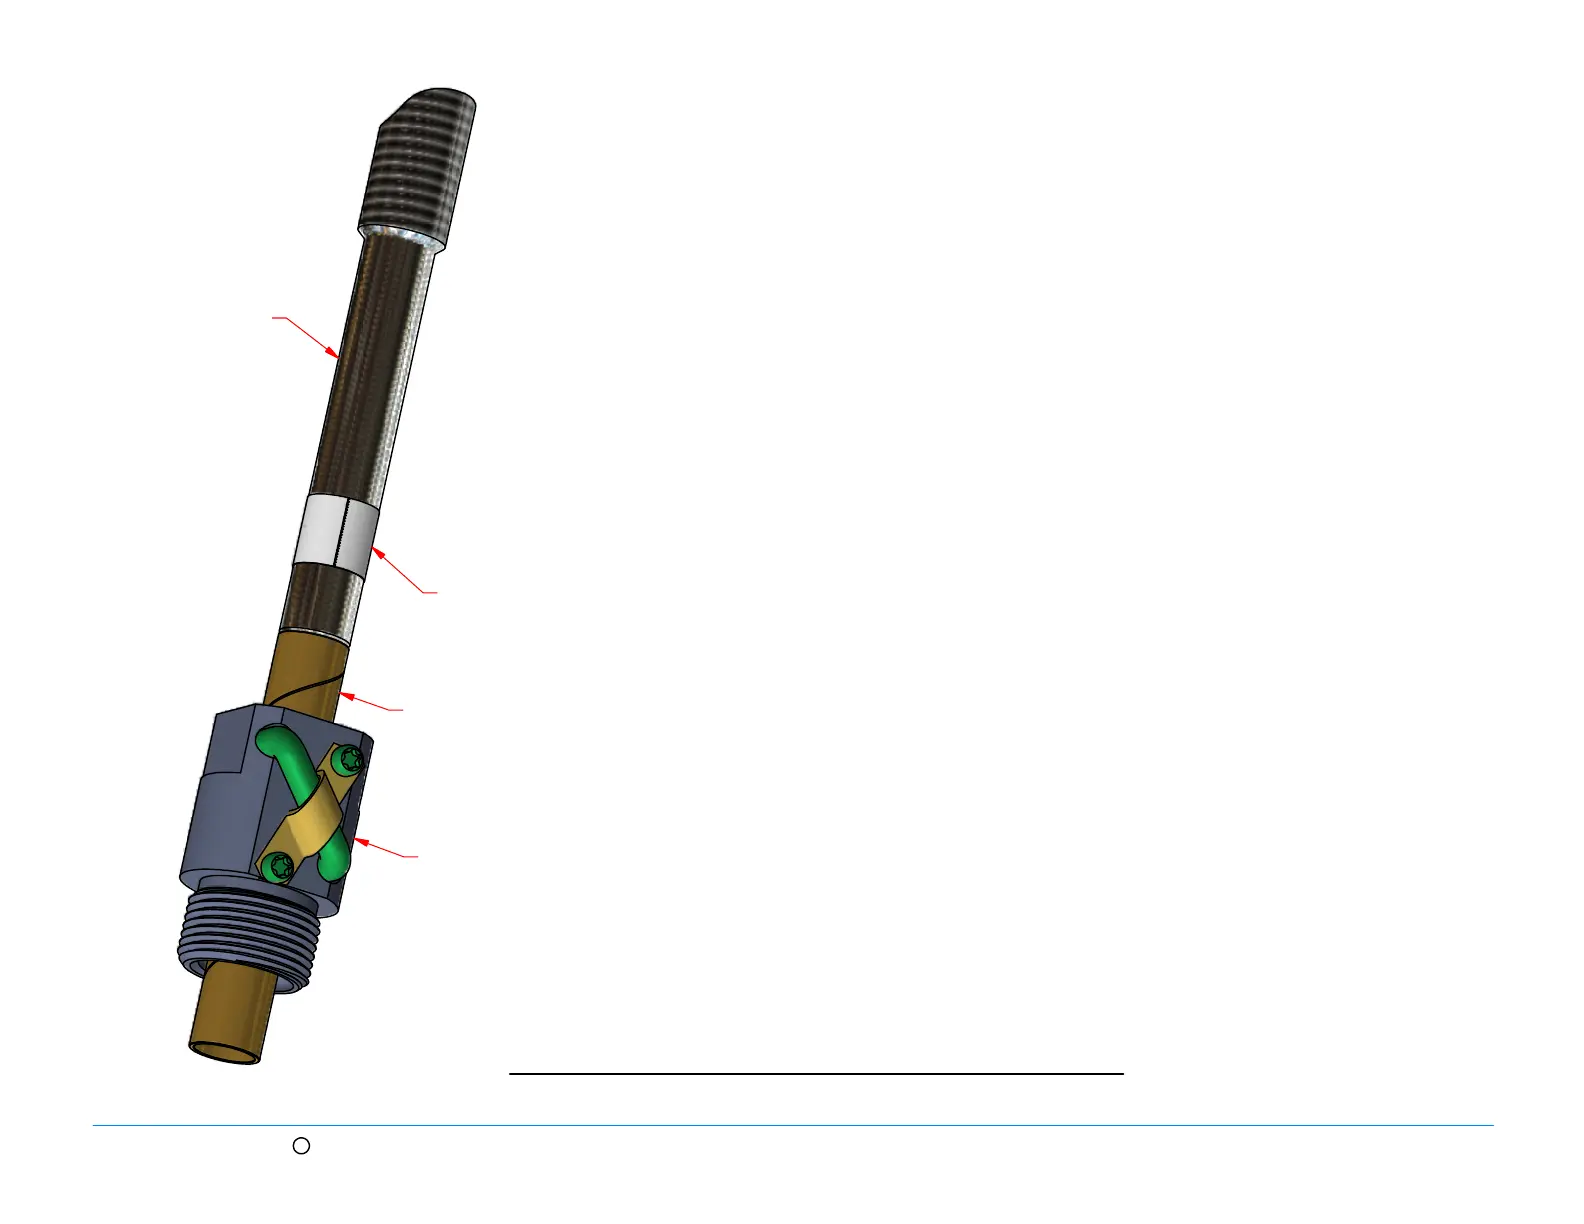
R
Ballnut
Cardboard Arbor
Plastic Tape
over cross hole
on Screw Drive
Drive Screw
(Long turned end)
BALLNUT REMOVAL AND REPLACEMENT
PROCEDURE:
1. To begin, the screw assembly must be removed from the unit.
Follow the procedure for Drive Screw removal and replacement.
2. Remove the tape from the drive screw that is keeping the ballnut
in position, if installed.
3. Apply one layer of thin plastic tape banding around the long turned
end of the screw over the cross hole. This is the end that the ballnut
will be removed.
4. Stand the drive screw vertically with the long turned end up. Thread
the ballnut up the screw until it is completely disengaged from the
thread. The tape over the cross hole prevents the balls in the ballnut
from falling out into the cross hole.
5. Place a cardboard arbor firmly against the end of the screw, insuring
that it is centered and square, and slide the ballnut up onto the card-
board arbor. Loop a tie-wrap through the Cardboard Arbor and around
the ballnut and secure tight.
6. To install a ballnut, the reverse happens. Remove the tie-wrap from
the cardboard arbor with a side cutter. Be sure the arbor does not
disengage from the ballnut or all the balls in the ballnut will fall out.
7. Place the end of the arbor firmly, centered and square, onto the long
turned end of the drive screw. Slide the ballnut off the arbor onto the
screw, over the tape and engage the drive screw thread. Allow the ballnut
to spin down the screw to approximately halfway along its length.
Band tape around the screw at both ends of the ballnut to keep the ballnut
in position.
8. Remove the plastic tape from the cross hole.
9. Return to the instruction for the installation of the Drive Screw, step 4.
PN 010580 Rev. E
Eng. 05/ 08/ 14
PowerMate Operation Manual
5.04