3
rd
step: connect loads
Connect the load cable to the correct polarity of the right pair of terminals on the solar
charge controller(with the lamp symbol).to avoid any voltage on the wires ,please connect
the wire to the load before connect to the controller.
4
th
step :Final worked
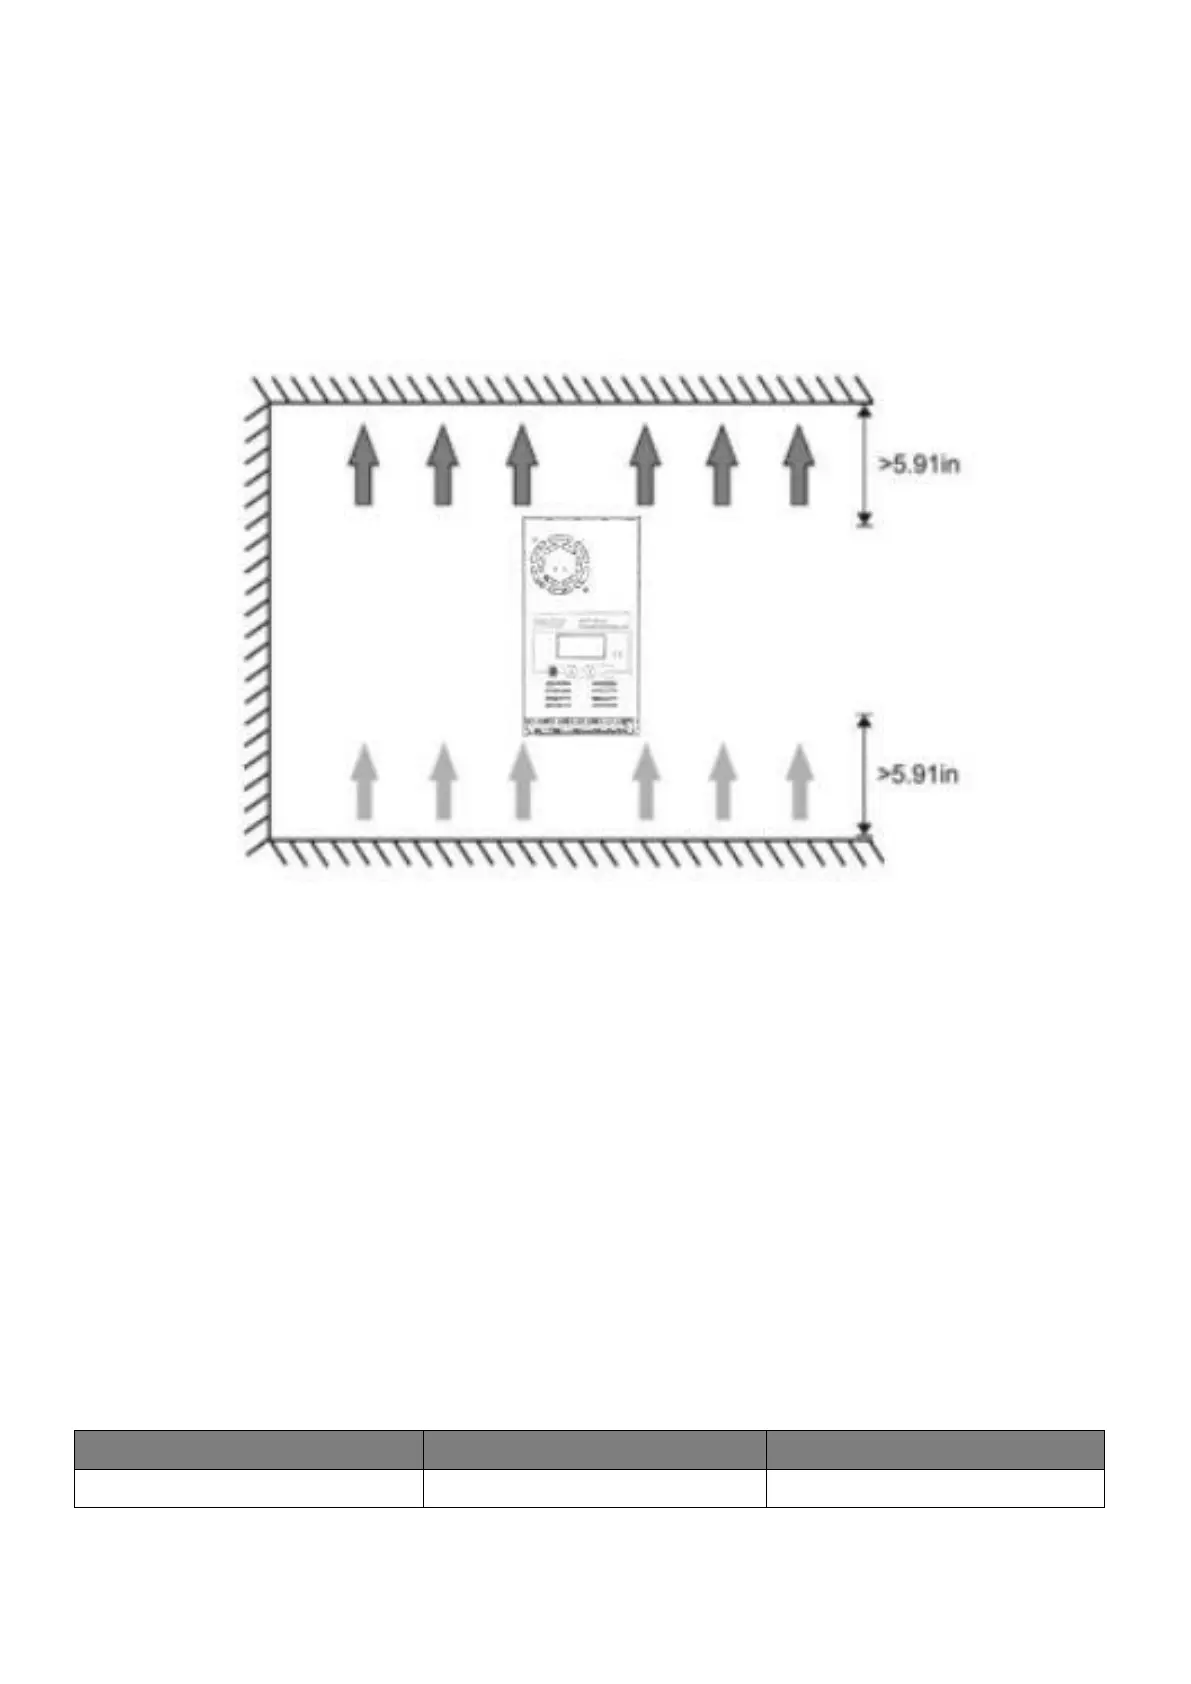
Tight all cables connected to the controller and remove all the debris around the
controller(leaving a space of approx. 5.91 in)
Notes:
When the reading data of PV or battery is constantly changing ,don’t worry about it , the
controller is finding MPP point,it’s caused by your PV input power or voltage isn’t
enough ,please contact us soon .our technological team will assist you.
◼ Air circuit Breaker installation
We strongly recommend connecting a fuse directly to the battery to protect any short
circuit at the battery wiring. Solar PV modules create current whenever light strikes them.
The current created varies with the light intensity, but even in the case of low levels of
light, full voltage is given by the modules. So, protect the solar modules from incident
light during installation. Never touch uninsulated cable ends, use only insulated tools, and
make sure that the wire diameter is in accordance with the expected currents of the solar
charge controller. Connections must always be made in the sequence described below.
Air Circuit Breaker and Wires Requirement