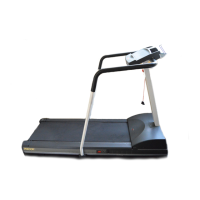
9.21, 9.21i, 9.21S, 9.21Si Treadmill
Page 4
Procedure 2.1 - Accessing the Diagnostic Program
(prior to July 21, 1997)
The 9.21, 9.21S diagnostic program cycles through the following modes:
Software Version Mode. Displays the PROM version number.
LED Mode. Illuminates each of the LED’s mounted on the upper PCA.
Lift Mode. Allows you to verify that the lift calibration number increments and decrements as the
INCLINE keys are pressed.
Power Bits Mode. Allows you to verify that the power bits number increments and decrements
as the SPEED keys are pressed.
Note:
When the treadmill is in power bits mode and the SPEED ▲ key is selected, the treadmill speed
will increase twice as fast as it does when the treadmill is in a normal operating mode.
Procedure
1. Plug the power cord into the wall outlet, then turn on the treadmill with the circuit breaker.
Note:
Diagram 2.1 illustrates the 9.21 Treadmill display. The 9.21S Treadmill display is shown in
Diagram 2.2.
2. Press and hold the STOP, SPEED ▼, SPEED ▲ and QUICK START keys simultaneously.
3. The electronic console displays the version number of the PROM mounted on the upper
PCA. Record the PROM version number.
4. Following the version number, a horizontal line sweeps from top to bottom and then a
vertical line sweeps from right to left.
Note:
The lines check the LED’s mounted on the upper PCA. If the lines are broken when they sweep
across the electronic console, replace the upper PCA as described in Procedure 5.2 of the
Residential Treadmill Service Manual.
5. After the LED test, the electronic console displays the potentiometer increment number.
6. Press the INCLINE keys. Verify that the running bed inclines and declines as the INCLINE
keys are pressed.
7. Watch the electronic console. When the potentiometer increment number is displayed on
the electronic console, enter power bit mode by starting the running belt.