C932, C932i, C934, C936i Treadmill
Page 33
Procedure 6.3 - Replacing the Lower PCA
1. Set the treadmill circuit breaker in the “off” position. Remove the AC line cord from the AC
outlet.
2. Disconnect the lower PCA drive motor connector from the drive motor. Disconnect Both lift
motor connectors, the speed sensor connector, the drive motor fan connectors, the lower
PCA fan connector and the AC input wires from the lower PCA.
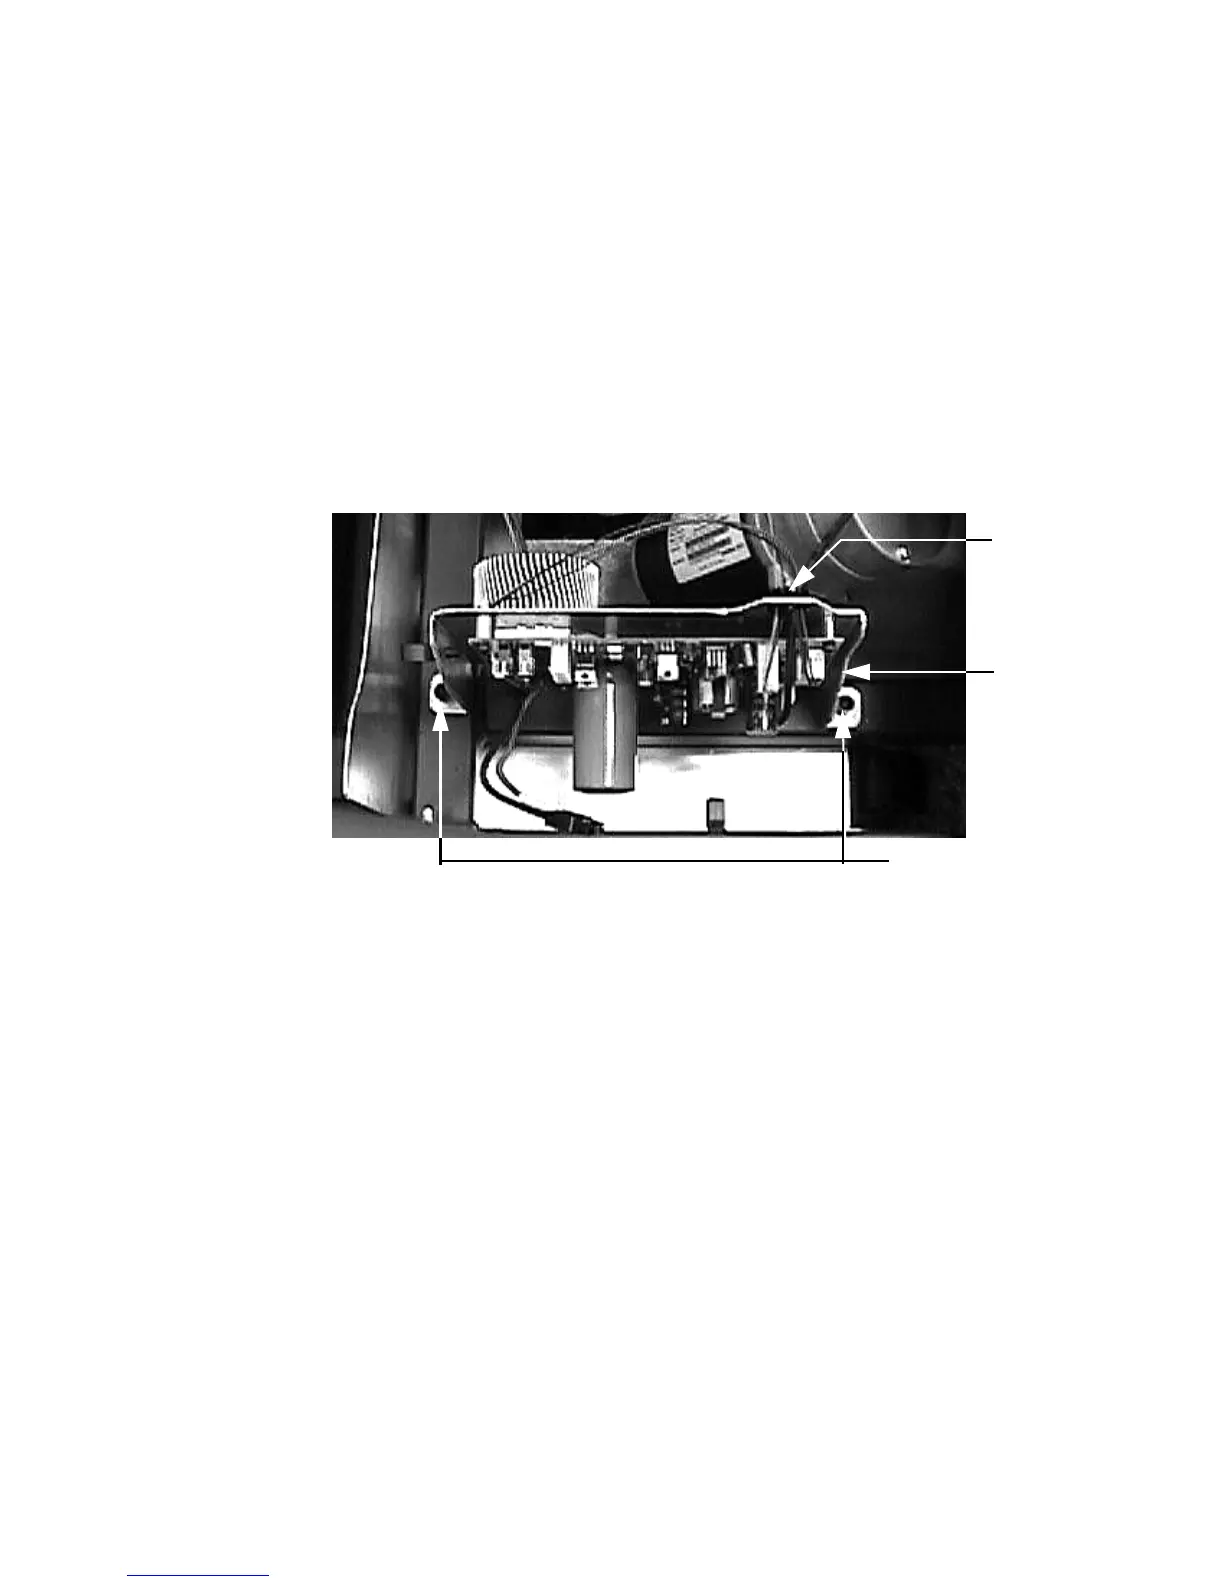
3. Remove both lower PCA mounting screws and remove the lower PCA. See Diagram 6.3.
Diagram 6.3 - Lower PCA
4. Set the replacement lower PCA in its mounting position and fasten it with the screws
removed in step 3. Torque the lower PCA mounting screws to 120 inch pounds.
5. The AC input wires are the blue and brown wires AC line filter on the front dress panel.
Connect the brown AC input wire to the M2 terminal and the blue AC input wire to the M3
terminal of the lower PCA.
6. Connect the brown drive motor fan wire to terminal M4 and the blue drive motor fan wire to
the M5 terminal on the lower PCA.
7. Connect the black and red drive motor wires to the mating black and red connectors on the
lower PCA.
8. Feed the speed sensor connector through the grommet in the lower PCA bracket and insert
it in the J3 connector of the lower PCA.
9. Feed the lower PCA fan r connector through the grommet in the lower PCA bracket and
insert it in the J4 connector of the lower PCA.
Mounting Screws
Lower PCA
Grommet