3. The test name HARDWARE VALIDATION will be displayed. Press the OK key to proceed
to the display test.
4. The test name “DISPLAY” will be displayed. Press the OK to enter the display test or an
S,
T key to proceed to a different test.
5. Each time you press the OK key a different block of LED’s will illuminate. Check each LED
in each block to ensure that all are functioning.
6. Press and hold the ENTER key for several seconds to proceed to the keyboard test.
7. The test name “KEYBOARD” will be displayed. Press the OK to enter the keyboard test or
an
S, T key to proceed to a different test.
8. A graphical representation of all the keys on the keyboard will be displayed. When a key is
pressed the representation of the key on the display will be turned “off”. Check all of the
keys on the keyboard in this manner.
9. Press and hold the ENTER key for several seconds to proceed to the heart rate test.
10. The test name “HEART RATE” will be displayed. Press the OK to enter the heart rate test
or an
S, T key to proceed to a different test.
11. Both the hand held heart rate and wireless heart rate function must be tested. A chest strap
heart rate transmitter or a heart rate test transmitter must be used to test the wireless heart
rate function.
12. When a heart rate signal is received, the unfiltered and filtered heart rates will be displayed.
In addition the Polar heart rate will be displayed in the “Heart Rate” window. The red heart
and the smart rate LED’s will illuminate.
13. Press the ENTER key to proceed to the machine test.
14. The test name “MACHINE” will be displayed. Press the OK to enter the brake test or an
S, T key to proceed to a different test.
15. The test name BRAKE will be displayed, press the OK key.
16. PWRB (powerbits) will be displayed. The resistance level will be displayed on the left side of
the display and the corresponding power bits (duty cycle) will be displayed on the right side
of the display. Initially, the power bits level will be zero, pressing the resistance
S, T keys
will change the number of power bits being applied to the eddy current system., ranging
from 0 to 68 powerbits.
17. Press the OK key to proceed to the Lift A/D test.
18. The test name “LIFT A/D” will be displayed, press the OK key to enter the Lift A/D test.
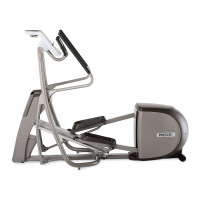
19. Please note, on EFX’s equipped with version 4.00 upper software, the EFX must be pedaled
to allow the incline to activate.