69
6 The Fat Channel
6.10 Input Controls
StudioLive™ Series III
Owner’s Manual
By pressing and holding any of these buttons, you’ll enter Multi-Assign mode, which
allows you to set the input source for multiple channels at once. Once in this mode,
the Select button for every Input Channel will flash. Press the Select button for any
channel for you which you’d like to set to that source. For example, if you would like
to engage the USB return for every Input Channel, press and hold the USB Input
Source button, then press the Select button for every Input Channel. This will engage
the corresponding USB Return for every channel.
6.10.2 Input Meters
On the left side of the Fat Channel control section, you’ll see the “Level” meter. This
meter gives you a visual indication of input signal level for the selected channel or
mix. On the right side, you’ll see meters that pertain to dynamics processing: “Comp”
shows compressor gain reduction, and “Gate” shows gate gain reduction.
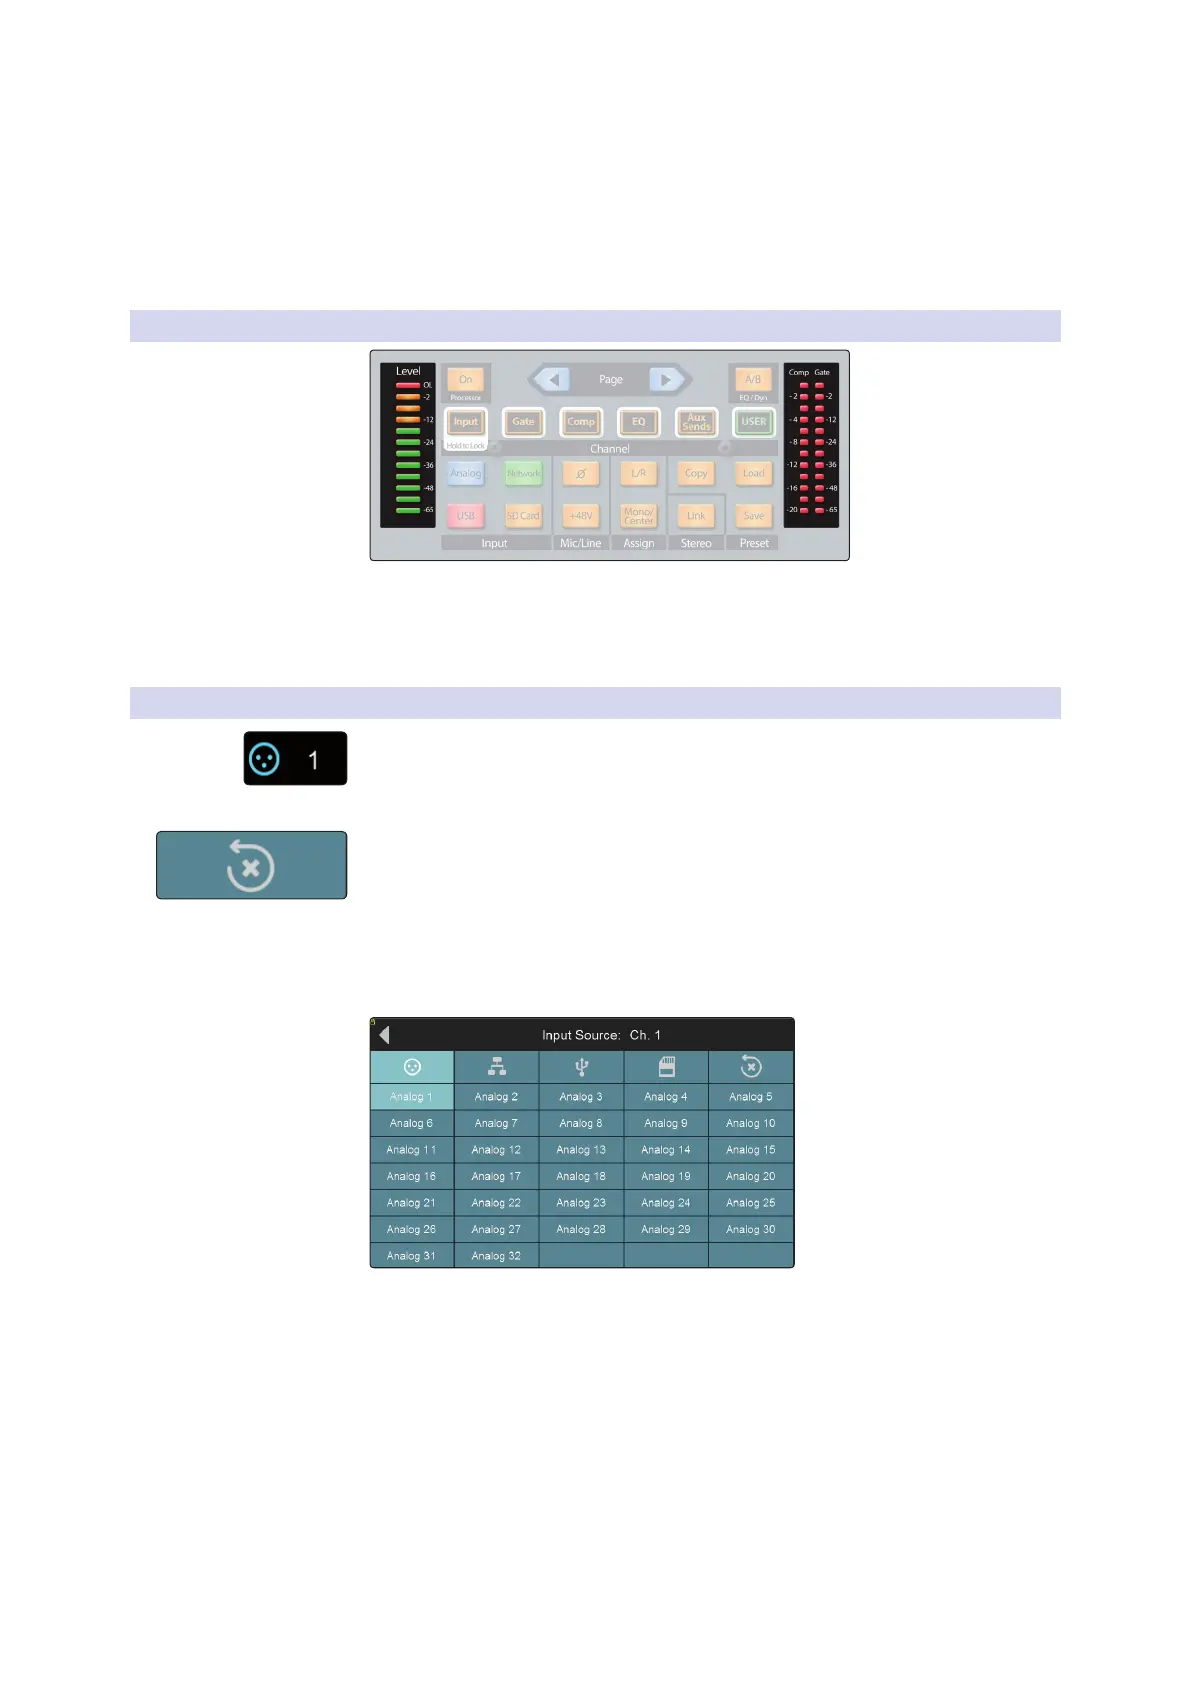
6.10.3 Input Source Routing
While any Overview Screen is active, you will see the Input Source button in the
upper left hand corner. Touching this button will open the Input Source Screen. From
here you can select the sources for the different input types available for the currently
selected channel or bus.
By default, every input source is routed to its respective channel (Analog Input 1 to
Channel 1, USB Playback stream 7 to Channel 7, etc.). You can reset the routing to the
default setting at any time, by pressing the Reset button.
Note: For a more detailed overview of the default channel routings, please review
Section 14.2.
Analog Input Source (Input Channels only)
Press the Analog Input Source icon to select the input channel that will be active on
the currently selected channel when the source is set to Analog in the Fat channel.
Tap on an analog input to patch it to the current channel.